Veris Industries Badger 228 SERIES Install User Manual
Page 7

7
Calibration
Badger Meter sensors use unique K
and Offset numbers for calibration.
These numbers are derived from
calibration runs using NIST trace-
able instruments. Using both a K and
an Offset number provides higher
accuracy than using a K (pulse/gal)
factor alone. K and Offset numbers for
each tee configuration are listed in the
following tables.
Calibration Tables
The table on page 9 provides cali-
bration and operation data for Data
Industrial Metal Tee Sensors 0.5” to
2.5”.
Column 1
Tee Model Number
Column 2
Apparent I.D. - For use with the Series
900 and the Series 1000
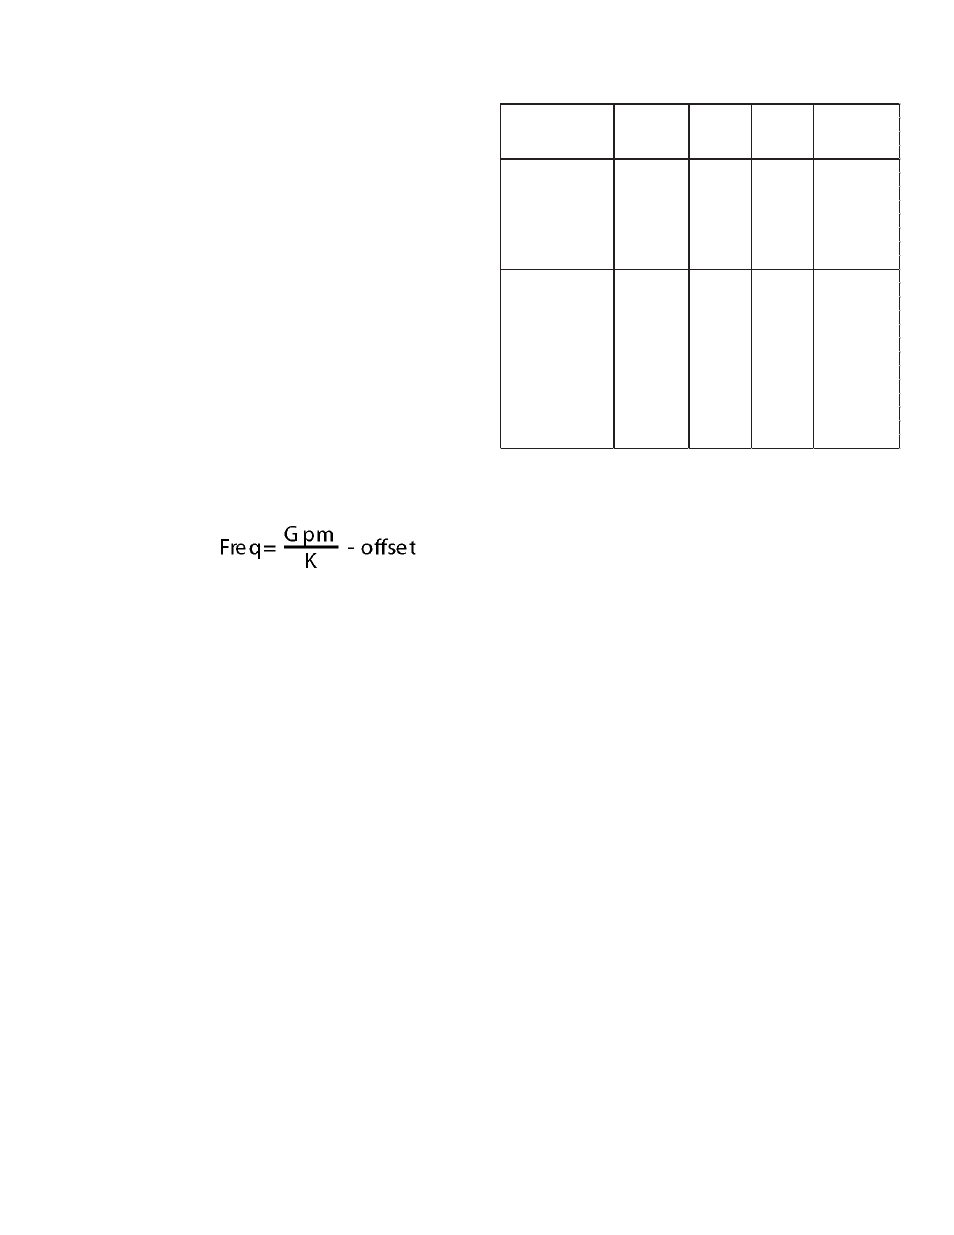
Columns 3 and 4 The K value and Offset values to use
in our frequency equation:
This equation describes the frequency
of the output signal of all Badger
Meter flow sensors. By substituting
the appropriate K and Offset values
from the table, the sensor’s output
frequency can be calculated for each
pipe size. This information is required
when calibrating an output board or
when using the raw sensor data as
direct output to interface with a device
that is not a Badger Meter product.
Column 5
This column indicates the suggested
flow range of each tee sensor. Badger
Meter sensors will operate both
above and below the indicated flow
rates. However, good design practice
dictates the use of this range for best
performance.
Sensors should be sized for flow
rather than pipe size. To prevent
disturbances to the flow profile always
connect the sensor tee to pipe nipples
measuring at least 10 pipe diameters
in length on the up stream (supply)
side and at least 5 pipe diameters in
length on the downstream (delivery)
side before making the transition in
pipe size.
Calibration Table for
Series 228BR, 228CB, 250BR, 228CS, 228SS
Apparent I.D.
Suggested
Model
for Series
K
Offset
Operating
1000, 900
Value
Range
(GPM)
228BR20xx-xxxx
1.99
2.747
0
10-100
228BR25xx-xxxx
2.52
3.741
0.386
16-160
228CB20xx-xxxx
2.07
2.809
0.276
12-120
150 PSI Tee
2.07
400 PSI Tee
2.1
2.604
0.25
12-120
228CB25xx-xxxx
2.51
3.74
0.277
16-160
228CS20xx-xxxx
2.07
2.809
0.276
12-120
228SS20xx-xxxx
1.99
2.747
0
10-100
250BR05xx-xxxx
sch40 PVC
none
0.337379
0.097041
0.8-8
sch80 PVC
none
0.338073
0.134854
0.8-8
sch40 steel
none
0.356212
0.075729
0.8-8
Type L
none
0.350899
-0.321666
0.8-8
250BR07xx-xxxx
sch40 PVC
none
0.436827
0.567915
1-10
sch80 PVC
none
0.43983
0.692372
1-10
sch40 steel
none
0.434836
0.766196
1-10
Type L
none
0.432127
0.619813
1-10
250BR10xx-xxxx
1.05
0.397368
0.261768
2-40
250BR12xx-xxxx
1.38
0.76447
0.16489
3-60
250BR15xx-xxxx
1.61
1.06526
0.0892
4-80
Impeller Assembly and Shaft Replacement
If you are replacing an existing Badger Meter impeller or
shaft and have already calibrated your flow monitor/trans-
mitter, no calibration changes are necessary. For instal-
lation of a new flow monitor or for relocation of a sensor
in a new pipe size, please refer to the calibration instruc-
tions in flow monitor manual.
1) Depressurize pipe from which sensor is to be re-
moved.
2) If insert style (Models 228xx) remove the three lock
nuts that secure the positioning collar to the threaded
rods of metal sensor.
nOTE: Before removing lock nuts, record the dimen-
sion from top of 2” NPT adapter to the bottom of the
positioning collar. This dimension will be required
later to reinstall. For Series 250BR style remove the
clevis pin.
3) Remove the sensor from the hex adapter or the tee.
4) Note the impeller blade orientation relative to flow ar-
rows and the alignment hole in metal sensors beside
one of the sight holes. In order to maintain proper
calibration, the impeller will have to be reinstalled in
the same manner with the impeller blades pointing
toward the small alignment hole, and into the flow
direction as indicated by the flow arrows.
5) To remove the old impeller blade assembly, push the
old shaft out of the sleeve with the new shaft (or small
diameter rod) just far enough to grab the end with a
pair of pliers and pull the shaft completely out. The
impeller assembly will now be free, and will drop out.
6) Inspect the shaft and bearings for wear, and replace
as necessary.
7) Refer to Figure 1. To reinstall, position the impeller in
the cavity oriented as in Step 4 so that the impeller
blades point into the flow direction and toward the
small alignment hole located beside one of the sight-
