Maintenance (aa14a and aa16a), Installation guide accessories aa14a, aa16a – Veris Industries AA16A Install User Manual
Page 2
Z205568-0D
Page 2 of 2
©2013 Veris Industries USA 800.354.8556 or +1.503.598.4564 / [email protected] 06133
Alta Labs, Enercept, Enspector, Hawkeye, Trustat, Aerospond, Veris, and the Veris ‘V’ logo are trademarks or registered trademarks of Veris Industries, L.L.C. in the USA and/or other countries.
Other companies’ trademarks are hereby acknowledged to belong to their respective owners.
Installation Guide
Accessories
AA14A, AA16A
TM
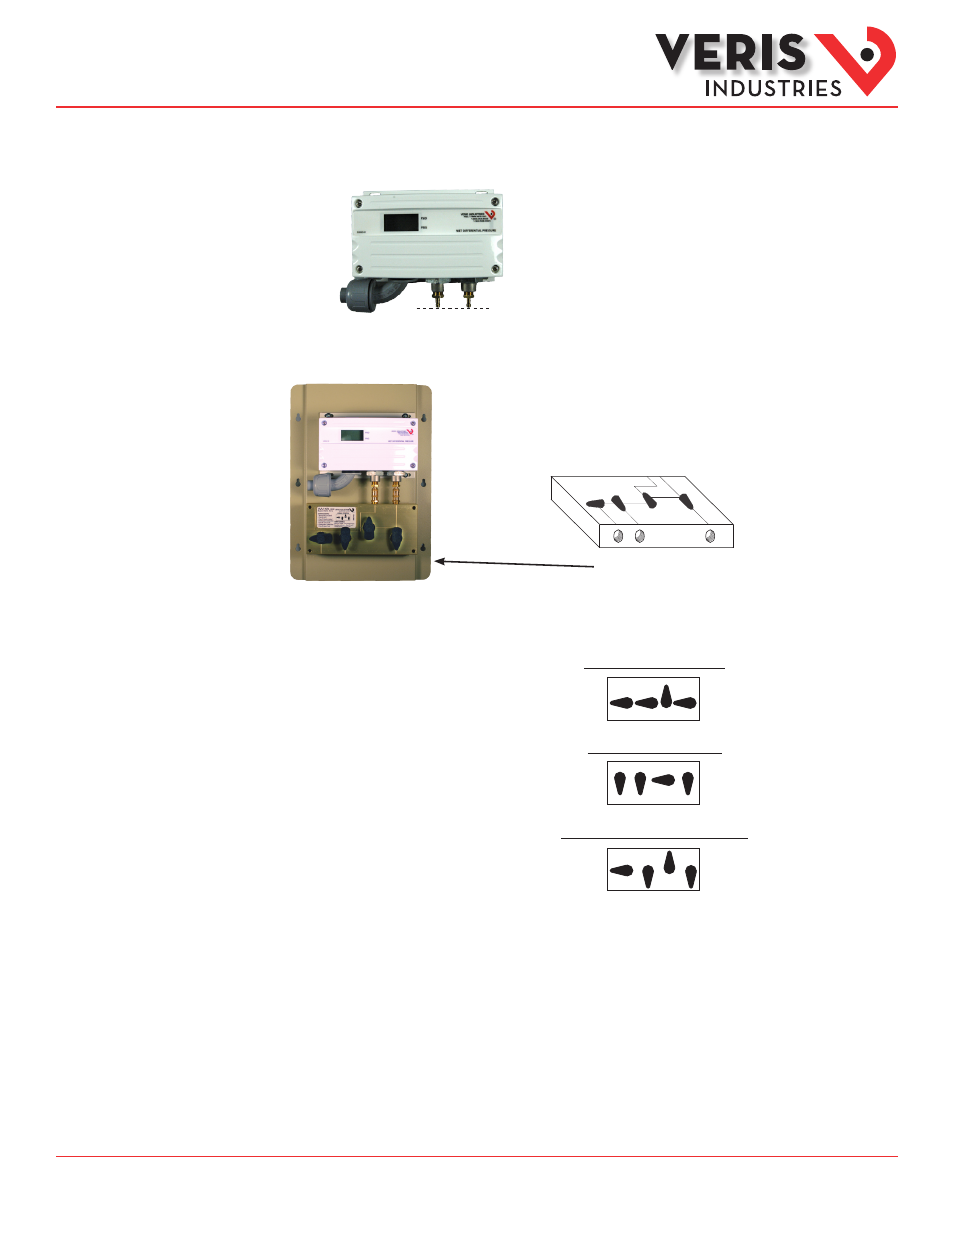
1. Install 1/8” male fittings into the PWxxxx (not included) as shown. Use Teflon tape or thread sealer to ensure a leak-free seal.
Align fitting tips so they extend an equal distance from the end of the PWxxxx sensor ports. Install 90° elbow to PWxxxx (not
included) as shown.
1/8” fittings. Align so that bottom
tips of fittings extend an equal
distance from end of ports.
90° Elbow
2. Connect PWxxxx (not included) to AA14A Bypass Valve Manifold as shown. Use enclosed screws to secure the PWxxxx on the
AA14A mounting bracket. Configure complete assembly.
3. Install and wire the PWxxxx (not included) per the installation instructions included with that product.
Installation
(AA14A only)
Commissioning
(AA14A and
AA16A)
1. Close C and D.
2. Open B (null).
3. Open D (bleed or purge).
4. Slowly open A to bleed air from line.
5. Close B, then fully open A.
6. Slowly open C to bleed air from line.
7. Close D, then fully open C.
1. Bleed or purge: see Commissioning step.
2. Equalize pressure: open B.
3. Isolate sensors: close A and C.
Maintenance
(AA14A and
AA16A)
B A
C
D
B
A
C
D
B A
C
D
Valve positions: All closed
Valve positions: All open
Valve positions: Normal operation
High
Port
Low
Port
Drain
Bottom of Manifold