Installation (cont.), Installation guide accessories ae012 – Veris Industries AE012 Install User Manual
Page 3
ZL0120-0A
Page 3 of 5
©2013 Veris Industries USA 800.354.8556 or +1.503.598.4564 / [email protected] 08131
Alta Labs, Enercept, Enspector, Hawkeye, Trustat, Aerospond, Veris, and the Veris ‘V’ logo are trademarks or registered trademarks of Veris Industries, L.L.C. in the USA and/or other countries.
Other companies’ trademarks are hereby acknowledged to belong to their respective owners.
Installation Guide
Accessories
AE012
TM
2. Mount the AE012 enclosure to a wall or panel
Cut holes in the enclosure for wire conduit connections prior to the installation of the meter in the
enclosure. After running the wiring, seal all holes properly to maintain the enclosure rating. If using
metallic conduit, bonding between the conduit connections is not automatic and must be provided as a
part of the installation.
Take care to protect the equipment from drill chips, filings, and other contaminants when making the
wire entry holes and mounting the enclosure to prevent component damage or a future malfunction.
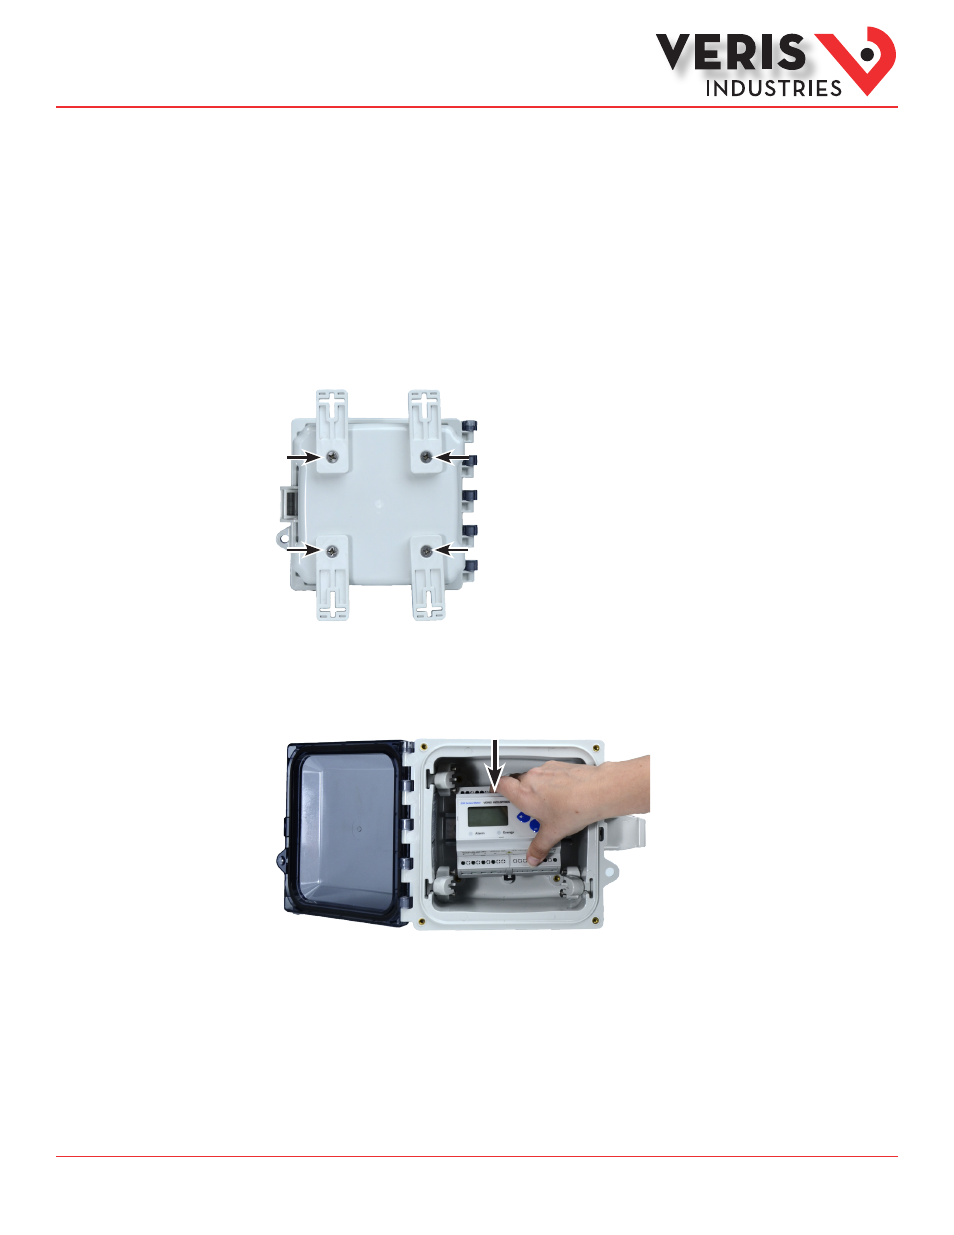
Use the included mounting hardware to attach the mounting feet to the enclosure. Then mount the enclosure to the wall or panel
using either a 4-point or 2-point configuration (hardware for mounting to the wall/panel is provided by the installer). The 4-point
configuration is shown here. For a 2-point configuration, mount the feet as shown, but rotate the bottom feet 180° so they are
flush against the back of the enclosure.
3. Install E5x Onto DIN Rail Inside the AE012
Run E5x wiring through the holes drilled previously. Wire the E5x according to the instructions in the E5x installation guide.
Push the top of the E5x onto the DIN rail.
Installation (cont.)