Spicer Single Speed Axle - Service Manual User Manual
Page 17
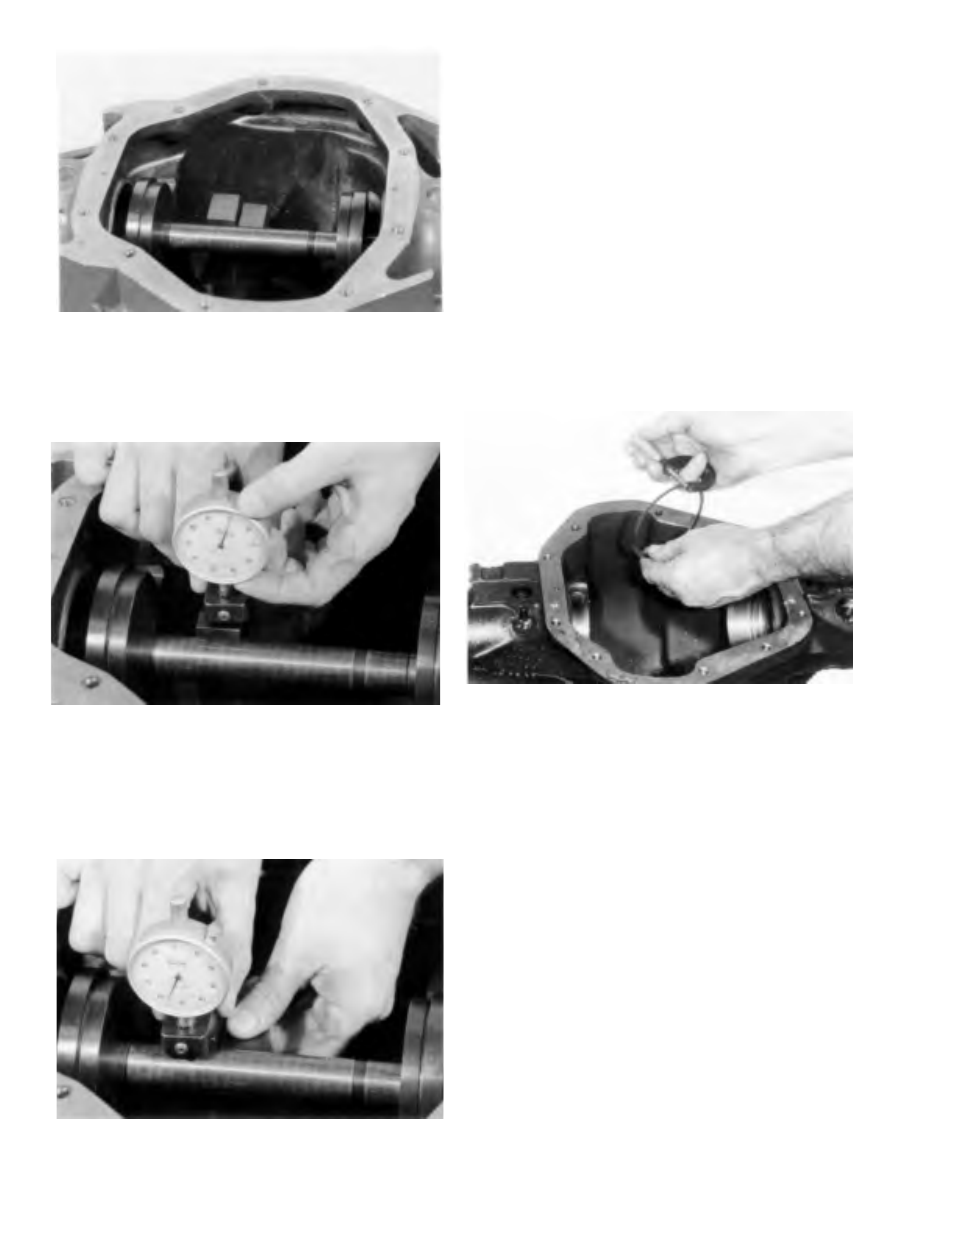
Figure 3-26
Step (28) Place pinion height block on top of the button
end of the pinion gear and against arbor as shown.
TOOL: 6775 Pinion Height Set
Figure 3-27
Step (29) Place scooter gage on pinion height block. Apply
pressure with fingers, making sure the gage is flat on the
pinion block. While pressure is applied, set indicator at
zero “0”.
TOOL: D115-2,6739 Scooter Gage
Figure 3-28
Step (30) Slide scooter gage over arbor. As gage slides
over top of arbor, it will travel in a clockwise direction.
When indicator is on center of arbor (on top) it will stop
traveling in a clockwise direction. If indicator starts to travel
in a counter-clockwise direction, this means you have
passed the center (top) of the arbor. Record only the reading
when the indicator is at the highest point.
This reading indicates the amount of shims necessary
to obtain the shim pack plus (+) or minus (-) the etching
on the button end of the pinion.
If the etching is zero (0), the shim pack will remain
unchanged.
For example: If the pinion is etched +3 (m+8), this
pinion would require .003" (.08 mm) less shims than a
pinion etched zero (0).
If the pinion is etched -3 (m-8), this would require.
003" (.08 mm) more shims than a pinion etched zero (0).
Figure 3-29
Step (31) Measure each shim separately with a micrometer
and add together to get total shim pack thickness. If baffle
is required it is to be included in the shim pack. If slinger
is used between the inner bearing cone and thrust face of
pinion, the slinger is also to be measured and included as
part of the total shim pack.
3-8