Installation / assembly, Drive axle overhaul – Spicer Drive Axles Service Manual Single Axles 2-Speed & Double Reduction User Manual
Page 31
Install Differential Carrier Assembly
NOTE: Before installing carrier assembly,
inspect and thoroughly clean interior of
axle housing.
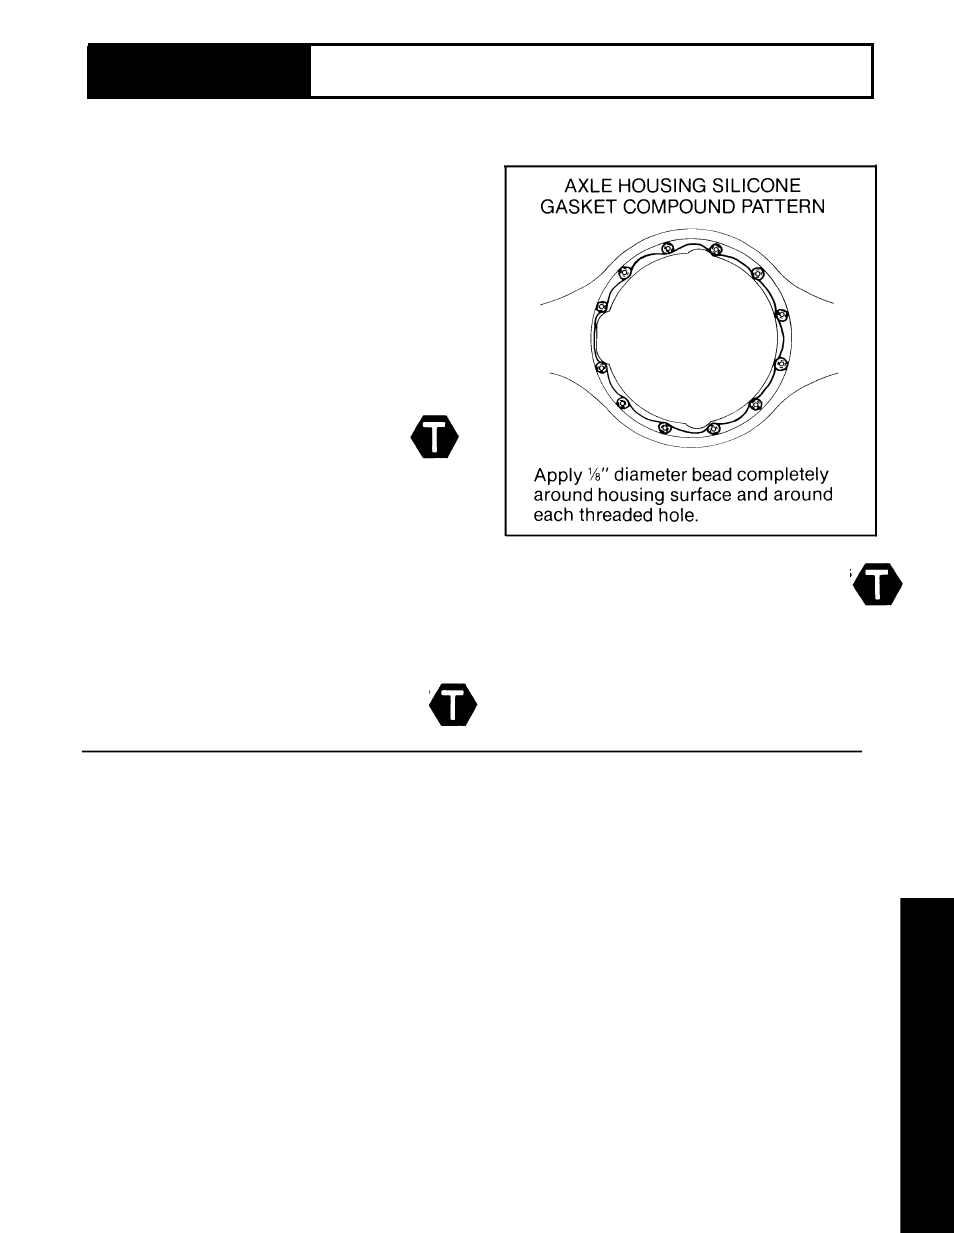
NOTE: Use silicone rubber gasket
compound on axle housing mating surface
as shown in the illustration. Gasket
compound will set in 20 minutes. Install
carrier before compound sets or reapply.
1. Install differential carrier assembly in
axle housing. Install cap screws, nuts and
lockwashers. Tighten to correct torque
(see chart, back page).
2. Install axle shafts and stud nuts. Connect
driveline.
3. Fill axle with correct lube (see
Lubrication Section 2, page 6 and 7).
NOTE: Before installing electric shift unit,
see IMPORTANT NOTE on page 30.
4. For electric shift units, connect electrical
wires. Install shift unit, nuts and washers.
Tighten nuts to correct torque (see chart,
back page).
For air shift units, connect airline. Install
shift unit, nuts and washers. Tighten nuts
to correct torque (see chart, back page).
NOTE: When axle has been disassembled
or housing, gears, axle shafts or wheel
equipment replaced, check axle assembly
for proper differential action before
operating vehicle. Wheels must rotate freely
and independently.
Section
3
INSTALLATION / ASSEMBLY
Drive Axle
Overhaul
31