Assembly / adjustment, Drive axle overhaul – Spicer Drive Axles Service Manual Single Axles 2-Speed & Double Reduction User Manual
Page 30
Adjust Ring Gear Tooth Contact
(cont'd)
When preload, backlash, and tooth contact
bearing cap screws to correct
are correct, align differential bearing adjust-
torque (see chart, back page)
ers and locks, then tighten differential
Differential Carrier Final Assembly
1.
Install adjuster lock and cap screw on ring
gear teeth side.
2. 2-Speed
Axles
(on backface side of ring
qear): Install adjuster lock, dowel bushings
and cap screws: Torque cap screws (see
chart, back page). Lockwire differential
bearing cap, and adjuster lock cap screws.
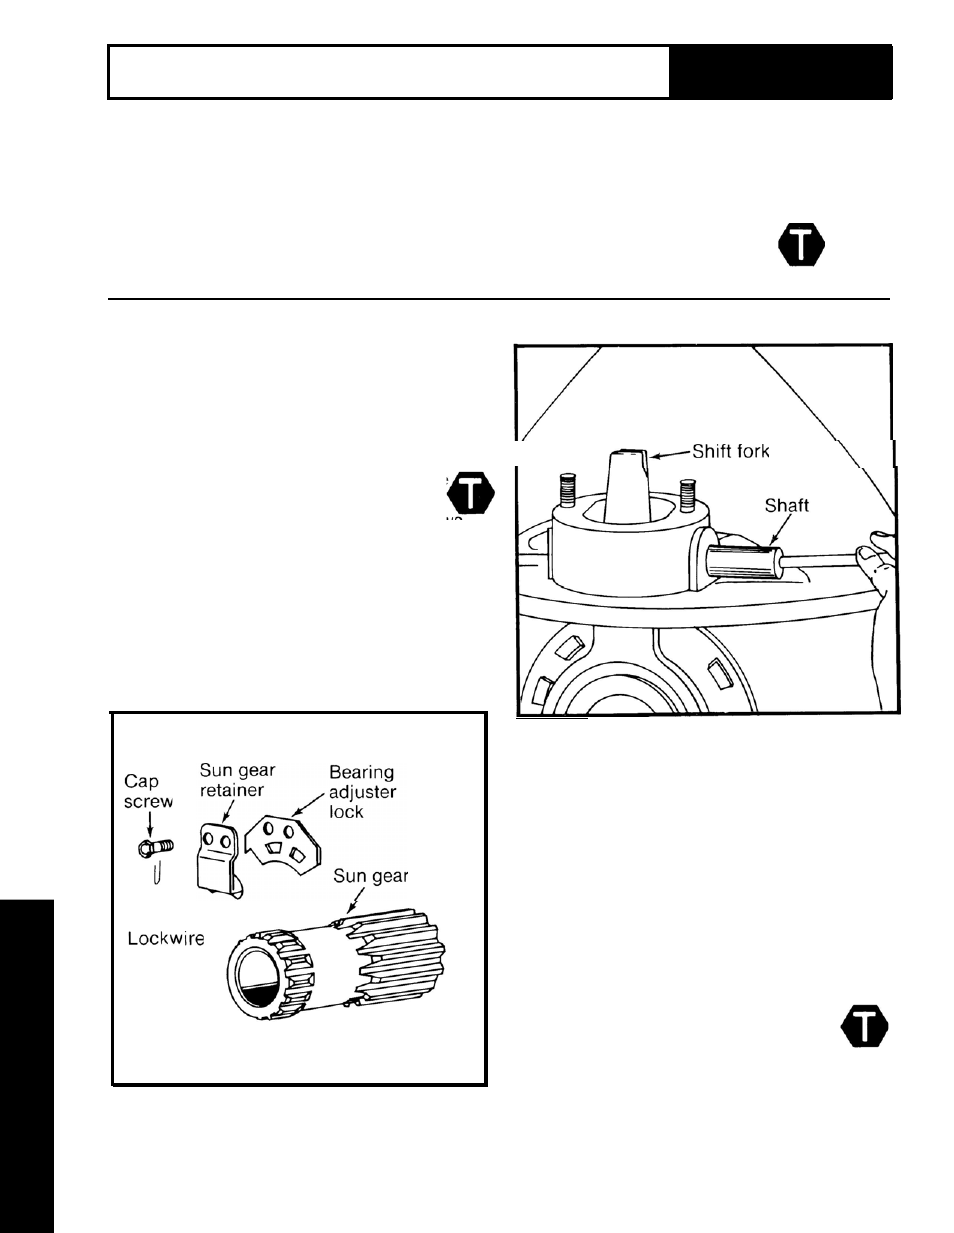
3. 2-Speed Axles: Position shift fork in
carrier opening, then install sliding clutch.
With clutch installed, engage shift fork yoke
with clutch collar. Then install shift fork
shaft. Install expansion plugs to seal
openings. Install shift unit seal and spring.
t
SUN GEAR COMPONENTS
NOTE: Lockwire used on all Early Axle
Models and Late Axle Model 35055P.
r
IMPORTANT (2-SPEED AXLES) Electric
shift unit replacement. Before installing a
rebuilt or new shift unit, check fit of shift
fork to slider block pivot using a "Fit-Up"
Card or Template (P/N 128039.)
These cards are furnished with new shift
units, retrofit and slider block kits.
Instructions are contained on the card or
refer to Spicer Service Manual EA-29.
4. Planetary Double Reduction Axles (on
backface side of ring gear): Install sun gear
and retainer, then install cap screws that
fasten both retainer and adjuster lock.
Tighten screws to correct torque (see
chart, back page) and lockwire.
Lockwire cap screws when used. See
illustration for application.
30
Section 3
ASSEMBLY / ADJUSTMENT
Drive Axle
Overhaul