Shift cylinder service – Spicer Tandem Drive Axles Service Manual S400 User Manual
Page 28
26
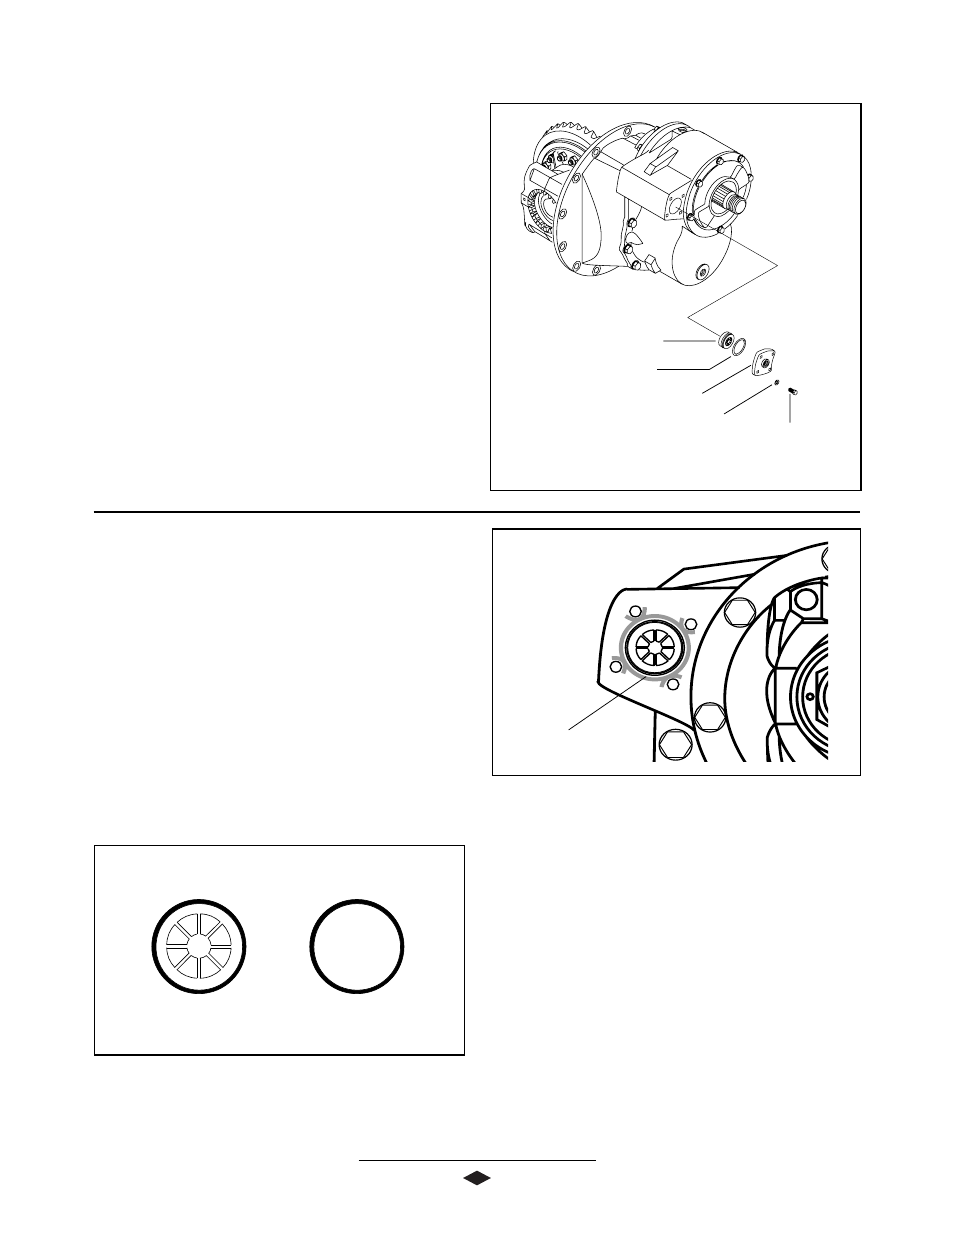
SHIFT CYLINDER SERVICE
Shift Cover Bolt
(15-20 Lb-Ft)
(20-27 N-m)
Washer
Shift Cover
Seal, "O"-ring
Piston Assembly
DISASSEMBLY
1. Disconnect air line from power divider.
2. Remove shift cylinder cover bolts and washers.
3. Remove cover and O-ring seal.
4. Pull shift cylinder piston assembly from carrier.
5. Inspect all components for wear.
NOTE: Do not remove shift fork shaft from assembly.
Disassembly Complete
(Found on later
production models)
Detail Faces Front
(Found on early production models)
FFFFFigur
igur
igur
igur
igure 2
e 2
e 2
e 2
e 27
7
7
7
7
NOTE: Care must be taken to keep Loctite off of
piston assembly.
ASSEMBLY
NOTE: Visually inspect the composite shift piston to
insure the steel spacer is present on the bottom of the
piston.
1. Inspect all new components.
2. Lubricate and place piston/O-ring assembly into
shift cylinder with detailed side facing front for the
composite piston and the flat face on the aluminum
piston.
See Figure 27. Seat piston firmly against
shift shaft.
Loctite 518
Gasket Eliminator
FFFFFigur
igur
igur
igur
igure 2
e 2
e 2
e 2
e 28
8
8
8
8
3. Clean the shift cover sealing area and the intermedi-
ate case and apply a 1/16 in. bead of Loctite #518
Gasket Eliminator.
See Figure 28.
4. Install shift cover and tighten bolts to precribed
torque. 15-20 Lb-Ft(20-27N-m)
NOTE: If old bolts are to be used, coat threads with
Loctite #277 before installing.
5. Install washers and cover bolts. Tighten bolts
alternately to 15-20 Lb-Ft (20-27 N-m) until
shift cover is seated properly.
6. Connect air line to power divider.
Assembly Complete
Composite Shift Piston
AluminumShift Piston