Pinion disassemly, Pinion disassembly – Spicer Tandem Drive Axles Service Manual S400 User Manual
Page 16
PINION DISASSEMBLY
1. Remove flanged hex nut.
NOTE: Use of a torque multiplier is recommended.
Torque flanged hex nut to 900-1,200 Lb-Ft (1,220-
1,627 N-m).
2. Remove end yoke on the rear rear axle using a
suitable puller. Refer to
RECOMMENDED
SERVICE TOOLS, pgs. 29-30).
3. Remove the oil seal on the rear rear axle and
discard.
4. Remove the four pinion pilot bearing support bolts.
5. Remove the pinion pilot bearing support.
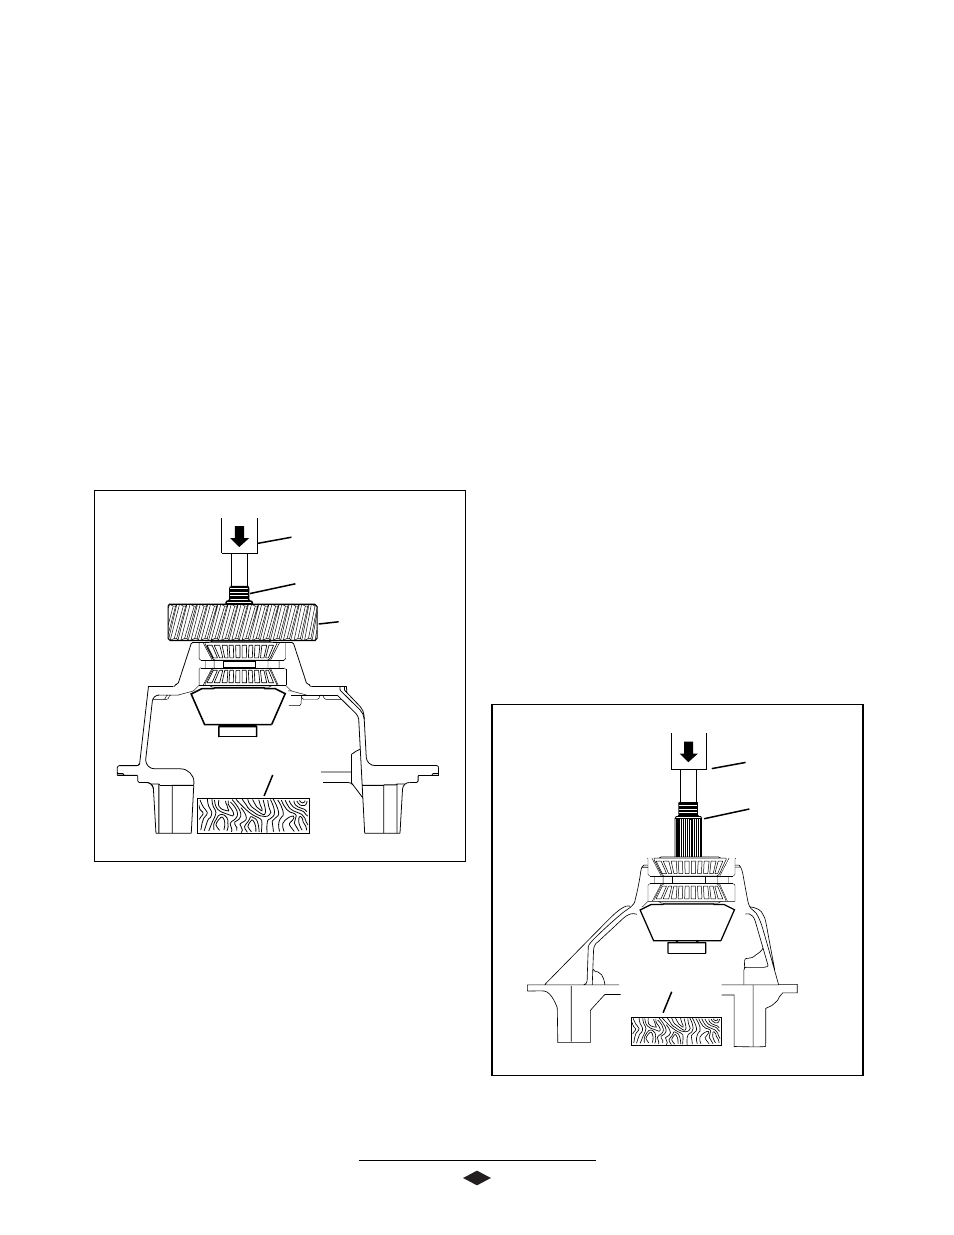
6. Place carrier in press with threaded end of pinion
face up.
See Figure 10 and 10A.
7. Place a wooden block under pinion to avoid damage
of gear teeth during removal.
8. Pinion removal -
•
On the
Forward Rear, press the pinion through
the helical driven gear and inner and outer
bearing cones.
See Figure 10.
•
On the
Rear Rear, press the pinion through the
inner and outer bearing cones.
See Figure 10A.
9. Remove the pinion from the bottom of the carrier.
10. Remove bearing preload spacer and save for use in
reassembly.
11. If the gearset is to be reused, remove inner pinion
bearing with a suitable puller at this time. If the
gear set is to be replaced new bearings must be
installed.
12. If bearings are to be replaced, press bearing cups
out of carrier casting at this time.
13. Remove pinion pilot bearing with a suitable puller.
Pinion Disassembly Complete
Press
Pinion
Driven Gear
Wood Block
FFFFFigur
igur
igur
igur
igure 1
e 1
e 1
e 1
e 10
0
0
0
0
14
Press
Pinion
Wood Block
FFFFFigur
igur
igur
igur
igure 1
e 1
e 1
e 1
e 10A
0A
0A
0A
0A