Installation of inter-axle differential to carrier, Yoke removal & seal replacement, Installation of inter-axle differnetial to carrier – Spicer Tandem Drive Axles Service Manual S400 User Manual
Page 27: Yoke removal and seal replacement
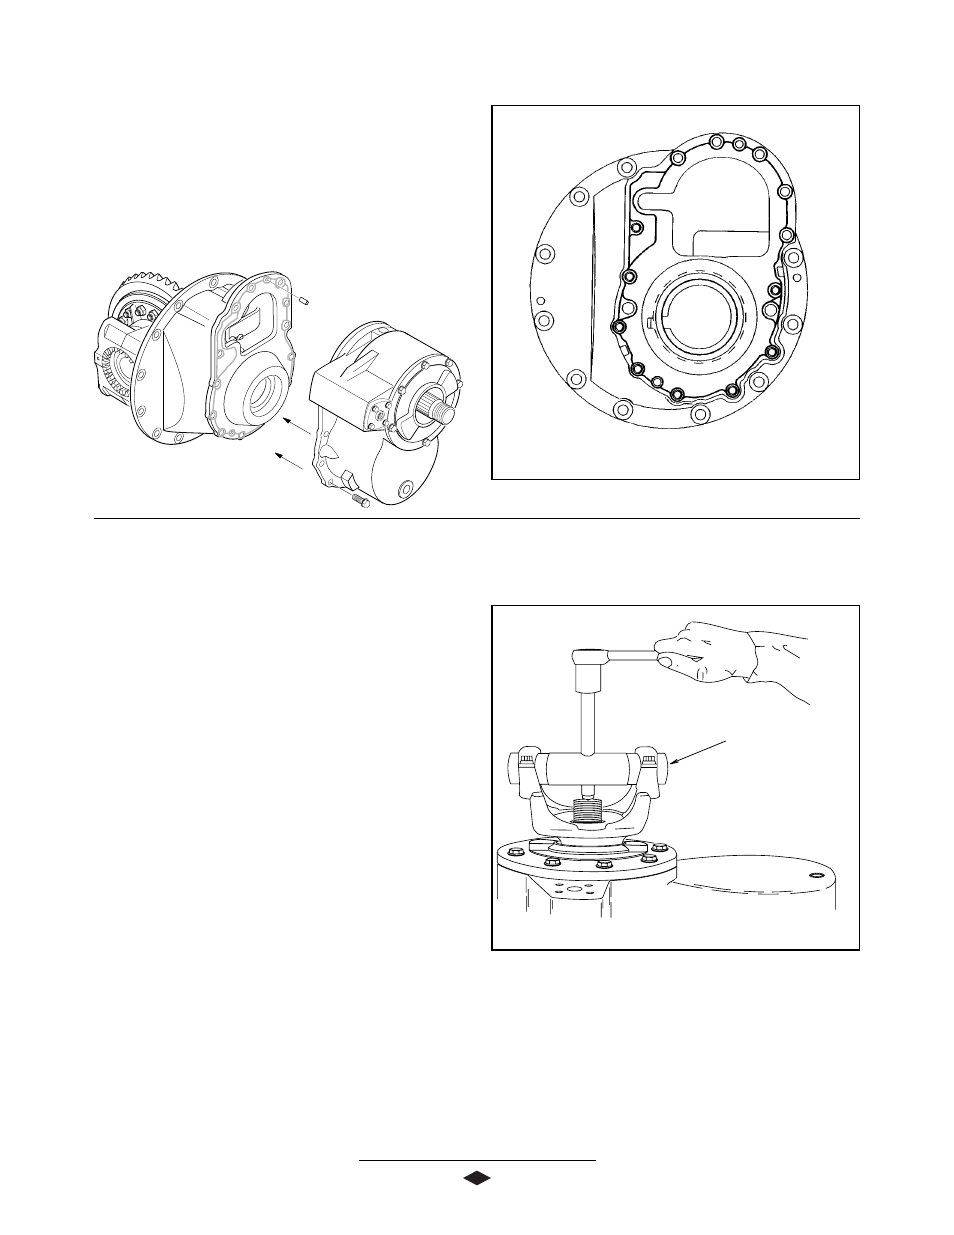
INSTALLATION OF INTER-AXLE DIFFERNETIAL TO CARRIER
1. Thoroughly clean mating face of carrier and apply
an 1/8 inch bead of Loctite #518 Gasket Elimina-
tor. See Figure 19 for correct bead pattern.
2. Align inter-axle differential case with carrier housing
and insert bolts and torque to 160-180 Lb-Ft
(217-244 N-m).
FFFFFigur
igur
igur
igur
igure 1
e 1
e 1
e 1
e 19
9
9
9
9
#518 Gasket Eliminator Bead Pattern
Yoke Remover
FFFFFigur
igur
igur
igur
igure 2
e 2
e 2
e 2
e 25
5
5
5
5
YOKE REMOVAL AND SEAL REPLACEMENT
1. Disconnect drive shaft at the rear U-joint.
2. Remove yoke nut.
NOTE: Use of torque multiplier is recommended as
torque specification on input flanged hex nut is 900-
1,200 Lb-Ft (1,220-1,627 N-m).
3. Remove end yoke using the yoke remover tool. See
Figure 25.
4. Remove oil seal.
5. Inspect end yoke seal surface for grooves. If grooves
can be detected with fingernail, it should be repaired
with a CR SPEEDI-SLEEVE
®
or replaced.
6. Clean and dry threads on input/ouput shaft or
pinion. Install oil seal using proper tools.
7. Install end yoke using yoke installer. See Figure 17
on page 17.
NOTE: Spicer recommends that new flanged hex nuts
be used.
8. Apply Loctite #680 (green) to threads.
9. Use torque multiplier and torque flanged hex nut to
900-1,200 Lb-Ft (1,220-1,627 N-m).
Yoke Removal and Seal Replacement Complete
25