2 menu navigation, 3 changing settings – Ohaus CARAT PLUS PRECISION JEWELRY BALANCES Manual en User Manual
Page 18
Adventurer Pro
EN-16
3.4.2 Menu Navigation
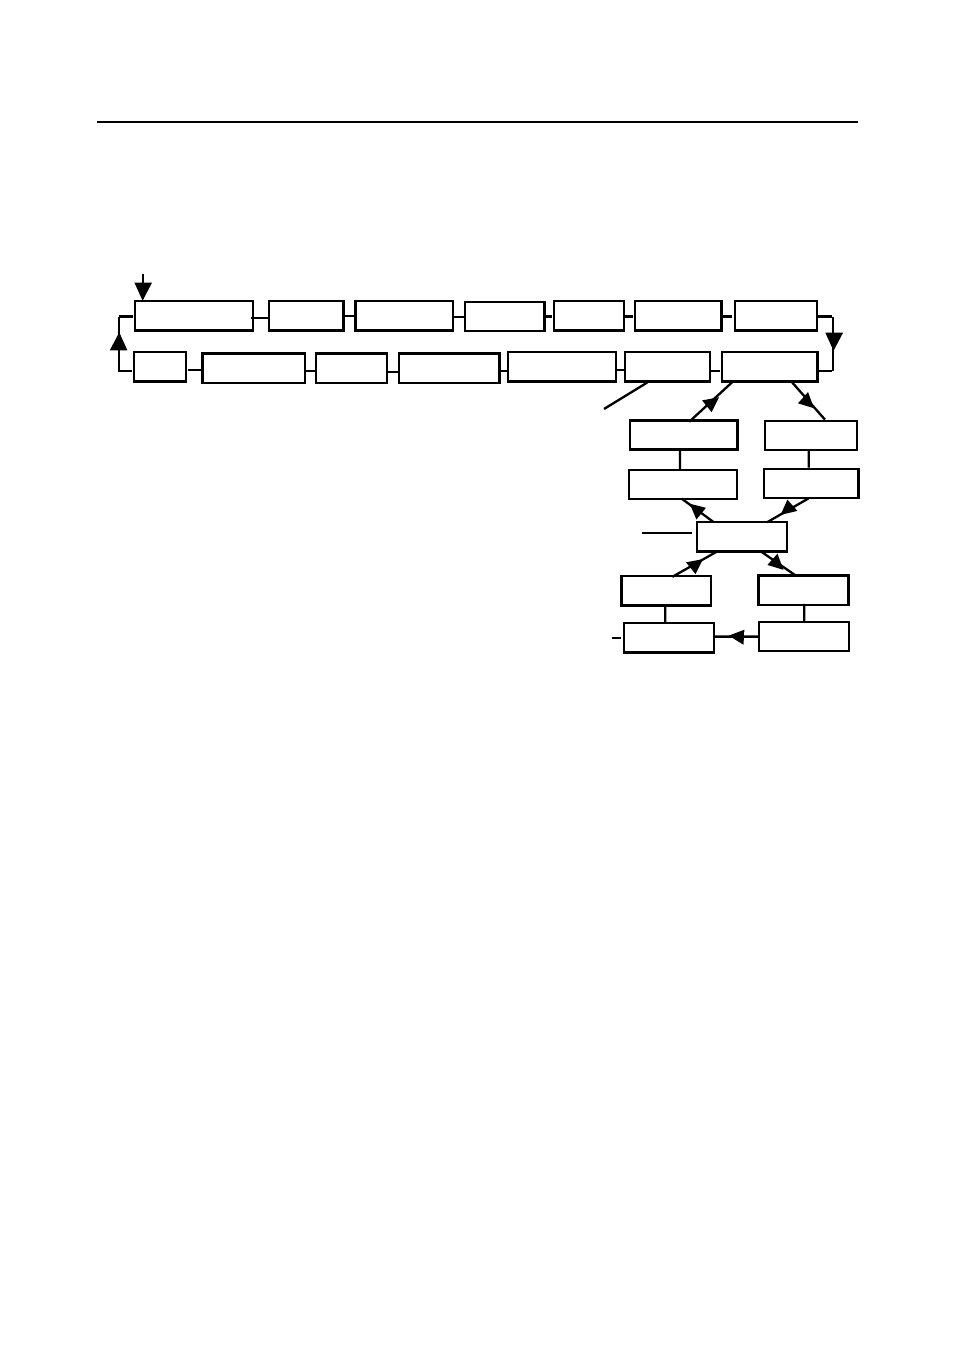
The Adventurer Pro menu structure consists of three levels. The top level is the main menu which
consists of a number of sub-menus.
CALIBRATION
SETUP
READOUT
MODE
UNIT
PRINT-1 PRINT-2
END
LOCKOUT
RESET
GLP PRINT GLP DATA
RS232-2 RS232-1
TOP LEVEL
END RS232
POWER
BAUD
HANDSHAKE
PARITY
7 EVEN
8 NOP
7 ODD
7 NOP
SECOND LEVEL
BOTTOM LEVEL
The second level of the menu structure is the
sub-menu level. Each sub-menu is a loop that
consists of a number of menu items.
The bottom level of the menu structure is the
menu item level. Each menu item level consists
of two or more settings
Typical Sub-menu
Typical Menu Item
Typical Setting
3.4.3
Changing Settings
To change a menu setting, perform the following steps:
ENTER THE MENU
Press and hold the
Menu button until MENU appears on the primary (7-Segment) display.
Release the button and the first sub-menu appears on the secondary (14-Segment) display
(blinking).
Note: When the secondary display is blinking, press Yes to accept.
Press No or Back or view another selection.
SELECT THE SUB-MENU
Press the No button to select the next sub-menu or the Back button to select the previous sub-menu
in the loop. Press the Yes button to select the sub-menu that appears on the secondary display
(blinking). The sub-menu name now appears on the primary display and the first menu item in the
sub-menu now appears on the secondary display (blinking).
SELECT THE MENU ITEM
Press the No button to select the next setting or the
Back button to select the previous setting in the
loop. Press the Yes button to select and save the setting on the secondary display (blinking) as the
new menu item setting.
EXIT THE MENU
Press the Exit button at any time to quickly exit the menu or select END sub-menu and press the Yes
button.
Enter