Installation installation – STIEBEL ELTRON HDB-E Si 01.11.2012 - 31.01.2013 User Manual
Page 21
EN
GL
ISH
www.stiebel-eltron.com
HDB-E Si |
21
INSTALLATION
Installation
f Drill the holes and secure the mounting bracket with
2 screws and 2 rawl plugs (screws and rawl plugs are not
part of the standard delivery).
Note
If you are installing the appliance with flexible water con-
nections, secure the back panel with a screw.
f Fit the mounting bracket.
160
30
26
_0
2
_02
_0
8
8
7
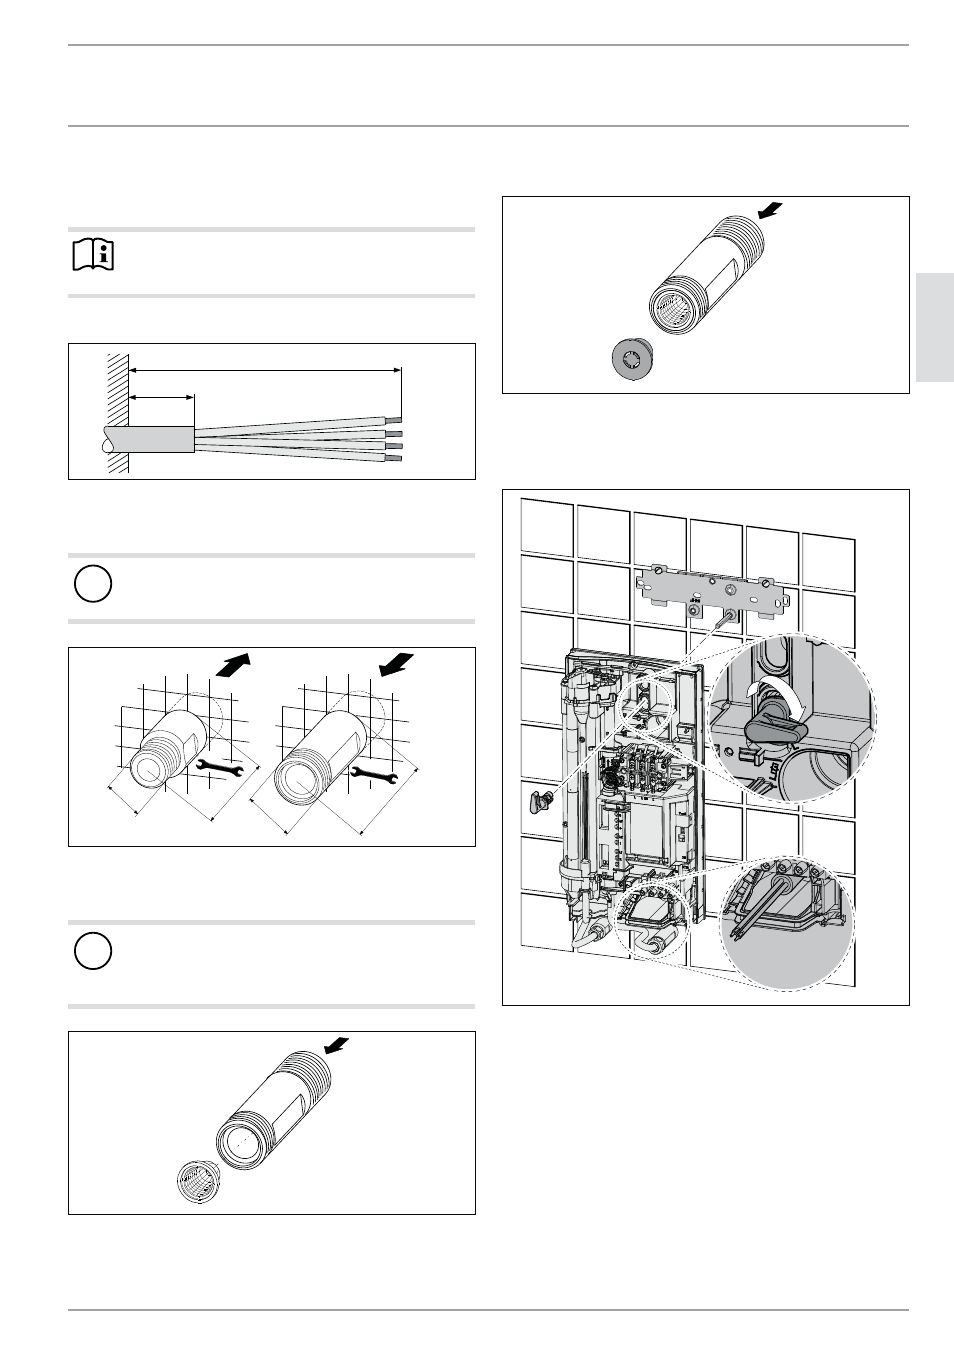
f Prepare the power cable.
Making the water connection
!
Material damage
Carry out all water connection and installation work in
accordance with regulations.
68 ±2
53 ±2
19
G 3/8
A
19
G 1/2
A
26
_0
2
_02
_1
3
6
8
f Seal and insert the twin nipples.
Fitting the strainer
!
Material damage
The strainer must be fitted for the appliance to function.
f When replacing the appliance, check that the strain-
er is present.
2
6
_0
2_0
2_
1
3
6
4
f Fit the strainer provided in the cold water inlet of the
appliance.
Installing the DMB flow limiter
26
_0
2
_02
_1
3
6
5
f Install the flow limiter provided in the cold water inlet of the
appliance.
Installing the appliance
2
6
_0
2_0
2_
1
3
7
2
f For easy installation, push the cable grommet of the upper
electrical connection into the back panel from behind.
f Remove the transport plugs from the water connections.
f Remove the fixing toggle from the upper part of the back
panel.
f Route the power cable from behind through the cable grom-
met until it rests against the cable sheath. Align the power
cable.
In the case of a cross-section > 6 mm², enlarge the hole in
the cable grommet.
f Push the appliance over the threaded stud of the mounting
bracket, so that it breaks through the soft seal. If necessary,
use a screwdriver.