Lighting and operating instructions, Temco dv5200 series, For your safety read before lighting – Temco Tool DV5200MB User Manual
Page 24
24
Temco DV5200 Series
78674
Lighting and Operating Instructions
FOR YOUR SAFETY READ BEFORE LIGHTING
WARNING: If you do not follow these instructions exactly, a fire or explosion may result caus-
ing property damage, personal injury or loss of life.
Before Lighting
A. Smell all around the appliance area for gas. Be
sure to smell next to the floor because some gas is
heavier than air and will settle on the floor.
WHAT TO DO IF YOU SMELL GAS
• Do not try to light any appliance
• Do not touch any electrical switch; do not use any
phone in your building.
• Immediately call your gas supplier from a neigh-
bor’s phone. Follow the gas supplier’s instructions.
• If you cannot reach your gas supplier, call the fire
department.
B. Use only your hand to push or turn the gas control
knob. Never use tools. If the knob will not push in
or turn by hand, do not try to repair it. Call a service
technician. Force or attempted repair may result in
a fire or explosion.
C. Do not use this appliance if any part has been un-
der water. Immediately call a qualified technician to
inspect the appliance and to replace any part of the
control system which has been under water.
Lighting Instructions
1. Stop! Read the safety information above.
2. Turn off all electrical power to the appliance.
3. Open the access door located at the bottom of the
appliance to expose the controls.
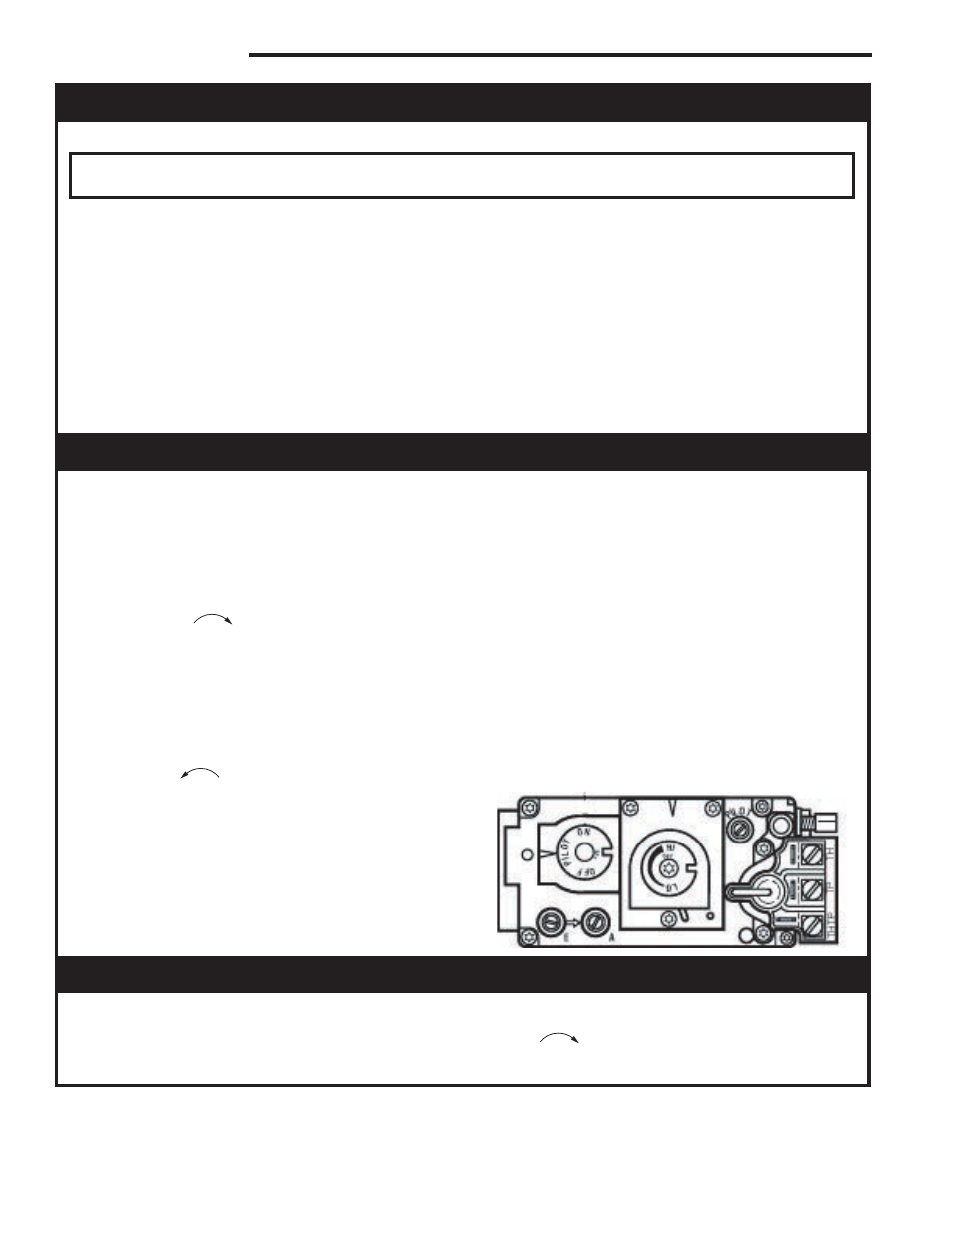
4. If the control knob is not already in the “OFF” posi-
tion, then push in the gas control knob slightly and
turn clockwise
to “OFF”. NOTE: The knob
cannot be turned from “PILOT” to “OFF” unless
the knob is pushed in slightly. Do not use force.
5. Wait five (5) minutes to clear out any gas. If you
smell gas, STOP! Follow “B” in safety information
above. If you do not smell gas, then go on to the
next step.
6. Push in the control knob slightly and turn it coun-
terclockwise
to the “PILOT” position.
7. Push in the control knob all the way and hold it.
With the other hand, push in the red indicator but-
ton until you hear a click. Now observe closely the
pilot burner located on the rear right hand side of
the main burner. If a flame has appeared, ten con-
tinue to depress the control knob for 20 seconds. If
the flame did not appear, then continue to depress
the red indicator button every 5 seconds until a
flame is established. NOTE: If after 30 seconds a
flame has not yet been established, then turn the
control knob back to the “OFF” position and repeat
Steps 7 and 8.
8. Once the pilot flame has been established, hold
the control knob in the depressed position approxi-
mately 20 seconds before releasing. If the flame
goes out, repeat Steps 7 and 8.
9. Now turn the control knob to the “ON” position.
The burner will not light unless the wall switch,
thermostat, or remote control is turned on or, in the
case of a thermostat, there is a call for heat.
10. Close the access door and turn all electric power
back to the appliance.
������
��������������
����
Turn Off the Appliance
1. Turn off all electrical power to the appliance if
service is to be performed.
2. Open the control access door.
3. Push in the gas control knob slightly and turn clock-
wise
to the “OFF” position. DO NOT FORCE!
4. Close the control access door.