Toro GREENKEEPER 212 User Manual
Page 36
The fuse protects the controller from damage due to
power surges and excessive current draw through the
Station Modules. Before replacing the fuse, check for the
probable cause, such as a shorted or improperly connect-
ed control valve wire, then replace the fuse as follows:
1. Unplug the transformer from the wall receptacle.
(indoor model) or shut off power at the source
(outdoor model).
2. Remove the lower housing cover from the controller.
3. Carefully remove the blown fuse from the retaining
clip. (See page 5 item 8 for fuse location.)
4. Remove the replacement fuse from the back side of
lower housing cover (indoor model) or the lower
inside corner of the door (outdoor model) and install it
into the fuse retaining clip.
5. Install the lower housing cover.
6. Apply power to the controller.
1. Turn the control dial to the
OFF
position.
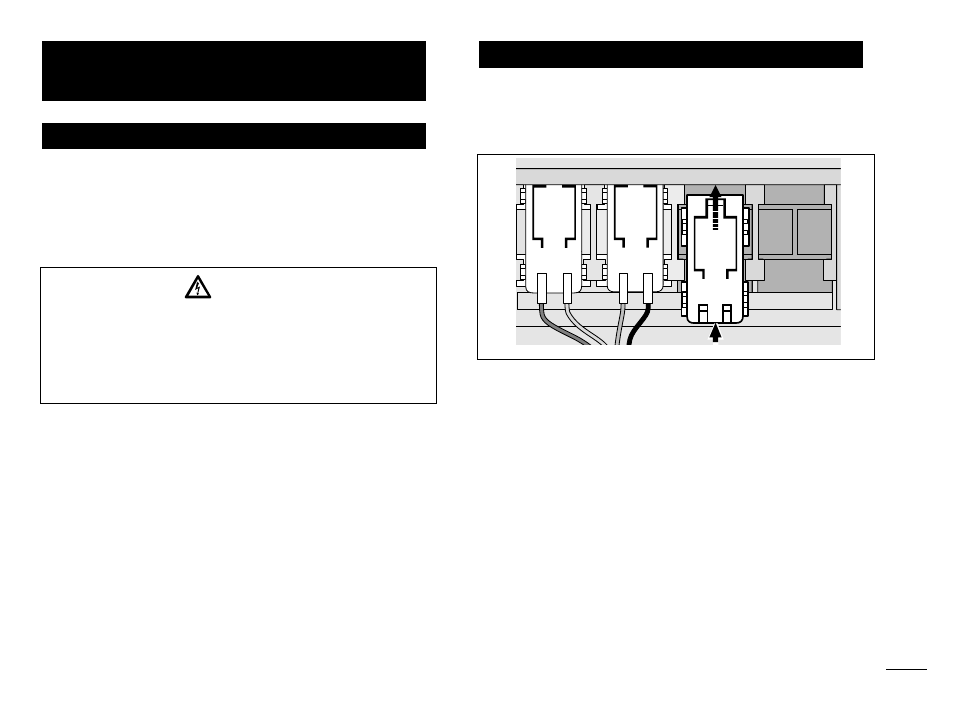
2. Remove the lower front cover from the controller
housing by sliding it downward.
3. Place the back of the station control module (model
number MOD 212-02) squarely between the guides
of the first open expansion slot (from left to right).
Pushing lightly on the bottom of the module, slide it
upward until it locks into position.
4. To connect the valve wires, refer to “Connecting The
Valves” on page 23 or 27.
5. Install the lower front cover.
6. To set the station run time, refer to “Setting Station
Run Times” on page 21.
7. To test the operation of the new watering station(s),
refer to “Manual Operation” on page 31.
Adding a Station Module
Replacing the Fuse
Service and Specifications
35
24HR
12HR
7
4
3
2
1
8
WARNING:
For continued protection against risk of fire,
replace only with the same type and rating of fuse.
Remove the controller power source prior to
servicing the fuse. Failure to comply may result in
serious injury and/or controller damage.