Installing the cabinet 26 – Toro GREENKEEPER 212 User Manual
Page 27
1. For safe, reliable operation, select an installation site
which will provide the following conditions:
• Protection from irrigation spray, exposure to direct
sun during the hottest hours, wind and snow.
• Access to a grounded power source which is not
controlled by a light switch or utilized by a high
current load appliance, such as a refrigerator or air
conditioner.
• Access to the sprinkler control valve wiring and
optional accessory wiring.
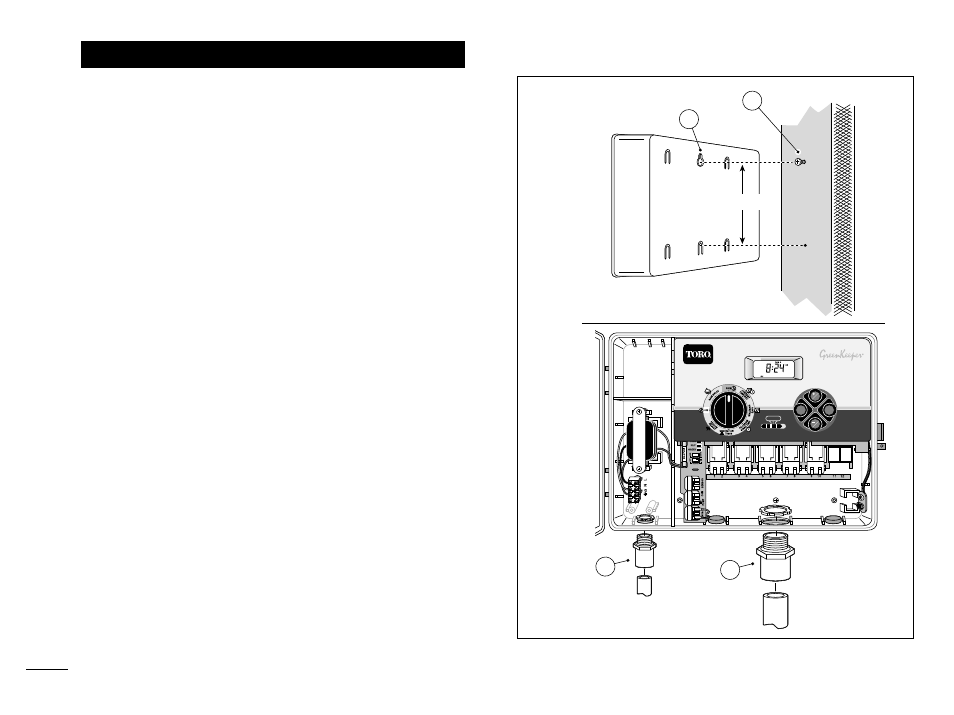
2. Drive a wood screw (provided) into the wall at eye
level (A). Leave the screw extended approximately
1/4" (6.5mm) from the wall.
Note: If you are installing the controller on drywall or
masonry, install screw anchors to prevent screws
from loosening. Use the dimension shown to predrill
holes for screw anchors.
3. Hang the cabinet on the screw using the keyhole
slot (B) on the back panel. Make sure the cabinet
slides down securely on the screw.
4. Install the lower mounting screw(s) and tighten
securely.
Note: Conduit and adapters are not provided. Install
conduit as required by local electrical codes.
5. Install 1/2" (13mm) conduit (C) for power/equipment
ground wires and 3/4" (19mm) conduit (D) for valve
wires.
Note: After installation, store the User’s Guide and
Quick Reference Guide on the hook located on the
inside of the door.
Installing the Cabinet
26
BATTERY
MANUAL
START
ON
NEXT
OFF
PROGRAMS
B
C
A
A
B
C
D
6" (15.24cm)