Transfer the voice files to your pc – Olympus LS-20M User Manual
Page 96
96
5
EN
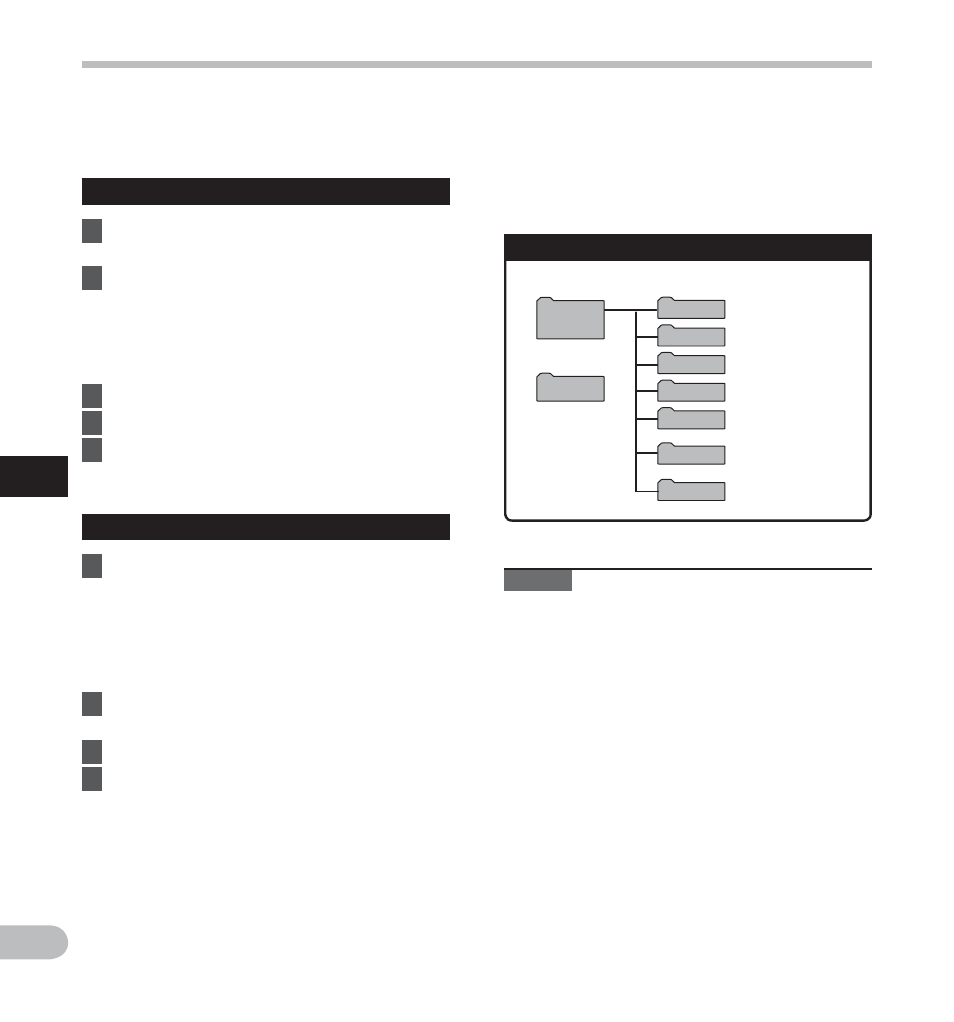
DSS_FLDA
DSS_FLDB
DSS_FLDC
DSS_FLDD
MUSIC
Windows
Removable
Disk
Macintosh
LS20M
DSS_FLDE
DCIM
Transfer the voice files to your PC
The 5 voice folders of this recorder are named as [DSS_FLDA], [DSS_FLDB], [DSS_FLDC], [DSS_FLDD] and
[DSS_FLDE], and the recorded voice files are saved in these folders. Furthermore, the movie shooting folder is
named as [DCIM]. Copy a folder to any folder on your PC.
Windows
1
Connect the recorder to your PC
(
☞ P.94).
2
Open the Explorer window.
• When you connect the recorder to Windows
and open [My Computer], it will be
recognized by the drive name of the product
name. Inserting an SD card will allow you to
use it as [Removable Disk].
3
Open the product name folder.
4
Copy the data.
5
Disconnect the recorder from the PC
(
☞ P.95).
4 Drive names and folder names when a
PC is connected:
SD card
Notes
• While transmitting data, [Busy] is displayed,
and the PEAK/LED indicator light flashes. NEVER
disconnect the USB cable while the PEAK/LED
indicator light is flashing. If you do, the data will
be destroyed.
• In a Windows standard environment, 24-bit
wav-format files cannot be played. Use “Quick
Time” or “Olympus Sonority” (Optional) for
playback of such files.
• “Olympus Sonority” (Optional) allows you to
perform operations such as editing voice files,
but it does not support movie files.
Drive name
Folder name
Macintosh
1
Connect the recorder to your PC
(
☞ P.94).
• When you connect the recorder to
Mac OS, it will be recognized by the drive
name of the product name on the desktop.
If an SD card is inserted, [LS20M] will be
displayed.
2
Double-click the product name icon on
the desktop.
3
Copy the data.
4
Disconnect the recorder from the PC
(
☞ P.95).
Transf
er the v
oice fi
les to y
our PC