Manual iris – RCA ProV950HB User Manual
Page 51
47
P R O V 9 5 0 H / p p . 0 4 2 - 0 5 0 ; 9 6 / 5 / 2 3 / 1 4 : 0 0
G. K . A s s o c i a t e s , To k y o
4
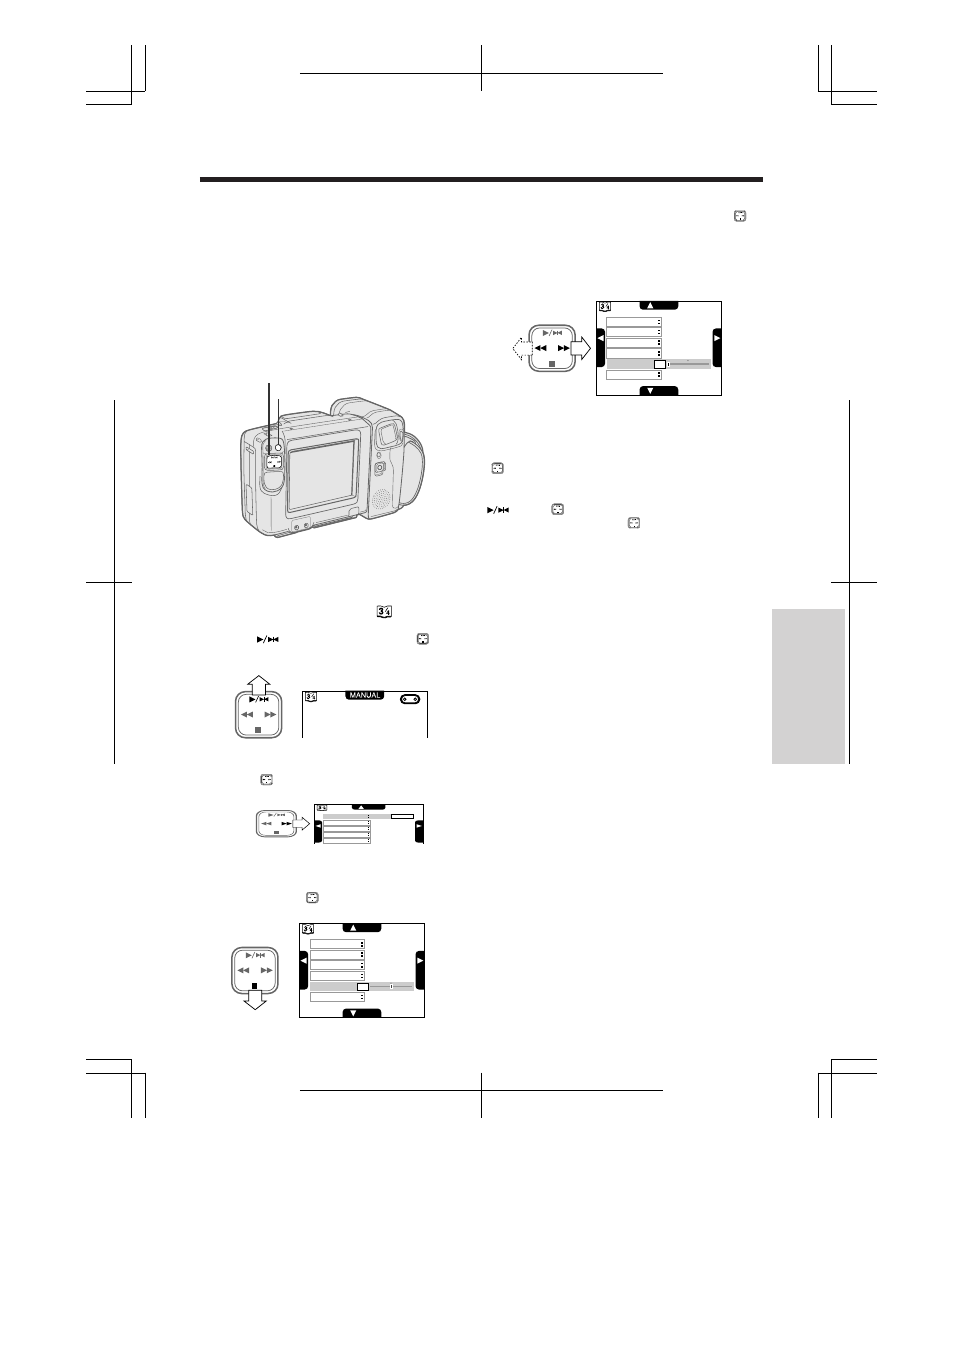
Press
C or B on the operation button ( )
to select the desired value setting.
• The number shows the selected aperture
value. The adjustable range is from
מ6
(least light) to
ם6 (most light).
To Return to the Auto Mode
In step 4, press
C or B on the operation button
(
) to select “0”.
To reset the camcorder to Full Auto mode, press
on the
button to select “CAMERA MODE”
and then press
C on the
button to select
“AUTO” in step 2.
Note:
• If the Scene Menu is set after setting the manual
iris, the aperture setting will automatically return
to “0” (normal).
Useful Features f
o
r
Camera Recor
ding
Manual Iris
The camcorder is normally set to Auto Iris
mode, which automatically chooses the optimal
aperture. When there is too much contrast in
brightness between the subject and
background, you may not be able to record a
clear image. Correct the iris to adjust the
aperture.
1
Press the MENU button until
appears on
the monitor (Camera mode).
Press
on the operation button (
) to
select “MANUAL”.
2
Select “CAMERA MODE” and then press
B
on the
button to select “MANUAL”.
3
Press
Aon the
button to select “IRIS”.
Operation Button
MENU Button
CAMERA MODE
SHUT. SPEED
WHITE BALANCE
IRIS
ITEM
ITEM
S
E
T
S
E
T
SCENE MENU
PREV. PAGE
-6
CAMERA MODE
SHUT. SPEED
WHITE BALANCE
IRIS
ITEM
S
E
T
S
E
T
MANUAL
AUTO
SCENE MENU
CAMERA MODE
SHUT. SPEED
WHITE BALANCE
IRIS
ITEM
ITEM
S
E
T
S
E
T
SCENE MENU
PREV. PAGE
0