Setting the camcorder to full auto mode, Recording the date and time, Camera recording – RCA ProV950HB User Manual
Page 36
32
P R O V 9 5 0 H / p p . 0 3 0 - 0 3 5 ; 9 6 / 5 / 2 1 / 1 0 : 0 0
G. K . A s s o c i a t e s , To k y o
1
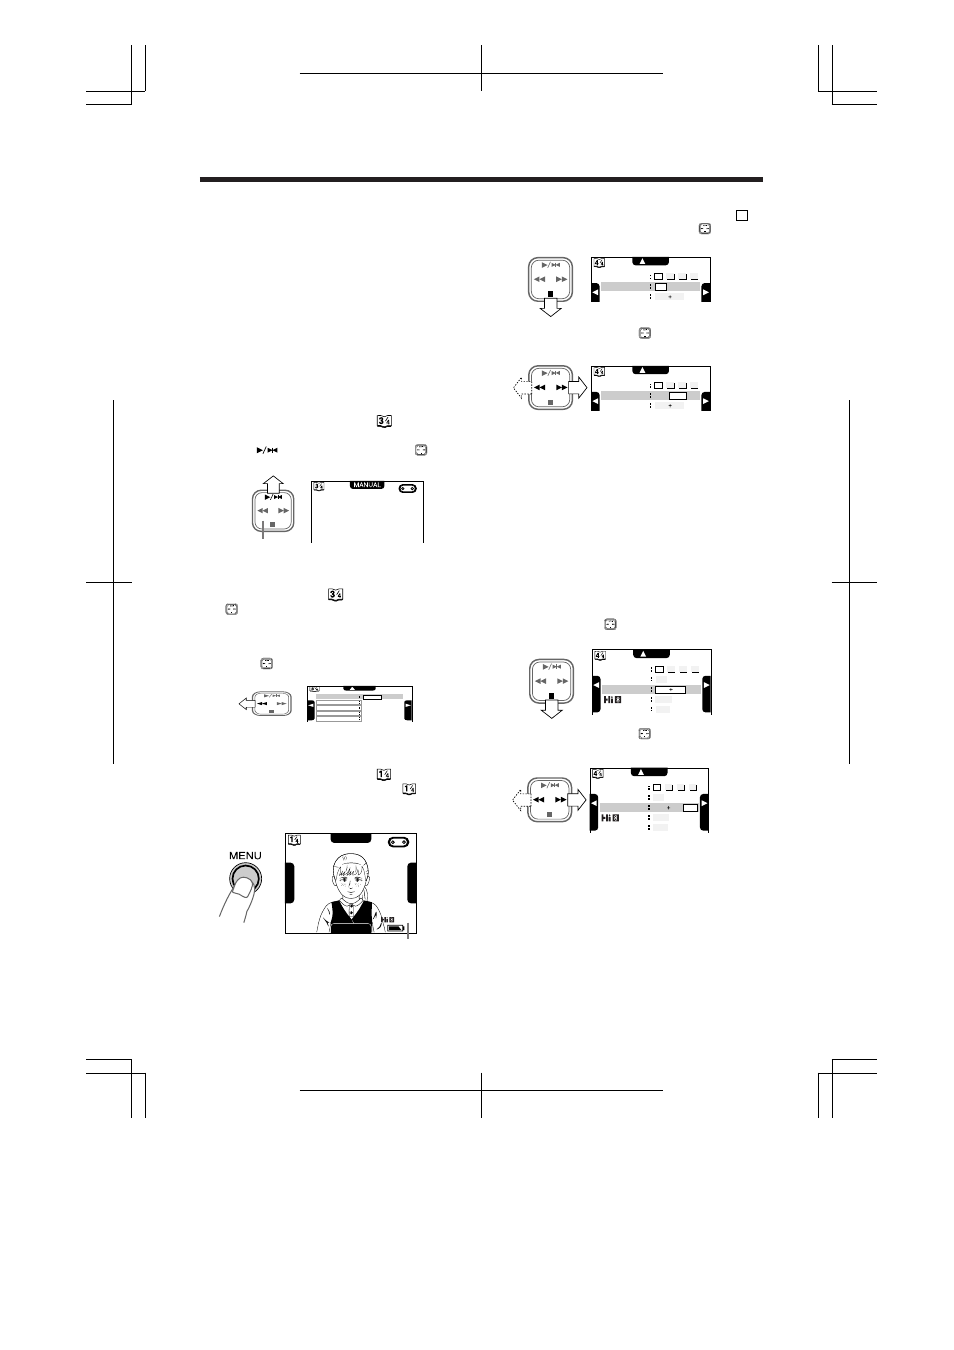
Refer to page 14 to display MENU-PAGE
1
.
Press
A on the operation button ( ) to
select “DATE/TIME”.
2
Press
C or B on the
button to select
“AUTO”, “ON” or “OFF”.
When “ON” is selected,
the date/time is
continuously displayed and recorded along with
the subject.
When “AUTO” is selected,
the date/time is
displayed and recorded for 10 seconds at the
beginning of the first recording of each day.
When “OFF” is selected,
the date/time is neither
displayed nor recorded.
Note:
• Select “AUTO” if continuous date/time display
annoys you during recording or playback.
3
Press
A on the button to select
“DISPLAY”.
4
Press
C or B on the
button to select
“DATE+ TIME” or “DATE”.
When “DATE+TIME” is selected
, both the
date and the time are displayed and
recorded.
When “DATE” is selected
, only the date is
displayed and recorded.
5
Press the MENU button to turn off the menu
display.
Note:
• When “AUTO” is selected in step 2, the date/
time is not displayed and recorded even if the
date changes during recording.
Setting the Camcorder to Full
Auto Mode
This camcorder is equipped with auto focus, auto
white balance, auto exposure, and auto shutter
speed functions. Setting the camcorder to Full
Auto mode lets you record high-quality pictures
easily.
When “AUTO” is not displayed on the monitor the
camcorder is not in Full Auto mode. Perform the
procedure below to set the camcorder to Full Auto
mode.
1
While the camcorder is in Camera mode,
press the MENU button until
appears.
2
Press
on the operation button (
) to
select “MANUAL”.
Note:
• If the camcorder is in manual focus mode
(“FOCUS” selected on
screen), press
A on
the
button to return to Auto Focus mode (see
page 43).
3
Select “CAMERA MODE” and then press
C
on the
button to select “AUTO”.
4
Press the MENU button until
appears.
During normal operation, use the
screen
for the Full Auto mode. “AUTO” appears on
the monitor.
Recording the Date and Time
Follow the procedure shown in the next column to
record the date and time – or the date only – along
with the subject.
Camera Recording
ITEM
S
S
PAGE
DATE/TIME
DISPLAY
ON
DATE
DATE
TIME
AUTO
1
2
3
4
OFF
ITEM
S
S
PAGE
DATE/TIME
DISPLAY
ON
DATE
DATE
TIME
AUTO
1
2
3
4
OFF
ITEM
S
E
T
S
E
T
PAGE
DATE/TIME
DISPLAY
SELF REC
ON
DATE
DATE
TIME
AUTO
AUTO
OFF
1
2
3
4
OFF
AUTO NO CORRECT
ITEM
S
E
T
S
E
T
PAGE
DATE/TIME
DISPLAY
SELF REC
ON
DATE
DATE
TIME
AUTO
AUTO
OFF
1
2
3
4
OFF
AUTO NO CORRECT
Operation Button
CAMERA MODE
SHUT. SPEED
WHITE BALANCE
IRIS
ITEM
S
E
T
S
E
T
MANUAL
AUTO
SCENE MENU
BLC
FADE
AUTO
D
I
S
E
X
T
E
N
D
“AUTO” appears.