Operation panel, Keys – Ricoh Priport JP5000 User Manual
Page 258
6
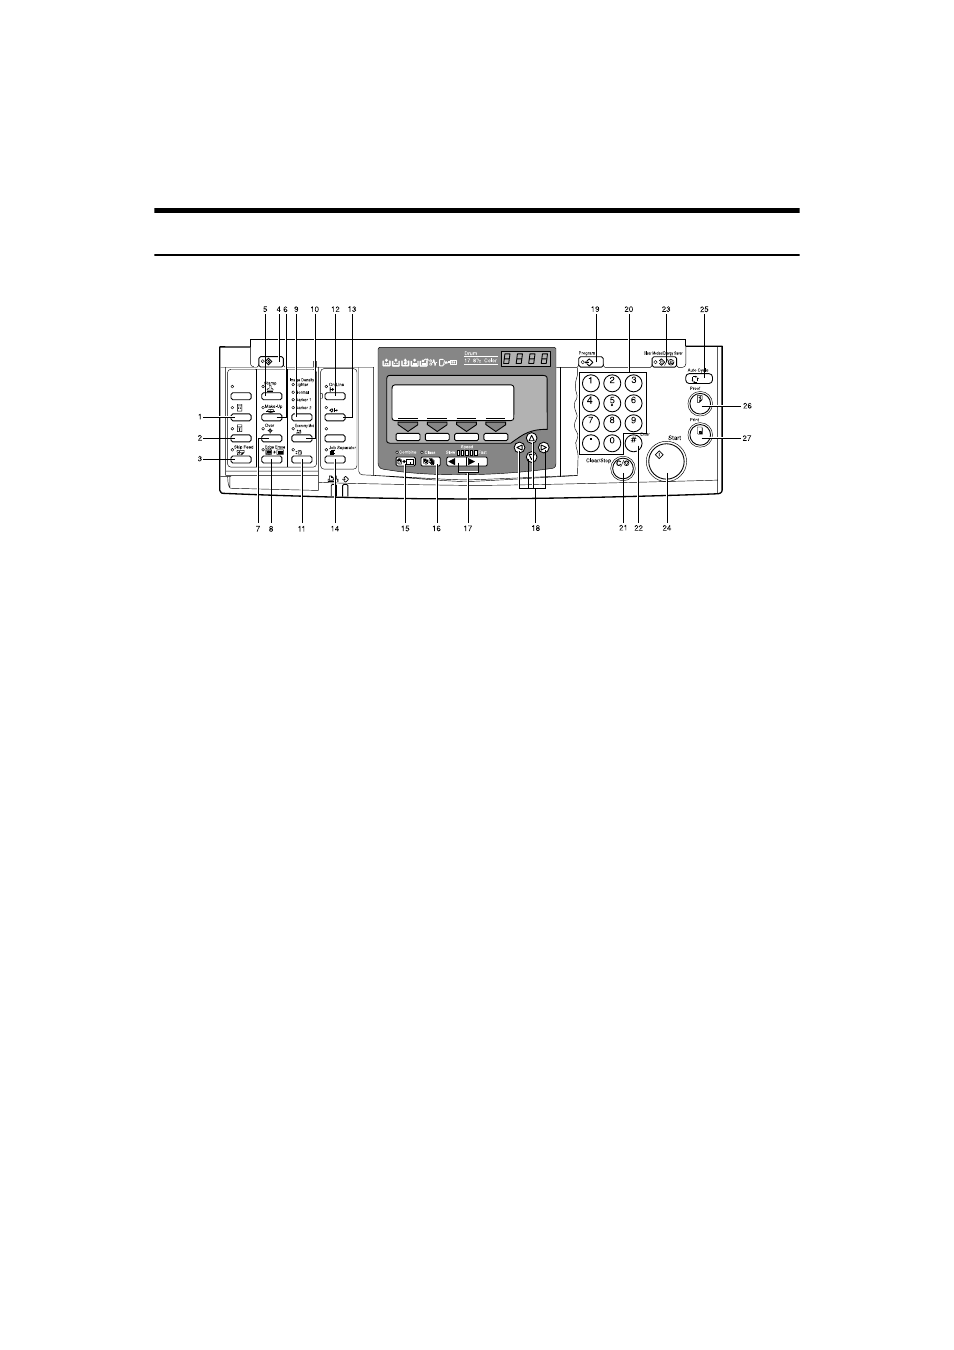
Operation Panel
Keys
1.
{{{{Quality Start}}}} key
See p.76 “Quality Start Mode”.
2.
{{{{Security}}}} key
See p.75 “Security Mode”.
3.
{{{{Skip Feed}}}} key
Press to select skip feed printing. See p.70
“Skip Feed Printing”.
4.
{{{{User Tools}}}} key
Press to change the default settings to
meet your requirements.
5.
{{{{Stamp}}}} key
Press to select the Stamp mode. See p.108
“Date Stamp”, see p.110 “Page Stamp”,
see p.113 “Stamp”.
6.
{{{{Make-Up}}}} key
Press to select the Make-up mode. See
p.94 “Make-up Printing”.
7.
{{{{Overlay}}}} key
Press to select the Image Overlay mode.
See p.105 “Image Overlay”.
8.
{{{{Edge Erase}}}} key
Press to select Edge Erase mode. See p.41
“Edge Erase”.
9.
{{{{Image Density}}}} key
Press to make prints darker or lighter. See
p.25 “Adjusting the Image Density of
Prints”.
10.
{{{{Economy Mode}}}} key
Press to save ink. See p.50 “Economy
Mode”.
11.
{{{{Original Storage}}}} key
Press to select the Original Storage func-
tion. See p.100 “Original Storage”.
12.
{{{{On Line}}}} key
See p.80 “On Line Printing”.
13.
{{{{Auto On Line}}}} key
See p.80 “On Line Printing”.
14.
{{{{Job Separator}}}} key
See p.77 “Job Separation”.
15.
{{{{Combine}}}} key
Press to combine originals onto one print.
See p.63 “Combine Originals”, see p.115
“Memory Combine”, see p.68 “Auto
Combine Mode”.
ZDZS200N
lay
Auto On Line
Original Storage