Ricoh Priport JP5000 User Manual
Page 130
OPTIONAL FUNCTIONS
108
2
E
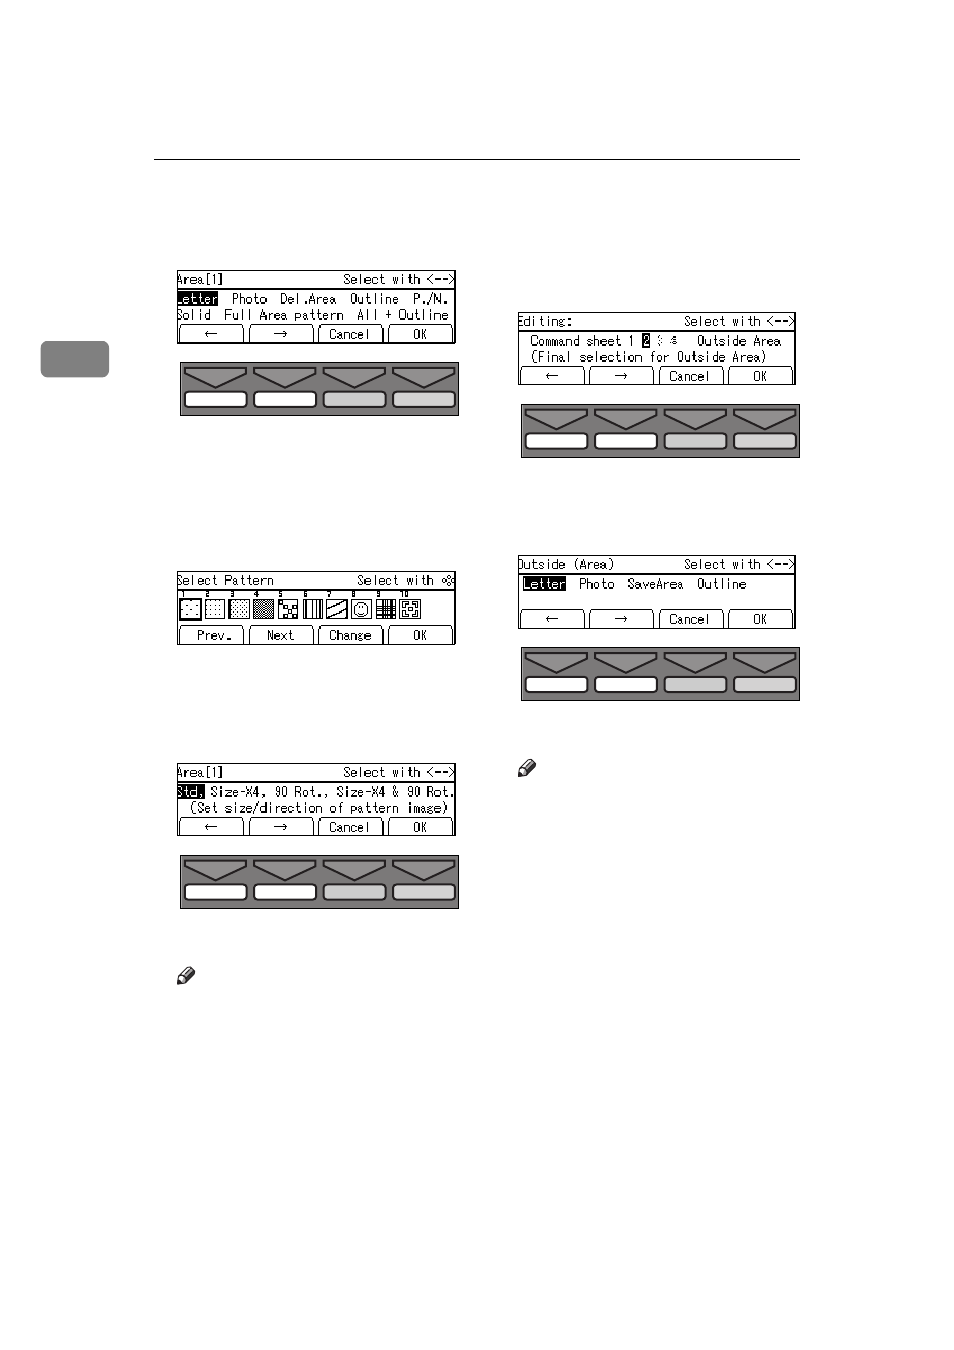
Select the mode for the first com-
mand sheet with the
[
←
←
←
←
]
,
[
→
→
→
→
]
,
{~}, {{{{}
}
}
}}}}}, {{{{|
|
|
|}}}}, or {{{{{
{
{
{}}}} key.
F
Press the
[OK]
key.
G
If necessary, select the pattern for
the first command sheet with the
{{{{~
~
~
~}}}}, {{{{}
}
}
}}}}}, {{{{|
|
|
|}}}}, or {{{{{
{
{
{}}}} key. Then
press the
[OK]
key.
H
If necessary, select the size and
direction of the pattern you se-
lected in step
GGGG with the
[
←
←
←
←
]
,
[
→
→
→
→
]
,
{~}, or {{{{}
}
}
}}}}} key.
I
Press the
[OK]
key.
Note
❒ Follow steps
B – I for the other
command sheets.
❒ You can select a pattern regis-
tered with the user tools for
only one command sheet.
❒ To change the value entered,
press the
{
Clear/Stop
} key and
enter the new value.
J
After you have finished designat-
ing modes for all the command
sheets, select
[Outside Area]
with
the
[
←
←
←
←
]
,
[
→
→
→
→
]
,
{{{{~
~
~
~}}}}, or {{{{}
}
}
}}}}} key.
Then press the
[OK]
key.
K
Select the mode for the outside
area with the
[
←
←
←
←
]
,
[
→
→
→
→
]
,
{{{{~
~
~
~}}}}, or
{{{{}
}
}
}}}}} key.
L
Press the
[OK]
key.
Note
❒ When you select Photo mode
for both inside and outside ar-
eas, you cannot select different
coarseness and image density.
❒ When you want to confirm your
settings, press the
{
Make-Up
}
key twice. Then press the
[OK]
key repeatedly until the panel
display reaches the setting you
want to confirm.
M
When you select Photo mode, se-
lect the coarseness and image
TPES530E
TPES530E
TPES530E
TPES530E