NEC PX-42XM4A User Manual
Page 22
En-21
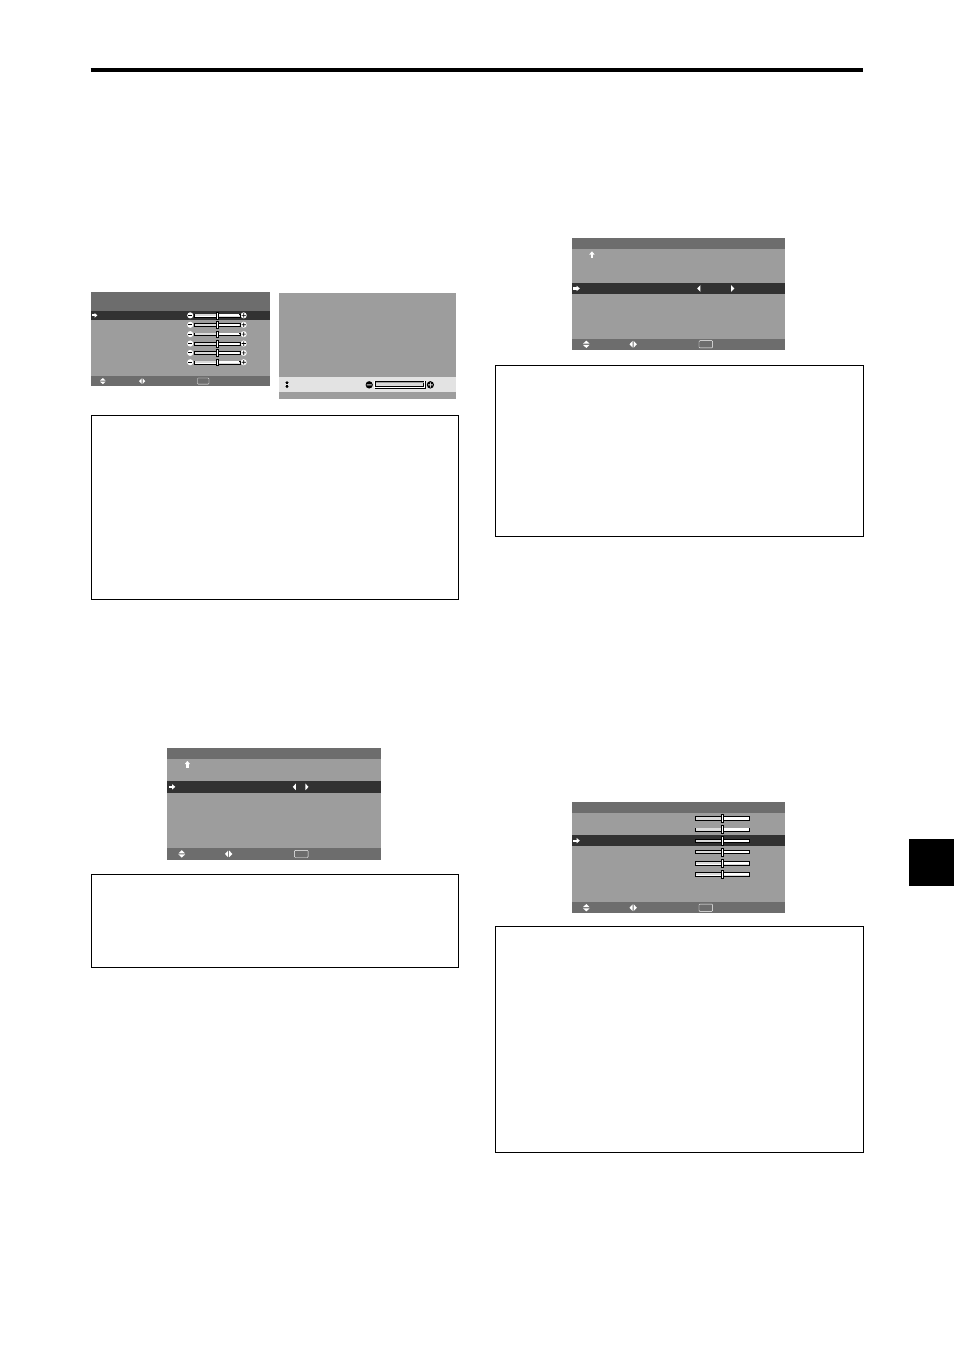
Adjusting the color to the desired level
Use this procedure to adjust the white balance for each
color temperature to achieve the desired color quality.
Example: Adjusting the “GAIN RED” of “HIGH” color
temperature
Set “ADVANCED OSM” to “ON” in the MAIN MENU.
On “COLOR TEMP.” of “PICTURE” menu, select “HIGH”,
then press the MENU/ENTER button.
The “WHITE BALANCE” screen appears.
On “GAIN RED”, adjust the white balance.
SEL.
ADJ.
RETURN
W H I T E B A L A N C E
C O L O R T E M P. H I G H
G A I N R E D
G A I N G R E E N
G A I N B L U E
B I A S R E D
B I A S G R E E N
B I A S B L U E
R E S E T
: O F F
: 4 0
: 4 0
: 4 0
: 4 0
: 4 0
: 4 0
EXIT
: 70
G A I N R E D
Information
Ⅵ
Adjusting the white balance
GAIN R/G/B:
White balance adjustment for white level.
BIAS R/G/B:
White balance adjustment for black level.
RESET:
Resets settings to the factory default values.
Use
ᮤ
and
ᮣ
buttons to select “ON”, then press the
MENU/ENTER button.
Ⅵ
Restoring the factory default settings
Select “RESET” under the WHITE BALANCE menu.
Changing the Gamma Curve
This feature adjusts the brightness of the midtone areas
while keeping shadows and highlights unchanged.
Example: Setting “3”
Set “ADVANCED OSM” to “ON” in the MAIN MENU.
On “GAMMA” of “PICTURE” menu, select “3”.
SEL.
ADJ.
RETURN
P I C T U R E
2 / 2
EXIT
P R E V I O U S PA G E
C O L O R T E M P.
G A M M A
L O W TO N E
C O L O R T U N E
: M I D
: 3
: A U TO
Information
Ⅵ
GAMMA settings
The picture becomes darker as the number increases
(in the sequence of 1, 2, 3, 4).
Making the Low Tone adjustments
This feature allows more detailed tone to be reproduced
especially in the dark area.
* This function is available only for 50 and 61 inch types.
Example: Setting “2”
Set “ADVANCED OSM” to “ON” in the MAIN MENU.
On “LOW TONE” of “PICTURE” menu, select “2”.
SEL.
ADJ.
RETURN
P I C T U R E
2 / 2
EXIT
P R E V I O U S PA G E
C O L O R T E M P.
G A M M A
L O W TO N E
C O L O R T U N E
: M I D
: 2
: 2
Information
Ⅵ
LOW TONE settings
AUTO:
Will automatically appraise the picture and
make adjustments.
1:
Will apply the dither method suitable for still pictures.
2:
Will apply the dither method suitable for motion
pictures.
3:
Will apply the error diffusion method.
Adjusting the colors
Use this procedure to adjust hue and color density for red,
green, blue, yellow, magenta and cyan without changing
the white point.
You can accentuate the green color of trees, the blue of
the sky, etc.
Example: Adjusting the color tune for blue
Set “ADVANCED OSM” to “ON” in the MAIN MENU.
On “PICTURE” menu, select “COLOR TUNE”, then press
the MENU/ENTER button.
The “COLOR TUNE” screen appears.
On “BLUE” of “COLOR TUNE”, adjust the color tune.
SEL.
ADJ.
RETURN
C O L O R T U N E
R E D
G R E E N
B L U E
Y E L L O W
M A G E N TA
C YA N
R E S E T
: 3 2
: 3 2
: 3 2
: 3 2
: 3 2
: 3 2
EXIT
B
R
R
G
C
M
Y
C
M
Y
G
B
: O F F
Information
Ⅵ
COLOR TUNE settings
RED:
Adjusts hue of Red
GREEN:
Adjusts hue of Green
BLUE:
Adjusts hue of Blue
YELLOW:
Adjusts hue of Yellow
MAGENTA:
Adjusts hue of Magenta
CYAN:
Adjusts hue of Cyan
RESET:
Resets settings to the factory default value.
Use
ᮤ
and
ᮣ
buttons to select “ON”, then press the
MENU/ENTER button.