Nuvo Stereo System User Manual
Page 32
24
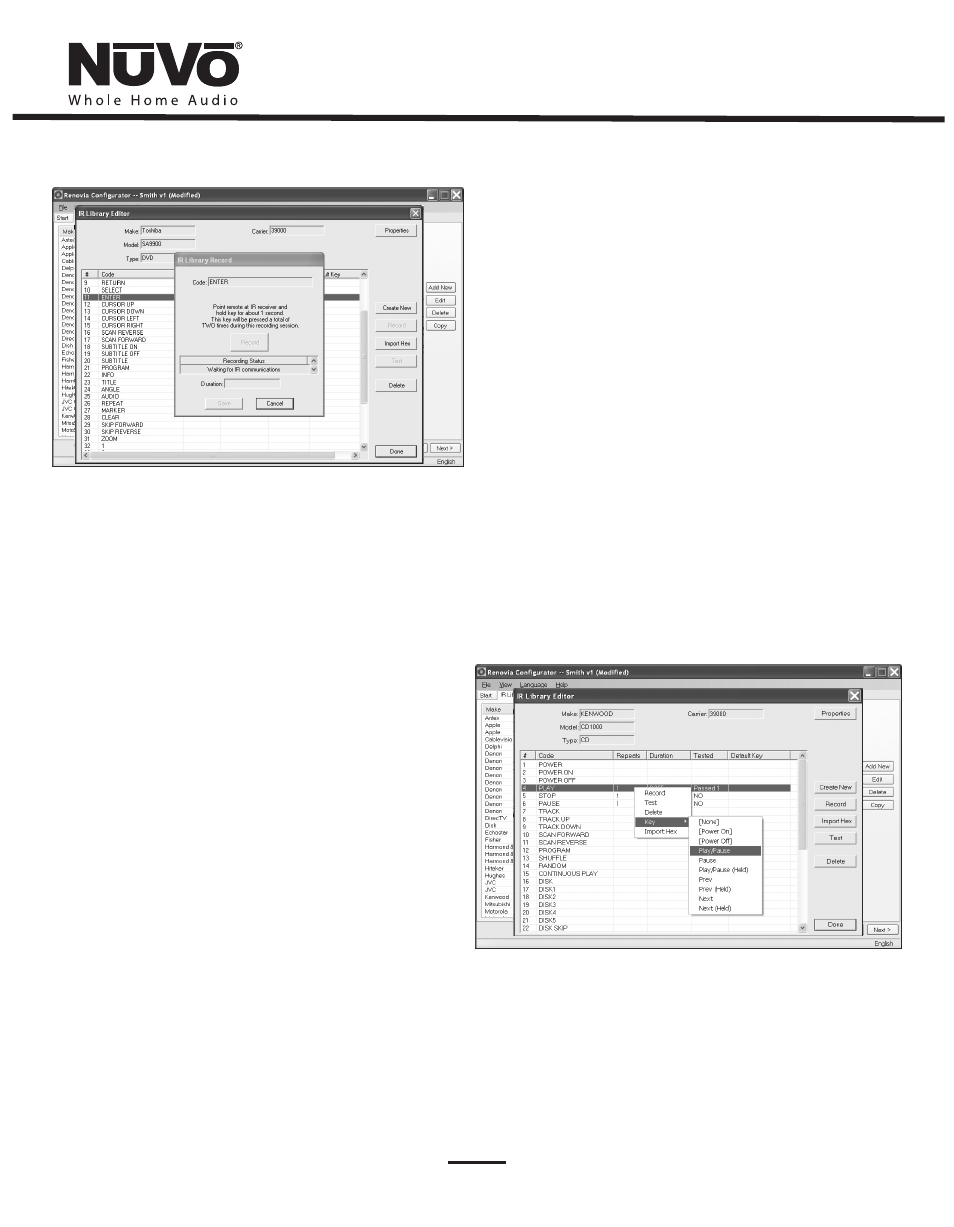
Fig. 28
When the remote code is entered, the IR Library Record window will
go from yellow to green and indicate that the capture was
successful, then return to yellow. Repeat this procedure three more
times until the desired code is added to the IR Library Edit window.
You will now see the number of code repeats and the duration of the
code. A normal non-toggling remote will require two button pushes
to successfully record a command, while a toggling remote will
require four button pushes for each command.
To assign default IR functions to the Control Pad buttons, right-click
on each code and select “Keys.” This opens a drop-down menu of the
possible key selections for the Control Pad. Select the appropriate
key for that command and the Configurator will add it to the Default
Key field for that command. The Play/Pause, Prev. and Next
functions have an additional (Held) function. This allows any code to
be added as an additional function assignment that is activated
when the button is held. The Control Pad automatically displays the
function being sent to the source component.
Once this sequence is completed, proceed to the next function
command and repeat the above steps. When you have assigned a
default key for each IR, click “Done” and that component's IR Library
is complete.
You can also assign discrete Power On and Off commands. The
Renovia System will initiate the On command when a zone is turned
on and the Off command when the zone All Off function (holding
the Power button for three seconds) is performed from any of the
Control Pads.
If there is an error in recording the code, the display in the Record
window will indicate that there was a communication error. If this
occurs, click on the Record button and reenter the code.
6.2.5 IR Library Default Key Assignment (as shown in Fig. 29)
Once the desired codes are added, assign them to the appropriate
key on the Control Pad. Note that by design, the Control Pad has only
3 IR programmable function keys and Power On/Power Off. Access to
multiple preset choices will be covered later in the Macros section
(see Section
6.4, Macros).
Fig. 29