Step 1: basic recorder connections, Connecting the audio cables – Philips DVDR7310H User Manual
Page 18
English
18
Step 1: Basic Recorder Connections
(continued)
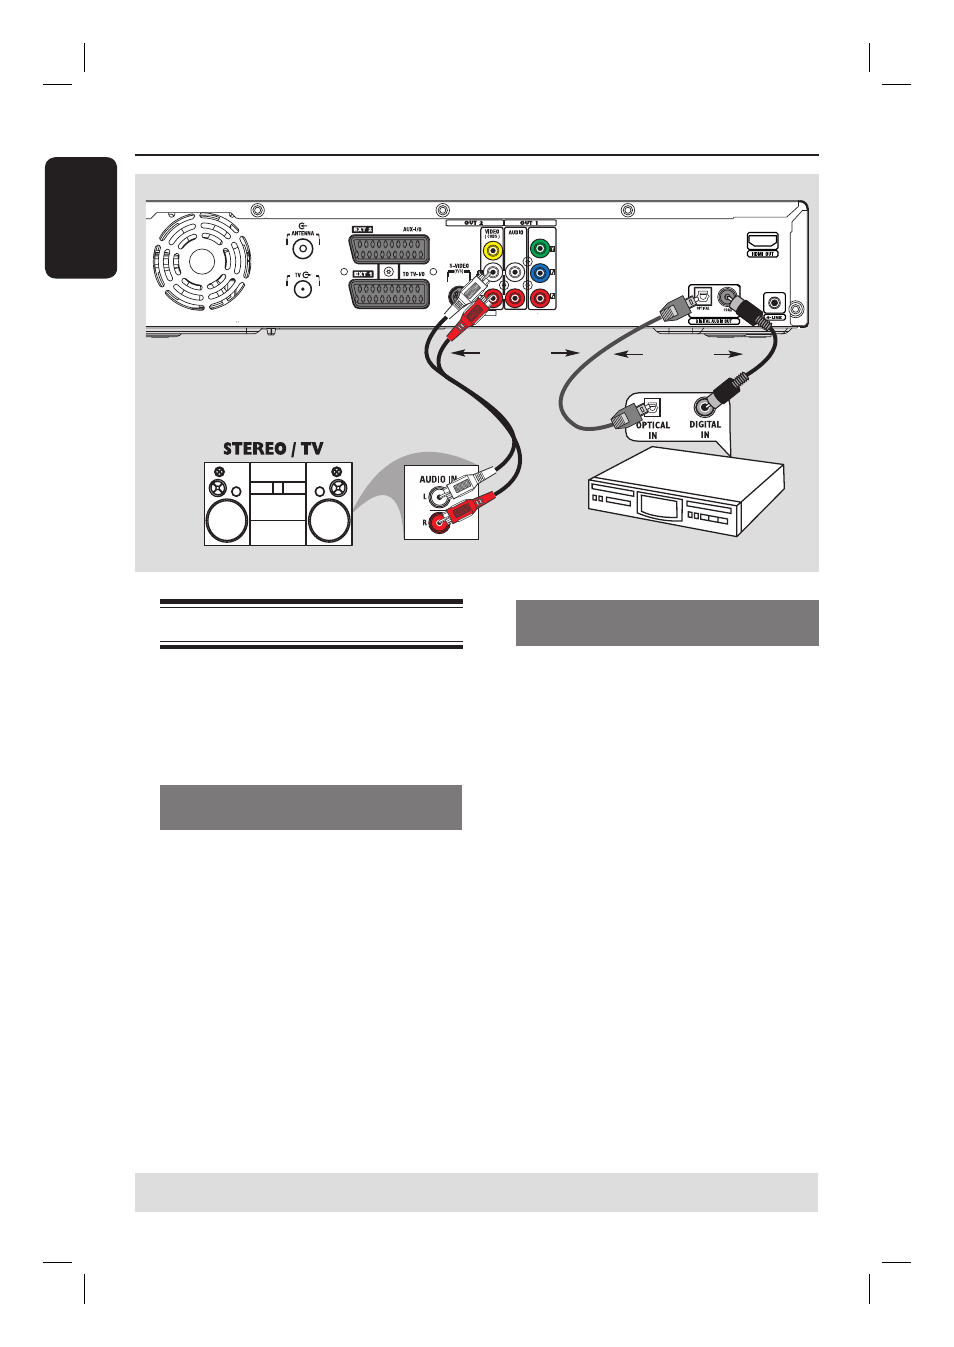
AV amplifi er/receiver
TIPS: For option 2 connection, you have to set the appropriate Digital Audio Output setting, see
page 80. Otherwise, no sound or interference may occur.
OR
OR
Connecting the audio cables
This connection enables you to listen to
the playback from this recorder.
However, this connection is not required
if this recorder is connected to the TV
using the Scart or HDMI connectors.
Option 1: Using the analogue audio
sockets
You can connect the recorder to a two
channel stereo system (mini system, TV)
or receiver in order to enjoy the stereo
sound system.
Use an audio cable (red/white - not
supplied) to connect the OUT2-
AUDIO L/R sockets to the audio input
sockets of the connected device.
Helpful Hint:
– If you have connected this recorder to your
TV using the OUT1-Y P
R
P
B
sockets, then
connect the audio cables to the OUT1-
AUDIO L/R sockets as described in page 17.
Option 2: Using the digital audio
socket (Optical or Coaxial)
You can connect the recorder to an AV
amplifi er/receiver in order to enjoy
multichannel surround sound.
Use a coaxial cable (not supplied) to
connect the COAX OUT socket to the
digital coaxial input socket (or labelled as
COAXIAL IN or DIGITAL IN) of the
connected device.
– an A/V receiver or amplifi er with a
digital multi-channel sound decoder.
– a receiver with two-channel digital
stereo (PCM).
OR
Use an optical fi bre-optic cable (not
supplied) to connect the OPTICAL
OUT socket to the optical input socket
of the connected device.
Make sure that both plugs are fully
inserted (until a click is heard).