Step 1: basic recorder connections – Philips DVDR7310H User Manual
Page 17
English
17
TIPS: Before making or changing any connections, make sure that all the devices are disconnected
from the power outlet.
Step 1: Basic Recorder Connections
(continued)
A
B
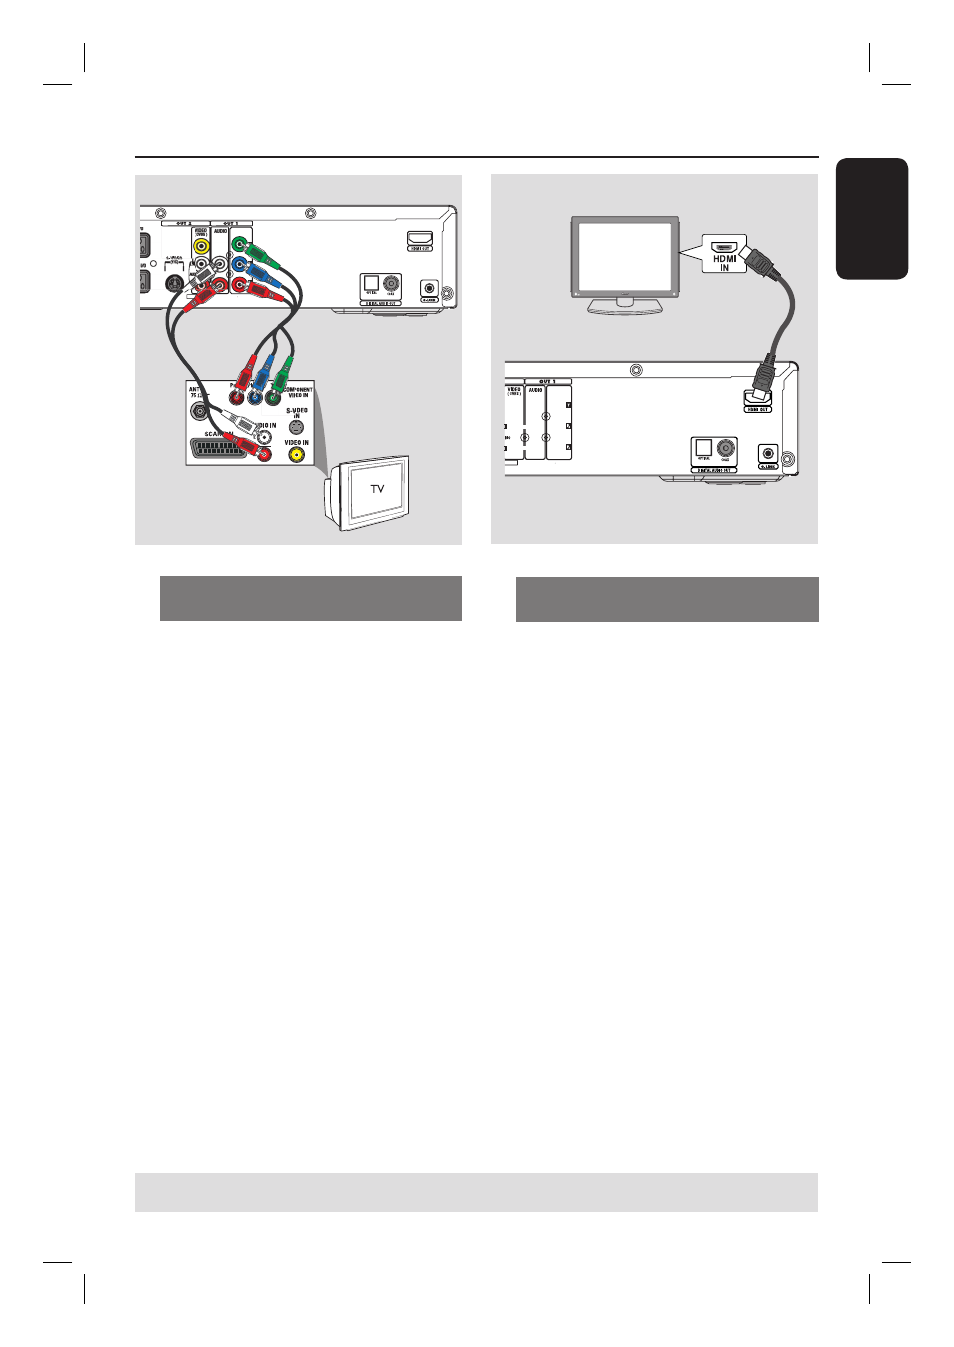
Option 4: Connecting to a
Progressive Scan TV
The progressive scan video quality is only
available when using Y Pb Pr connection
and a progressive scan TV is required. It
provides superior picture quality when
watching DVD movies.
A
Use the component video cables (red/
blue/green - not supplied) to connect the
OUT1- Y P
B
P
R
sockets on the
recorder to the corresponding
component video input sockets (or
labelled as Y Pb/Cb Pr/Cr or YUV) on
the TV.
B
Use an audio cable (red/white - not
supplied) to connect the OUT1-
AUDIO L/R sockets on the recorder to
the audio input socket (or labelled as
AV IN or AUDIO IN) on the TV.
C
Once you have completed the necessary
connections and the recorder basic
installation/set-up, turn on the
progressive scan feature, see page 83.
Option 5: Connecting to a HDMI-
compatible TV
HDMI (High Defi nition Multimedia
Interface) is a digital interface that allows
pure digital video transmission without
the loss of image quality.
A
Use an HDMI cable (not supplied) to
connect the HDMI OUT on this
recorder to the HDMI IN on a HDMI-
compatible device (e.g. HDMI TV, HDCP
compliant DVI TV).
B
Once you have completed the necessary
connections, installation and set-up, see
pages 80~81 for optimum HDMI setting.
Helpful Hints:
– Digital devices from different
manufacturers may have different output
standards which may result in unreliable
signal transfers.
– The HDMI connector is only compatible
with HDMI compliant devices and DVI-TV.
Option 4
Option 5