Using the control panel buttons and menus – Lexmark 4800 User Manual
Page 78
Using the control panel buttons and menus
Using the control panel
The display shows:
•
Mode indicators
•
Main menu art messages
•
Icons
•
Ink cartridge levels
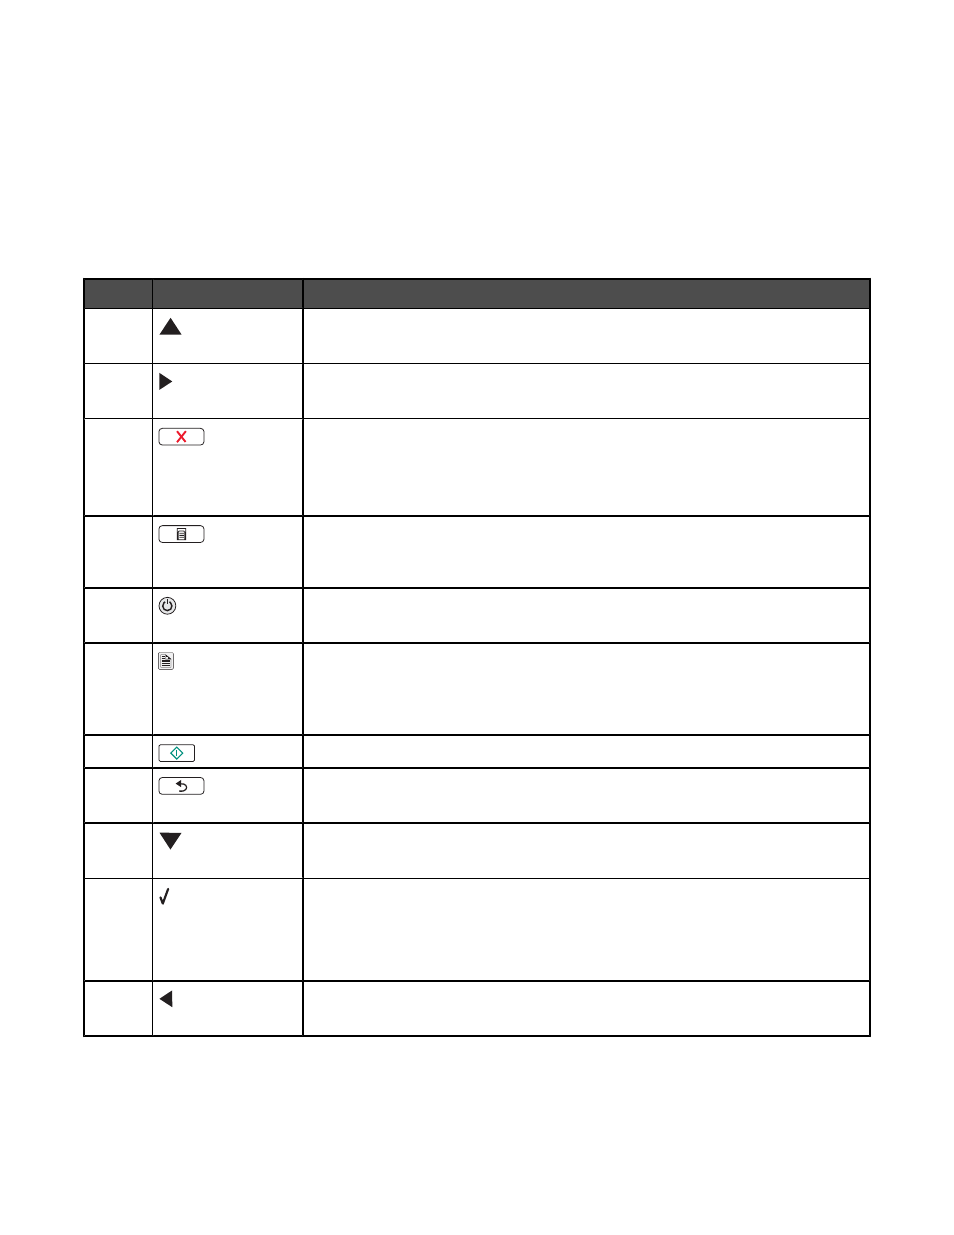
Mode
Main Menu Area Message
1
•
Scroll through submenus.
•
Increase the numbers of copies to be printed.
2
•
Scroll through menus, submenus, or settings on the display.
•
Increase a number.
3
•
Cancel a print, copy, or scan job in progress.
•
Exit a menu or submenu, and return to the default copy, scan, or photo card
screen.
•
Clear current settings or error messages, and return to default settings.
4
Display the Copy, Photo, Print files, Scan, Setup, and Maintenance menu,
depending on which mode is selected.
Selects submenus (such as the Photo Menu when viewing photos).
5
•
Turn the printer on and off.
•
Stop the print, copy, or scan process.
6
A
Select for duplex (two-sided) printing.
Note: This button is not functional with a Macintosh operating system. You can
print two-sided documents with a Macintosh operating system by using the settings
in the Two-Sided menu of the Print dialog.
7
Start a copy, scan, or photo print job, depending on which mode is selected.
8
•
Save temporary settings.
•
Return to the previous screen.
9
•
Scroll through submenus.
•
Decrease the number of copies to be printed.
10
•
Choose a menu or submenu item that appears on the display.
•
Save settings.
•
Feed or eject paper.
•
In Photo mode, select or deselect a photo.
11
•
Scroll through menus, submenus, or settings on the display.
•
Decrease a number.
Understanding the printer
78