Applications and gaming > single port forwarding, Single port forwarding – Linksys E2100L User Manual
Page 35
32
Advanced Wireless-N Router
Linksys E2100L
Chapter 3: Advanced Configuration
6 . Decide which days and what times you want this
policy to be enforced . Select the individual days during
which the policy will be in effect, or select Everyday .
Then enter a range of hours and minutes during which
the policy will be in effect, or select 24 Hours .
7 . You can block websites with specific URL addresses .
Enter each URL in a separate Website Blocking by URL
Address field .
8 . You can also block websites using specific keywords .
Enter each keyword in a separate Website Blocking by
Keyword field .
9 . You can filter access to various services accessed
over the Internet, such as FTP or telnet . (You
can block up to three applications per policy .)
From the Applications list, select the application you
want to block . Then click the >> button to move it to
the Blocked List . To remove an application from the
Blocked List, select it and click the << button .
10 . If the application you want to block is not listed or you
want to edit a service’s settings, enter the application’s
name in the Application Name field . Enter its range
in the Port Range fields . Select its protocol from the
Protocol drop-down menu . Then click Add .
To modify a service, select it from the Applications
list . Change its Application Name, Port Range, and/or
Protocol setting . Then click Modify .
To delete a service, select it from the Applications list .
Then click Delete .
11 . Click Save Settings to save the policy’s settings, or
click Cancel Changes to clear the changes .
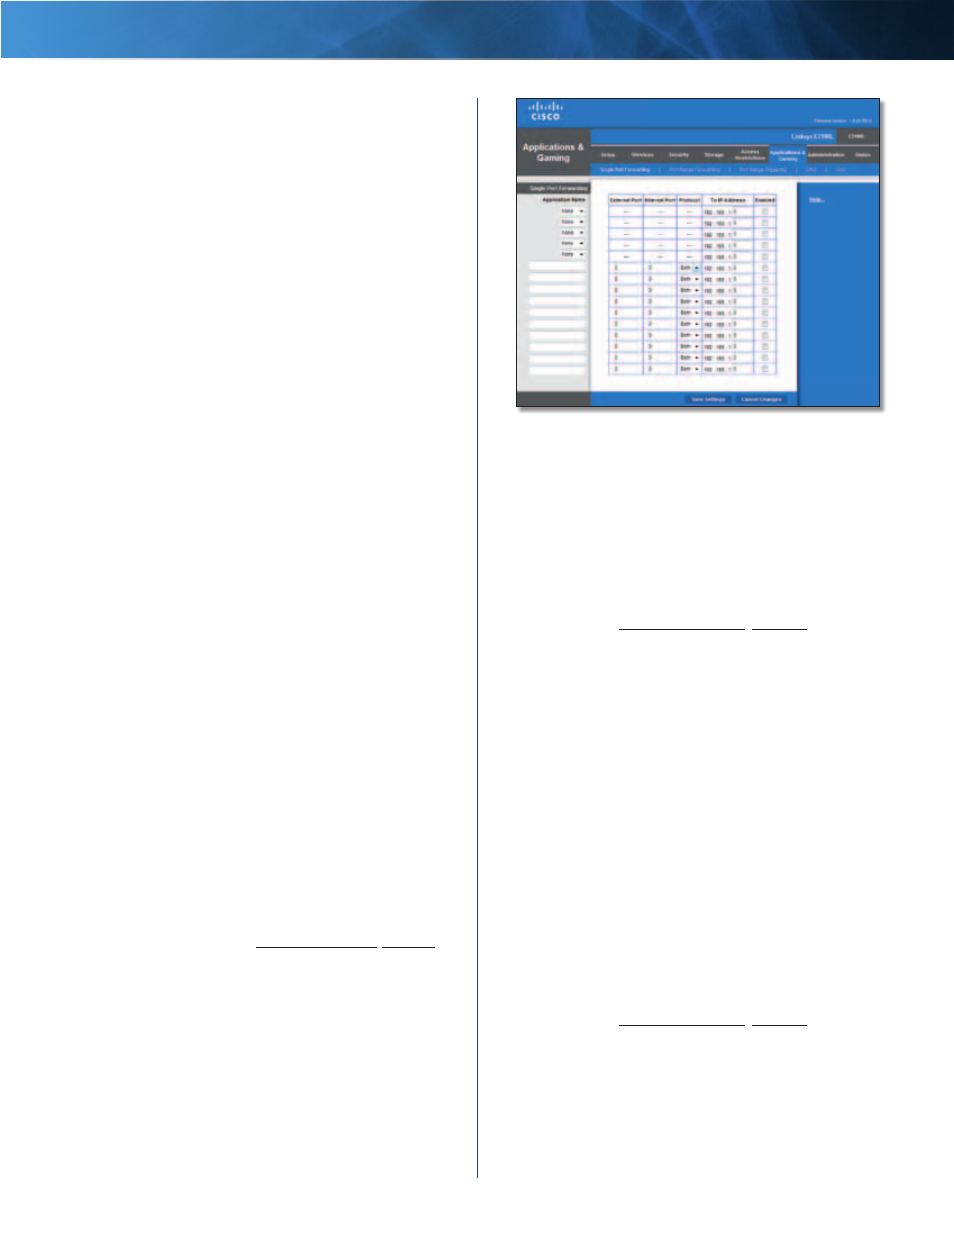
Applications and Gaming > Single Port
Forwarding
The Single Port Forwarding screen allows you to customize
port services for various applications .
When users send these types of requests to your network
via the Internet, the Router will forward those requests to
the appropriate computers (also called servers) . Before using
forwarding, you should assign static IP addresses to the
designated computers (use the DHCP Reservation option on
the Basic Setup screen; refer to DHCP Reservation, page 14) .
Applications and Gaming > Single Port Forwarding
Single Port Forwarding
Preset applications are available for the first five entries .
For each entry, complete the following:
Application Name
Select the appropriate application .
To IP Address
Enter the IP address of the computer that
should receive the requests . If you assigned a static IP
address to the computer, then you can look up its static IP
address; refer to DHCP Reservation, page 14 .
Enabled
Select Enabled to enable port forwarding .
You can customize entries for additional applications . For
each entry, complete the following:
Application Name
Enter the name you wish to give the
application . Each name can be up to 12 characters .
External Port
Enter the external port number used by
the computer or Internet application . Check with the
Internet application documentation for more information .
Internal Port
Enter the internal port number used by the
computer or Internet application . Check with the Internet
application documentation for more information .
Protocol
Select the protocol(s) used for this application,
TCP (Transmission Control Protocol), UDP (User Datagram
Protocol),or Both .
To IP Address
Enter the IP address of the computer that
should receive the requests . If you assigned a static IP
address to the computer, then you can look up its static IP
address; refer to DHCP Reservation, page 14 .
Enabled
Select Enabled to enable port forwarding .
Click Save Settings to apply your changes, or click Cancel
Changes to clear your changes .