Storage > disk, Disk management – Linksys E2100L User Manual
Page 27
24
Advanced Wireless-N Router
Linksys E2100L
Chapter 3: Advanced Configuration
Storage > Disk
The storage options are available when a USB storage
device is connected to the USB port of the Router . If the
storage device does not fit (for example, it may block
port 1), then use the included USB extension cable .
The Disk screen describes the disk currently attached to
the Router . Use this screen to create shared folders, safely
remove a disk, or format a disk (any data on the disk will
be deleted during formatting) .
Each shared folder created on the Disk screen has a unique
name (Display Name), is mapped to a folder on the disk,
and specifies access rights to that folder .
Access rights are managed by group and user accounts
that you create on the Storage > Administration screen
(refer to Storage > Administration, page 29) . Each user
has his or her own login and belongs to a group . Each
group has either read-and-write or read-only access rights .
By default the Router creates two user groups, admin
(read-and-write access) and guest (read-only access) .
By default the Router creates a shared folder called Public,
which can be accessed by the admin and guest groups .
Any sub-folders you create in the Public folder will have
the same access rights .
The Router does not automatically share any pre-existing
folders on the USB storage device, so you will have to
create shared folders if you want network access to these
pre-existing folders . You have two choices:
•
Create a shared folder that shares the entire partition
•
Create multiple shared folders, which share specific
folders with specific user groups
Proceed to Create a Shared Folder, page 25 .
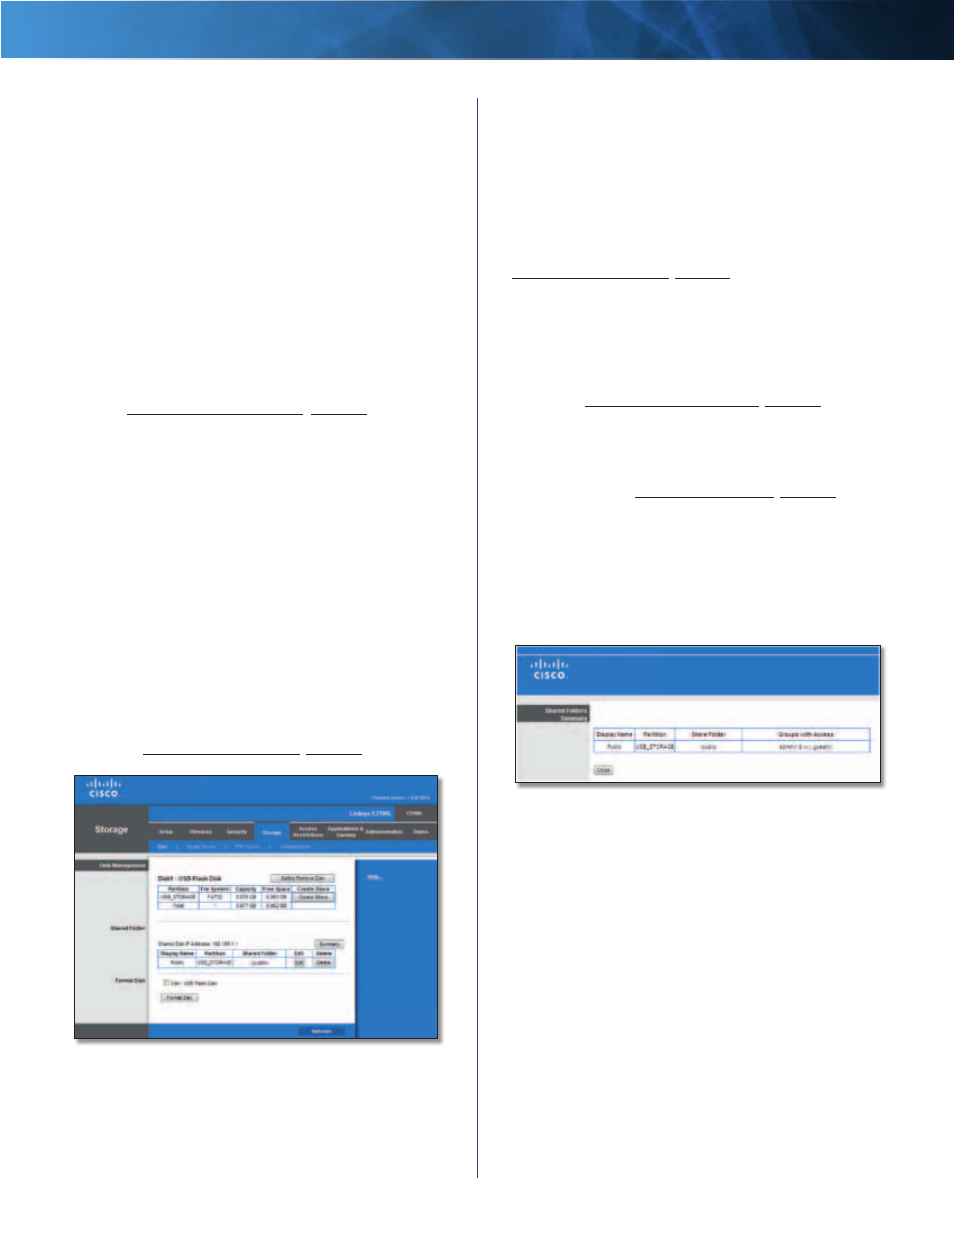
Storage > Disk
Disk Management
If a formatted disk is connected to the Router, then its name
is displayed . For each partition of the disk, the Partition,
File System, Capacity, and Free Space information are
displayed .
Safely Remove Disk
Before physically disconnecting a
disk from the Router, click Safely Remove Disk first . This
prevents the possible loss of data, which may occur if you
remove the disk while it is transferring data .
Create Share
To create a shared folder, click this
option for the appropriate partition . Proceed to
Create a Shared Folder, page 25 .
Shared Folder
Shared Disk IP Address
The IP address of the disk is
displayed .
Summary
To view a list of shared folders, click this option .
Proceed to Shared Folders Summary, page 24 .
For each shared folder, the Display Name, Partition, and
Shared Folder location are displayed .
Edit
To change the settings of a shared folder, click this
option . Proceed to Edit a Shared Folder, page 26 .
Delete
To delete a shared folder, click this option .
Shared Folders Summary
The Shared Folders Summary screen displays the following
information: Display Name, Partition, Shared Folder, and
Groups with Access .
Shared Folders Summary
To exit the Shared Folders Summary screen and return to
the Disk screen, click Close .
Format Disk
Disk
To format a disk and create a new partition, select
the disk you want to format, and then click Format Disk . (If
your disk was formatted with multiple partitions, then the
formatting will delete them and create a single partition .)
The Claim Disk screen appears .