Prepare boiler – Lochinvar Kight XL 400-801 User Manual
Page 10
10
2
Prepare boiler
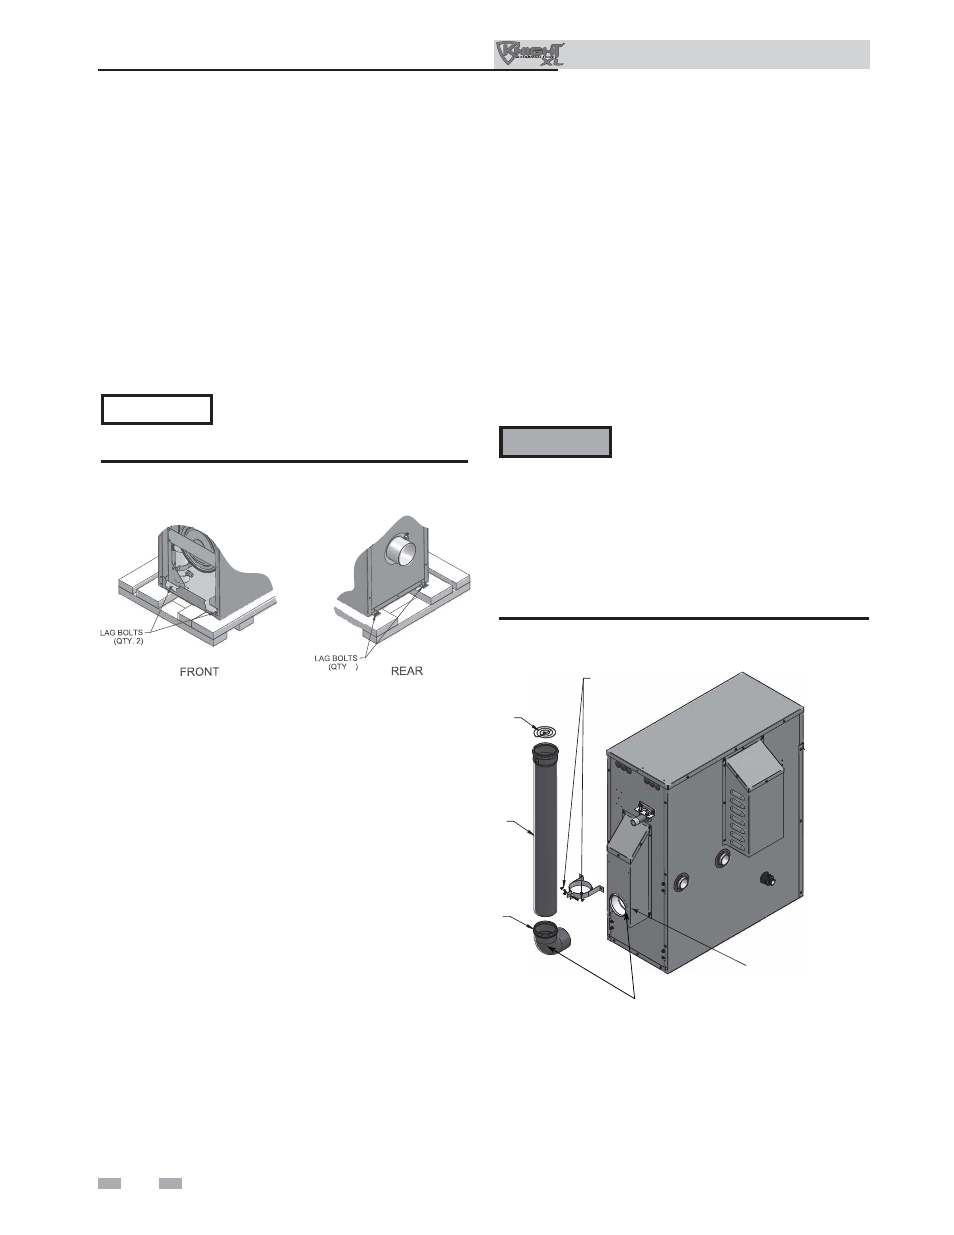
Install fl ue pipe assembly
This unit is provided with all of the necessary venting
components. All components must be installed prior to
operation.
1. Locate all venting components from the installation kit
and carton.
2. Before connecting the vent pipe sections or components,
verify that the gasket is seated evenly inside the groove in
the female end of the elbow and fl ue adaptor (FIG. 2-2).
3. Remove the provided screws from the vent cover and use
them to install the vent strap (FIG. 2-2).
4. Insert the elbow into fl ue adaptor (FIG. 2-2).
Outdoor Knight XL Installation & Operation
Manual
Do NOT use grease or other lubricant
on the vent seals. Only water may be
used for this purpose. Grease or other
lubricant can make the seal brittle or
cause tearing of the seal surface which
can result in fl ue gas leakage.
ƽ CAUTION
5. Slide the vent pipe through the wall strap and insert it
into the elbow (FIG. 2-2).
6. Install the bird screen into the top of the vent.
Figure 2-2 Install fl ue pipe assembly - Models 400 -
601
FLUE
ADAPTER
ELBOW
VENT PIPE
BIRD SCREEN
WALL STRAP
AND SCREWS
IMG00444
NOTE: VERIFY THAT GASKET IS SEATED EVENLY
INSIDE THE GROOVE IN ELBOW AND ADAPTER
Models 400 - 601
Remove boiler from wood pallet
1. After removing the outer shipping carton from the
boiler, remove the parts box.
2. Remove the front door to access the lag bolts in front
of the unit (FIG. 2-1).
3. To remove the boiler from the pallet (after removing
the front door):
a. Remove the two lag bolts from the wood pallet
inside the boiler (FIG. 2-1).
b. Detach the boiler from the lag bolts in the rear of the
unit, see FIG. 2-1.
Do not drop the boiler or bump the
jacket on the fl oor or pallet. Damage to
the boiler can result.
. 2
Figure 2-1 Boiler Mounted on Shipping Pallet
NOTICE