Connecting rod removal, Connecting rod installation – Kawasaki STX-15F User Manual
Page 239
ENGINE BOTTOM END 8-19
Crankshaft and Connecting Rods
•
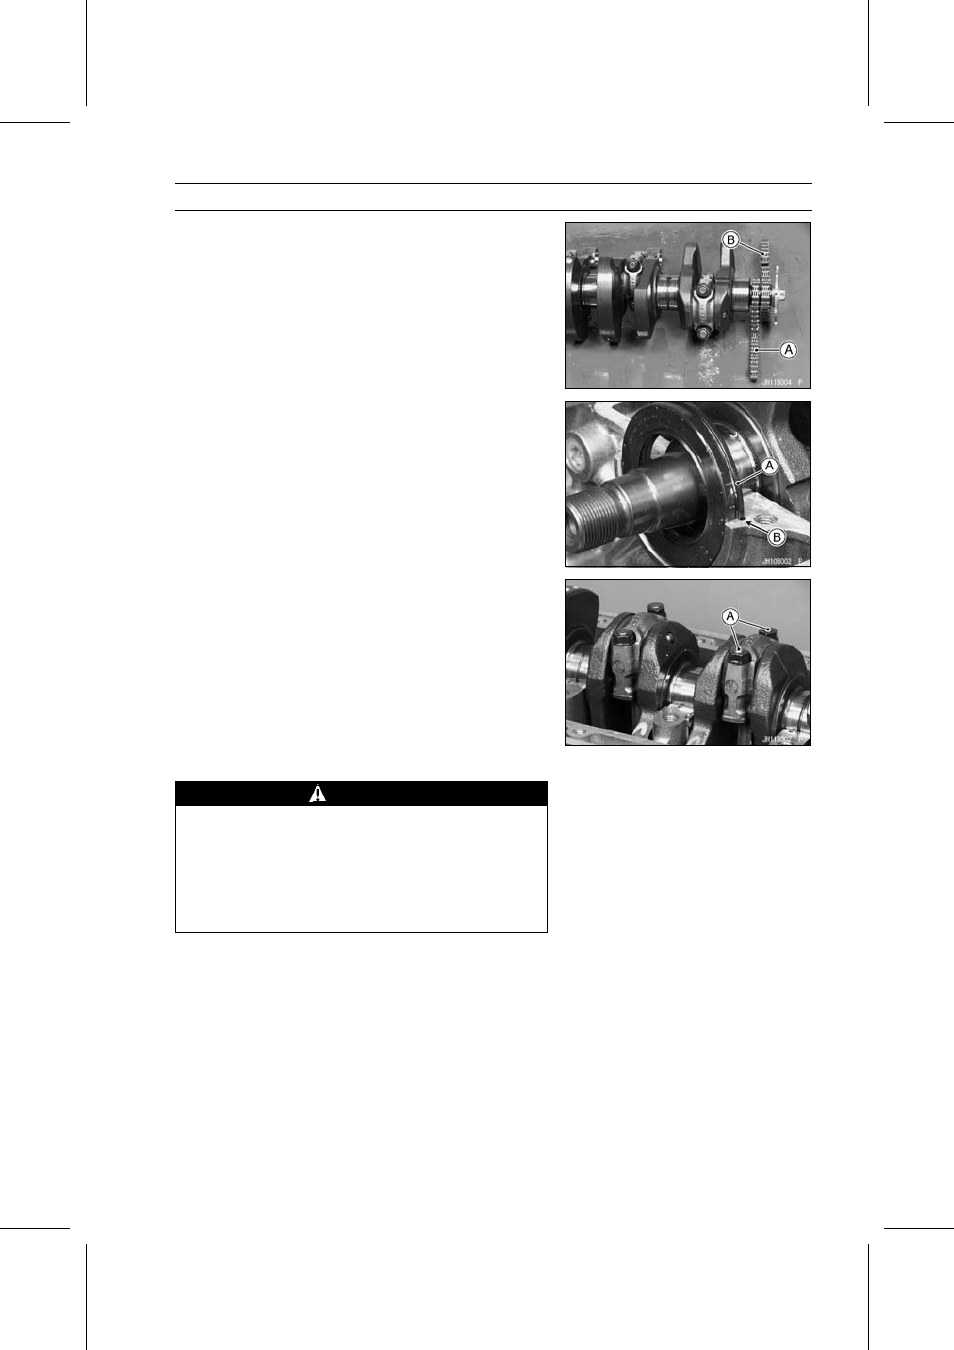
Install the crankshaft with the oil pump sprocket chain [A]
and camshaft chain [B] hanging on them.
•
Fit the oil seal [A] into the groove [B] of the crankcase.
•
Assemble the crankcase (see Crankcase Assembly).
Connecting Rod Removal
•
Split the crankcase (see Crankcase Splitting).
•
Remove the connecting rod nuts [A].
•
Remove the crankshaft.
NOTE
○
Mark and record the locations of the connecting rods
and their big end caps so that they can be reassembled
in their original positions.
•
Remove the connecting rods from the crankshaft.
Connecting Rod Installation
WARNING
Clean the crankshaft, bolts, nuts, and connecting
rods in a well-ventilated area, and take care that
there is no spark or flame anywhere near the work-
ing area. This includes any appliance with a pilot
light. Because of the danger of highly flammable
liquids, do not use gasoline or low-flash point sol-
vents to clean them.
•
After removing the connecting rods from the crankshaft,
clean them with high-flash point solvent.
•
Blow the crankshaft oil passages with compressed air to
remove any foreign particles or residue that may have
accumulated in the passages.