User’s guide – Silex technology SX-200 User Manual
Page 14
User’s Guide
Document #40181-420 Rev. A
14
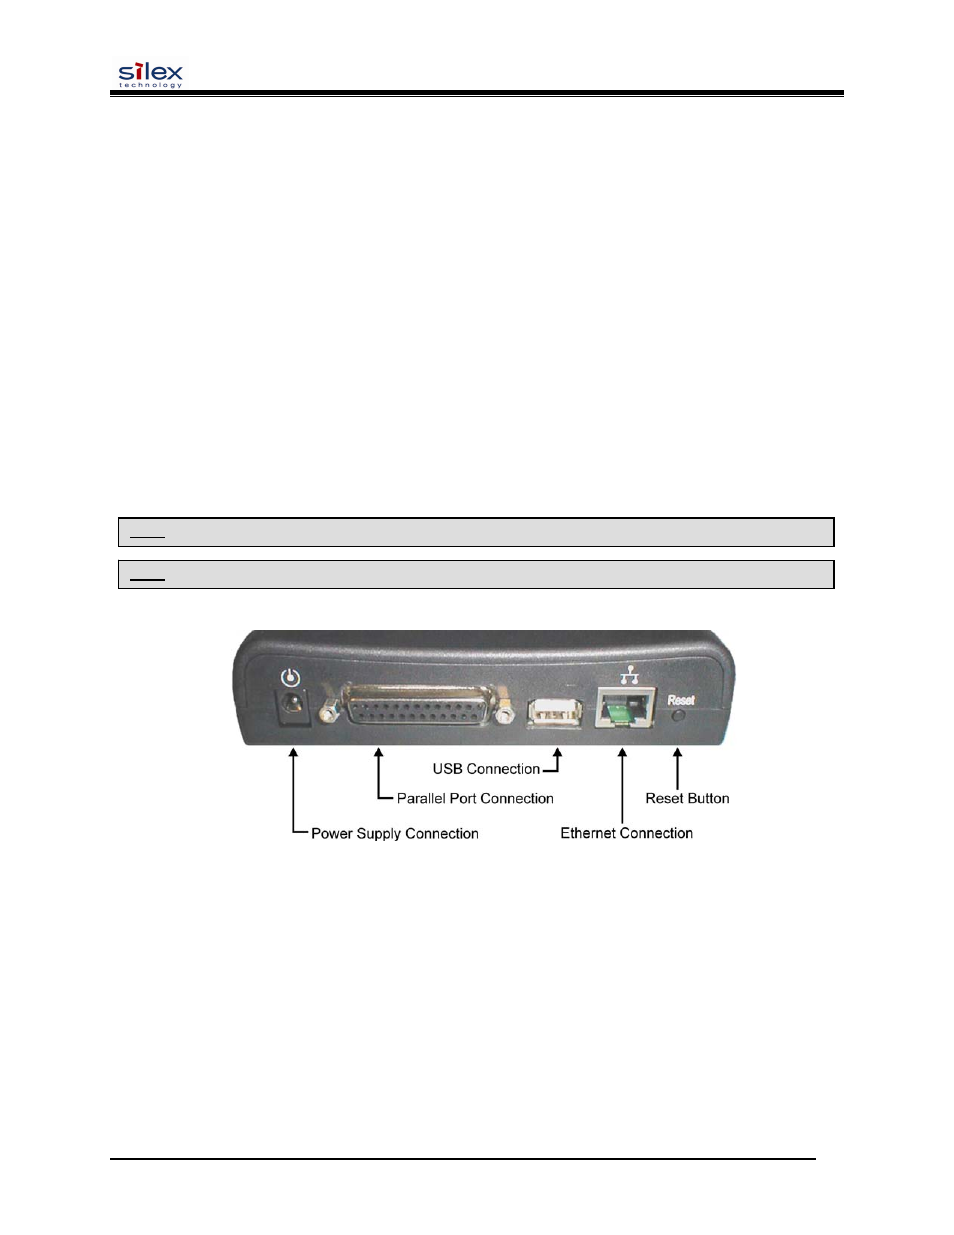
3. Connect the print server to your printer(s) using the USB and/or parallel port of your printer. For a
USB connection, use a standard USB A (print server side) to B (printer side) cable. For a parallel
connection, use an IEEE 1284-compliant parallel printer cable.
4. Plug the print server power supply adapter into a suitable AC receptacle, and then plug the power
supply cable into the print server. The print server will run through a sequence of power-up
diagnostics for a few seconds.
If the print server is operating properly, the power LED will illuminate continuously (refer to
page 1-5 for detailed LED status descriptions).
If the power LED blinks continuously in a regular pattern, a problem exists. If this is the case, try
powering the print server OFF and then ON again.
If the problem persists, refer to the Troubleshooting section in this User’s Guide.
5. Connect the print server to your network through a switch or hub using a category 5 (CAT5) Ethernet
cable. The print server’s IP address must be configured before a network connection is available. If
your network offers DHCP (Dynamic Host Configuration Protocol), the print server will
automatically search for a DCHP server upon power up and obtain an IP address. If your network
does not offer DHCP, a static (fixed) IP address must be assigned (see your system administrator for
assistance). In most cases, a fixed IP address is preferred because a DHCP server may not always
assign the same IP address to the print server when the print server is powered ON.
NOTE: The IP address must be within a valid range, unique to your network, and in the same subnet as your PC.
NOTE: For wireless print servers, if a wired connection is established to the unit, the wireless link will be disabled.