Power, Charging the battery pack 1, Using the battery pack 1 – JVC GR-PD1 User Manual
Page 10
Master Page: Left-start
10
EN
GETTING ST
AR
T
E
D
This camcorder’s 2-way power supply system lets
you choose the most appropriate source of power.
Do not use provided power supply units with other
equipment.
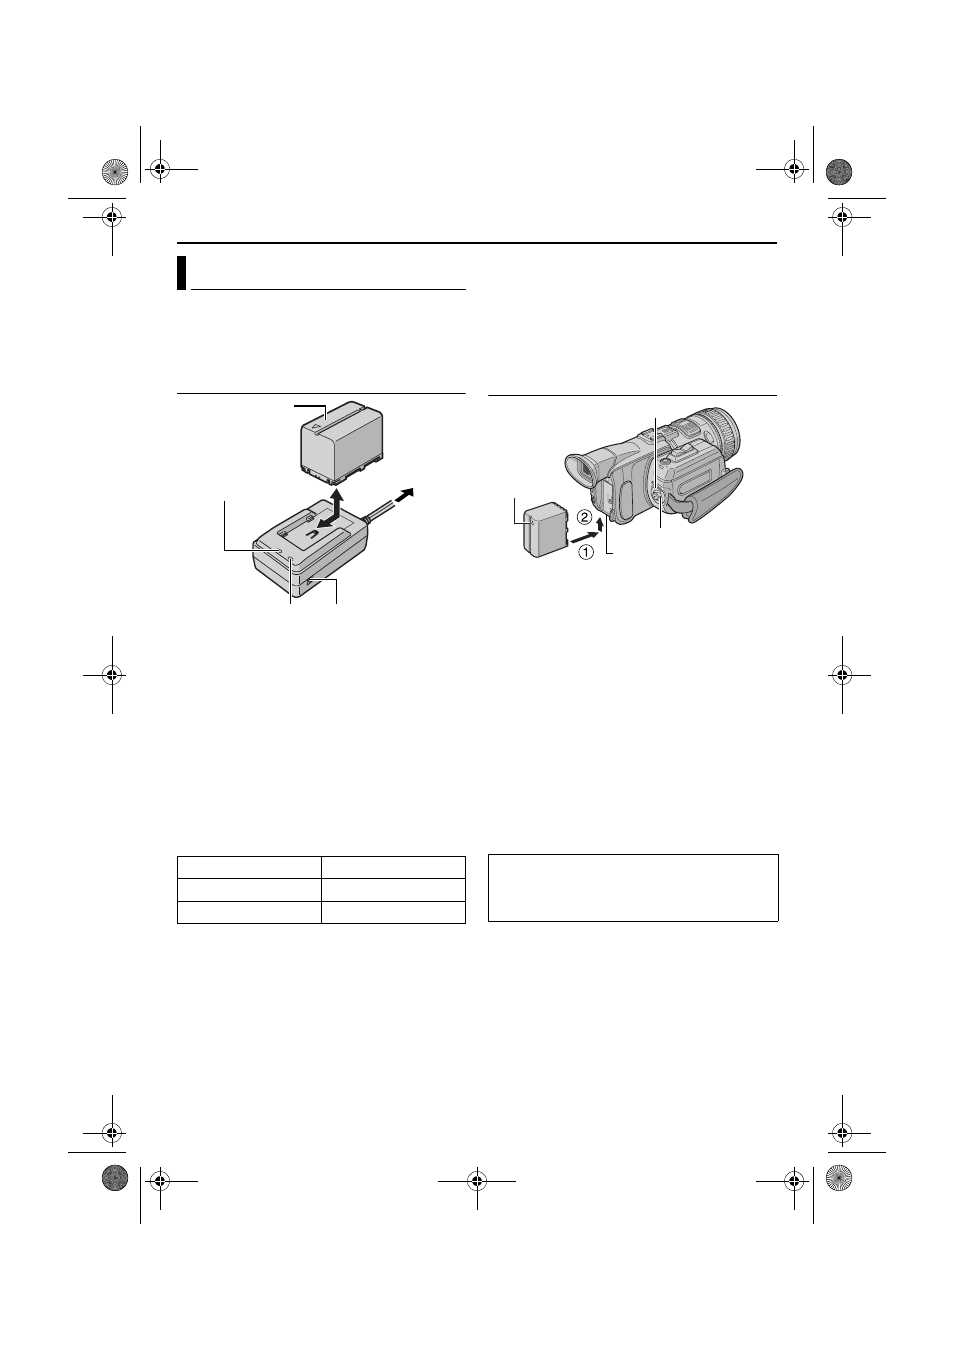
Charging The Battery Pack
1
Make sure you unplug the camcorder’s DC cord
from the AC Power Adapter/Charger.
2
Plug the AC Power Adapter/Charger’s power cord
into an AC outlet. The POWER indicator lights.
3
Attach the battery pack with the YZ mark
aligned with the corresponding marks on the AC
Power Adapter/Charger. The CHARGE indicator
begins blinking to indicate charging has started.
4
When the CHARGE indicator stops blinking but
stays lit, charging is finished. Remove the battery
pack.
5
Unplug the AC Power Adapter/Charger’s power
cord from the AC outlet.
* Provided
NOTES:
● If the protective cap is attached to the battery
pack, remove it first.
● If you connect the camcorder’s DC cord to the AC
Power Adapter/Charger during battery charging,
power is supplied to the camcorder and charging
stops.
● Charging is not possible if the wrong type of
battery is used.
● When charging the battery pack for the first time
or after a long storage period, the CHARGE
indicator may not light. In this case, remove the
battery pack from the AC Power Adapter/Charger,
then try charging again.
● If the battery operation time remains extremely
short even after having been fully charged, the
battery is worn out and needs to be replaced.
Please purchase a new one.
● For other notes, ੬ pg. 67.
Using The Battery Pack
1
With the arrow on the battery pack pointing
upward, push the battery pack slightly against the
battery pack mount
a.
2
Slide up the battery pack until it locks in place
b.
To detach the battery pack...
Slide the battery pack down slightly while sliding
BATT. RELEASE to detach it.
NOTES:
● Recording time is reduced significantly under the
following conditions:
• Zoom or Record-Standby mode is engaged
repeatedly.
• The LCD monitor is used repeatedly.
• The playback mode is engaged repeatedly.
● Before extended use, it is recommended that you
prepare enough battery packs to cover 3 times the
planned shooting time.
INFORMATION:
The optional extended-use battery pack kit is a set
composed of a battery pack and AC Power Adapter/
Charger:
VU-V840 KIT: BN-V840U battery pack & AA-
V15EG or AA-V15EK AC Power Adapter/Charger
VU-V856 KIT: BN-V856U battery pack & AA-
V80EG or AA-V80EK AC Power Adapter/Charger
Read the kit’s instruction manual before using.
Also, by using the optional JVC VC-VBN856U DC
Cord, it will be possible to connect BN-V840U or
BN-V856U battery packs to the camcorder and
supply power directly to the camcorder.
Power
Battery pack
Charging time
BN-V416U
Approx. 2 hr.
BN-V428U*
Approx. 3 hr. 20 min.
Battery pack
BN-V416U or
BN-V428U
To AC outlet
POWER indicator
CHARGE indicator DC OUT connector
AC Power Adapter/
Charger
ATTENTION:
Before detaching the power source, make sure
that the camcorder’s power is turned off. Failure to
do so can result in a camcorder malfunction.
BATT.RELEASE Switch
Power Switch
Lock Button
Arrow
GR-PD1PAL.book Page 10 Tuesday, June 17, 2003 7:31 PM