Margin adjustment – Savin 4027 User Manual
Page 67
Copier Functions
57
2
Center/border erase
AAAA
Press [Edit/Stamp].
BBBB
Press [Erase].
CCCC
Press [Center/Border].
DDDD
Set the center and border to be
erased.
Selecting [Same Width]
A Press [Same Width].
B Press [Center], and then set the
erase center width using [
n
n
n
n]
and [
o
o
o
o].
C Press [Border], and then set the
erase border width using [
n
n
n
n]
and [
o
o
o
o].
D Press [OK].
Selecting [Diff. Width]
A Press [Diff. Width].
B Press the key for the part you
want to change, and then set
the erase margin width using
[
n
n
n
n] and [o
o
o
o].
C Press [OK].
EEEE
Press [OK].
FFFF
Place originals, and then press the
{{{{Start}}}} key.
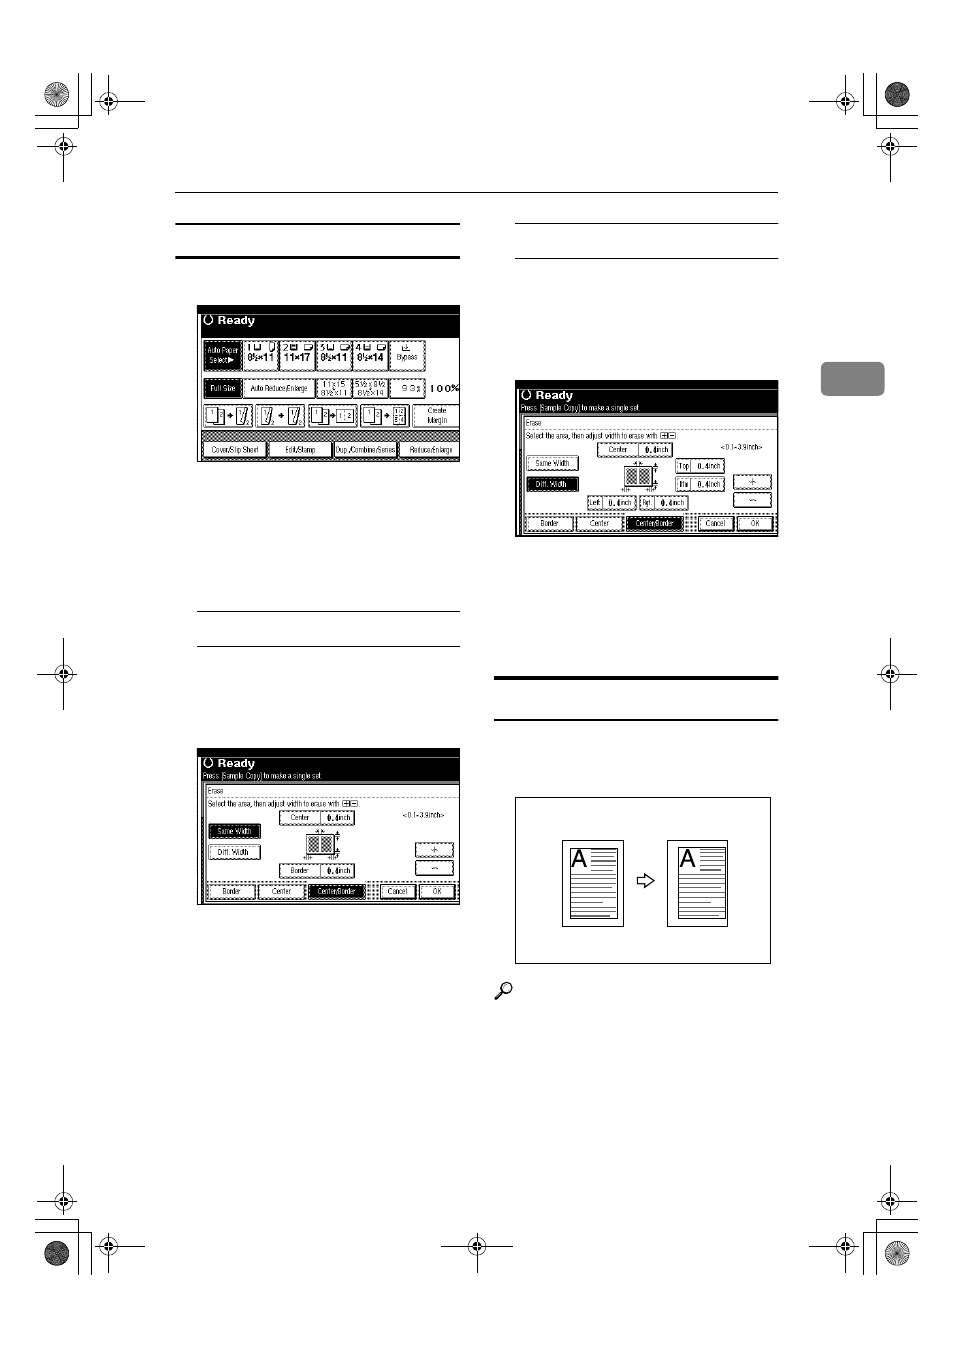
Margin Adjustment
You can shift the image to the left,
right, top, or bottom to make a bind-
ing margin.
Reference
Related default settings:
p.96 “Front Margin: Left/Right”
p.96 “Back Margin: Left/Right”
p.96 “Front Margin: Top/Bottom”
p.96 “Back Margin: Top/Bottom”
p.97 “1 Sided
→2 Sided Auto Mar-
gin: TtoT”
RuC3_ENcopy-F_FM.book Page 57 Monday, June 16, 2003 4:57 PM