Mo vie c lip, Selecting pla y bac k mode of mo vie c lip – JVC SA-DV6000 User Manual
Page 27
3838
Mo
vie c
lip
Selecting pla
y bac
k mode of mo
vie c
lip
The repeat play selection determines how the movie clip files are played, either indi-
vidually or in sequence.
If the repeat play is set to OFF
, playback is performed from the specified clip file to the
latest clip file and pauses at the specified clip file.
If the repeat play is set to REPEA
T1, specified clip file is played back 3 times.
If the repeat playe is set to REPEA
T
, play back is performed 3 times from the specified
clip file to the latest clip file.
1.
Press the MENU button to display the
T
O
P
MENU screen.
2.
Form the NETWORK P
ACK CONFIG menu, select MOVIE CLIP
SET
.
3.
Move the cursor (
t
) to REPEA
T
PLA
Y
and press the SET
button.
4.
Press the DISP (
6
) or BLANK (
7
) button, selecting the desired mode and press
the SET button.
Memo
The MOVIE CLIP screen cannot be accessed during transmission. When entering
the MOVIE CLIP
screen, the transmitted screen may flicker momentarily
.
NE
T
W
O
R
K
OR
TW
E
NK
A
C
K
P
ON
C
IG
F
EN
C
O
D
E
MP
E
G
R
E
C
T
RG
I
MO
V
I
E
C
LI
P
ME
N
U
R
E
S
E
T
C
A
N
C
E
L
PA
GE
B
A
C
K
T
SE
.
.
T
SE
.
.
T.
.
SE
P
U
M
AI
N
(
W
M
Pu
n
d
r
8
)
e
(
C
F
Vi
e
w
r)
e
TC
0
0
:
0
0
:
0
00
.0
DE
L
E
E
TA
L
L
RE
P
E
T
AP
L
A
Y
NC
E
L
CA
NC
E
L
CA
IE
OV
MC
I
P
L
FO
R
M
A
T
CA
P
T
UR
E
..
FIL
E
S
E
ND
PA
G
E
B
A
C
K
S
E
T
T
P
RE
E
A
NETWORK P
ACK CONFIG
menu screen
MOVIE CLIP
SET
menu screen
39
Memo
When a MOVIE CLIP menu item is se-
lected and the SET
button is pressed
●
with no clips recorded on the CF
memory card, “NO CLIP!” will flash for
about 3 seconds.
●
If there is no CF memory card inserted,
“NO CF CARD!” will flash for about 3
seconds.
●
If a still image does not appear even
when selecting the clip to play back,
move the cursor and reselect the clip.
39
IE
OV
MC
I
P
L
mc
0
0
8
.
0a
s
f
W
R/
SE
L
E
C
T
OF
F
FT
P
S
E
N
D
FT
P
S
E
N
D
PA
G
E
B
A
CK
REV
IE
W
DE
LE
T
E
PR
O
T
E
C
T
Mo
vie c
lip
Pla
ying bac
k a CF memor
y car
d
When simultaneously recording the video to a DV cassette and CF memory card, recording event will be registered to the clip lis
t of the
CF memory card each time recording is performed.
The clip list is stored with the recorded event number (clip number) and the d
ate/
time when the recording was started.
All events (clip numbers) can be played back on the MOVIE CLIP
screen.
mc
0
0
5
.
0a
s
f
W
R/
IE
OV
MC
I
P
L
02
03
/0
2
/
09
0
0
:0
0
:
mc
0
0
6
.
0a
s
f
W
R/
02
03
/0
2
/
09
3
0
:2
5
:
mc
0
0
7
.
0a
s
f
W
R/
02
03
/0
2
/
10
1
0
:5
5
:
mc
0
0
8
.
0a
s
f
W
R/
02
03
/0
2
/
11
0
0
:0
0
:
PA
GE
B
A
CK
Clip number
Date/time
Cursor
Latest clip
The clip page in the
MOVIE CLIP
screen dis-
plays 4 lists per page.
MOVIE CLIP
screen
●
MOVIE CLIP
will not appear during card
initialization (flashing
display).
TO
P
MENU screen
Selected clip number
CLIP FUNCTION screen
Still image (starting point)
of the selected clip
→
O
VER
BR-D
V6000
PROFESSIONAL
MENU
RESET
A.DUB
EJECT
COUNTER
AU
D
IO
INPUT SELECT
MONIT
OR
OUTPUT
R
EMO
TE
LOCAL
CTL
L
MIX
R
CH-1/2
MIX
CH-3/4
DV
LINE
Y/C
(CPN)
TC
UB
REW
ST
OP
FF
REC
OPERA
TE
PLA
Y
P
A
USE
DISP
SET
SEARCH+
BLANK
CUE UP
HOLD
PHONES
REC LEVEL
CH-1/3
CH-2/4
MIC
SEARCH–
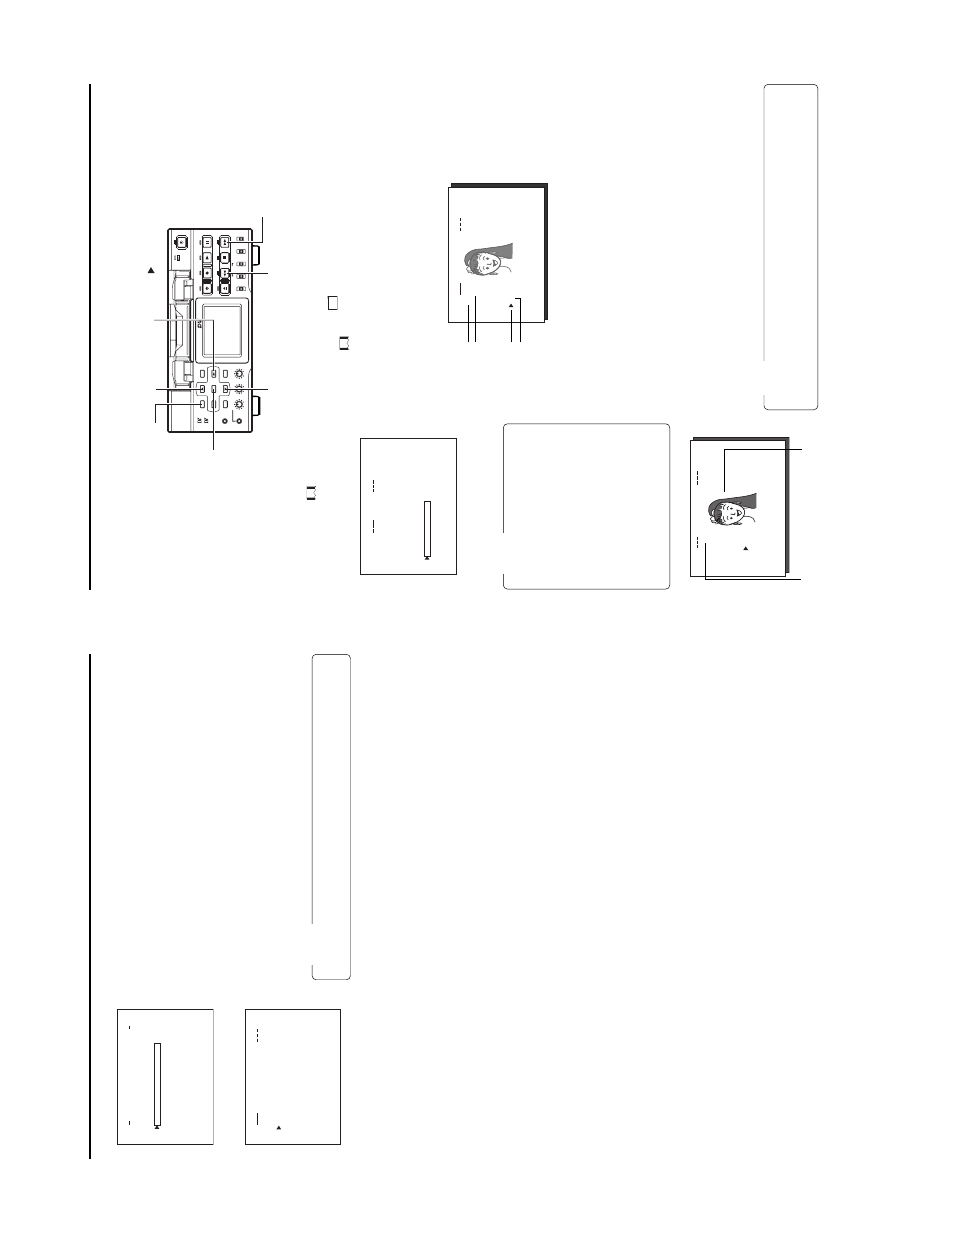
Mini
MENU button
SET
button
REW button
FF button
SEARCH+ (
) button
DISP
(
6
) button
BLANK (
7
) button
SY
S
T
E
M
.
.
ME
N
U
REM
O
T
E
.
.
AU
D
IO
.
.
VI
D
E
O
.
.
TC
/
U
B
/
C
L
O
C
K
.
.
DI
S
P
L
A
Y
S
E
T
.
.
.
.
E
MO
V
I
C
L
I
P
.
.
N
E
TW
O
R
KP
A
C
K
C
O
N
F
IG
E
X
I
T
1.
Insert an already recorded CF memory card.
2.
T
urn on the BR-DV6000 power
.
Check to see that the
C
F
display appears on the LCD screen. (When the power is
turned on,
display will flash during initialization.)
3.
Display the MOVIE CLIP
screen.
q
Press the MENU button to display the
T
O
P
MENU screen.
w
Press the DISP
(6
) or BLANK (
7
) button, move the cursor (
t
) to MOVIE CLIP
and press the SET button or SEARCH+ (
t
) button.
●
The movie clip list of the latest clip page recorded on the CF memory card
and the still image (starting point) of the latest clip number appear by overlap-
ping.
4.
Select the clip to play back.
q
Press the DISP
(6
) or BLANK (
7
) button and move the cursor (
t
) to the clip to
play back.
●
Pressing the DISP
(6
) button up scrolls to the page with smaller (older) clip
numbers.
●
Pressing the BLANK (
7
) button down scrolls to the page with larger (newer)
clip numbers.
●
Press the [FF] button to scroll to the next page. Press the [REW] button to
scroll to the previous page.
●
Press and hold the [FF] button for about 2 seconds to scroll to the page with
the newest clip.
●
Press and hold the [REW] button for about 2 seconds to scroll to the page
with the oldest clip.
w
Press the SET
button.
CLIP
FUNCTION screen of the selected clip appears.
●
Still image (starting point) of the selected clip appears.
Note
●
ASF files recorded using another device may not play back properly on this unit.
●
If recording into the CF card is carried out within 5 seconds, either a file cannot
be made or it becomes dif
ficult to display a thumbnail (a still picture displayed
when CLIP FILE is selected).