Intel SR1450 User Manual
Page 59
Hardware Installations and Upgrades
Intel
®
Server Chassis SR1450 User Guide
59
TP01629
L
K
H
G
G
F
J
I
A
C
B
E
K
D
Q
P
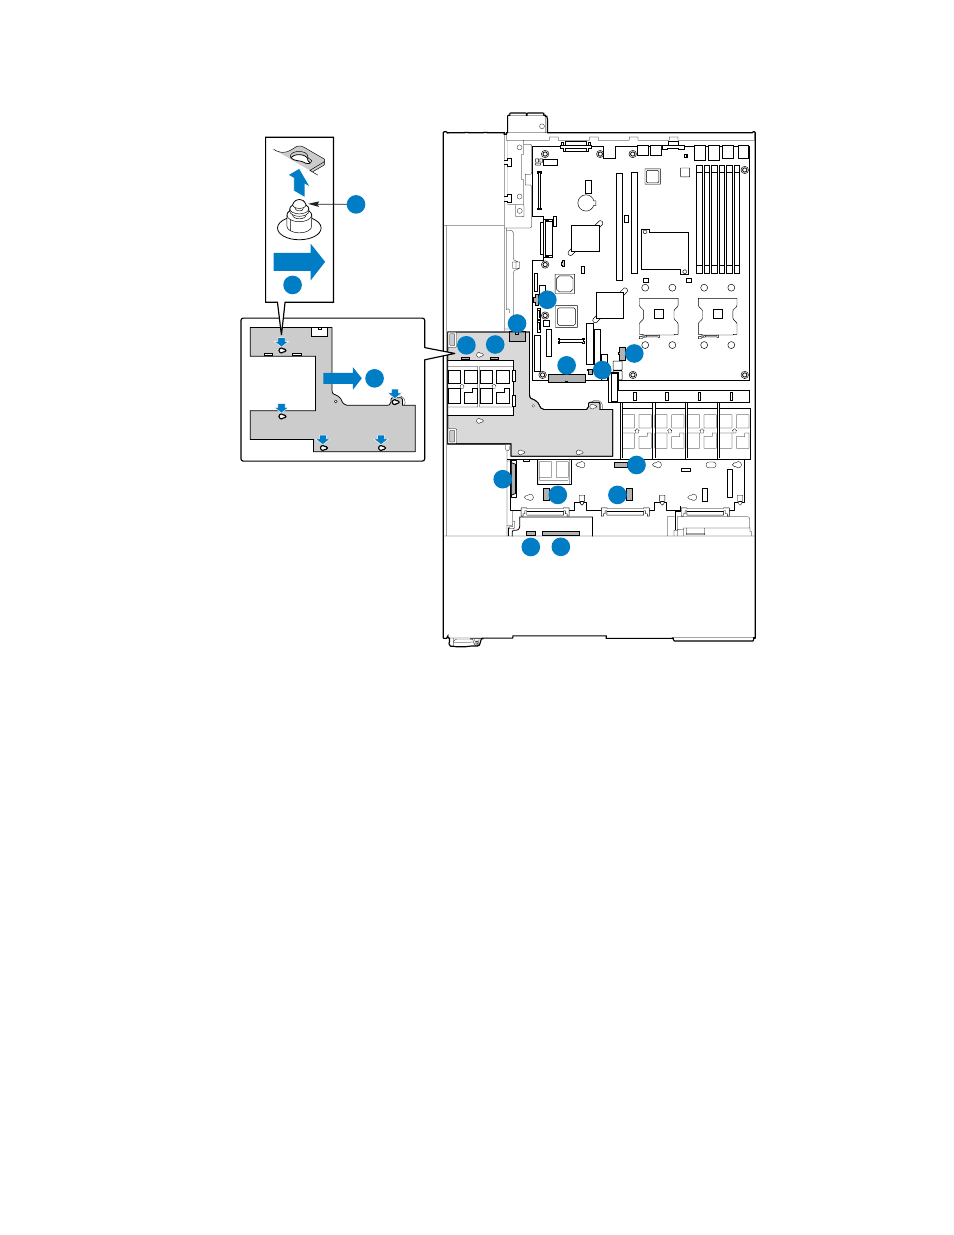
Figure 43. Removing the Power Distribution Board
15. Line up the holes on the replacement power distribution board with the power supply stand-offs
on chassis. See letter “A” in
“Figure 44. Installing the Power Distribution Board”.
Press down
and slide the power distribution board to the left until it sits firmly in place. See letter “B” in
“Figure 44”
.
16. Connect the main power, CPU power, and power signal from the power supply to the server
board. In
“Figure 44”
, letter “C” shows the main power cable, letter “D” shows the CPU power
cable, and letter “E” shows the power signal cable.
17. Connect the power cable to the power distribution board (see letter “F” in
“Figure 44”
) and
connect the power cable to the backplane (see letter “G” in
“Figure 44”
).
18. If a SATA backplane is installed, connect the SATA cables. See letter “H” in
“Figure 44”
.
19. Reconnect the power supply fans.
20. If a SCSI backplane is installed, connect the SCSI cables. See letter “I” in
“Figure 44”
.
21. Install the power supply modules. For instructions see
“Installing a Hot-Swap Power Supply”.
22. Install the power supply air duct. For instructions see
“Installing the Power Supply Air Duct”
.