Removing the power supply air duct, Installing the power supply air duct – Intel SR1450 User Manual
Page 56
Hardware Installations and Upgrades
56
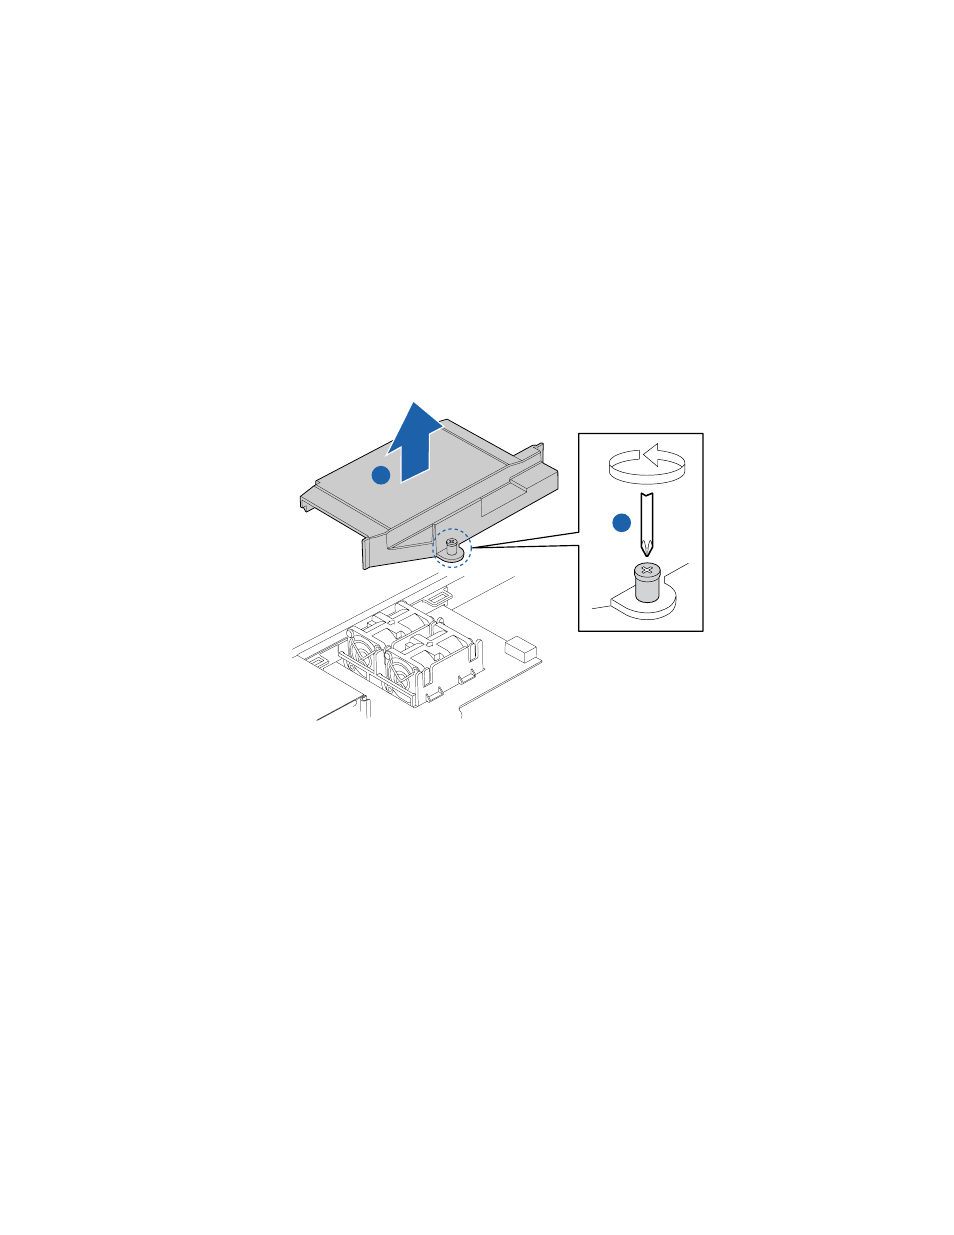
Removing the Power Supply Air Duct
Use the steps below to remove the power supply air duct.
1. Observe the safety and ESD precautions at the beginning of this book. See
“Safety
Information.”
2. Power down the server and unplug all peripheral devices and the AC power cable(s).
3. Remove the chassis cover. For instructions, see
“Removing the Chassis Cover.”
4. Remove cables from the air duct channel.
5. Remove the screw from the power supply air duct. See letter “A” in the figure below.
6. Lift the power supply air duct from its location over the two power supply fan modules. See
letter “B” in the figure below.
TP01623
A
B
Figure 41. Removing the Power Supply Air Duct
Installing the Power Supply Air Duct
Use the steps below to install the power supply air duct.
1. Place the power supply air duct over the power supply fan modules.
2. Line up the hole in the power supply air duct with the stand-off below the power distribution
board. Make sure that the air duct edges fit down into the grooves next to the power supply
module. Screw down the power supply air duct.
3. Route cables through the air duct channel.
4. Install the chassis cover. For instructions, see
“Installing the Chassis Cover”.
5. Plug all peripheral devices and the AC power cable(s) back into the server.