Menu (no. 9), Map orientation and overview (no. 10), Gps position quality (no. 11) – Mio MIOMAP C220 User Manual
Page 28
4.3.7 Menu (No. 9)
This button opens the Menu with the Find engine, the Quick menu, the Route menu
and the exit button that takes you to the Main menu screen. The Menu will be
described in detail later: Page 39.
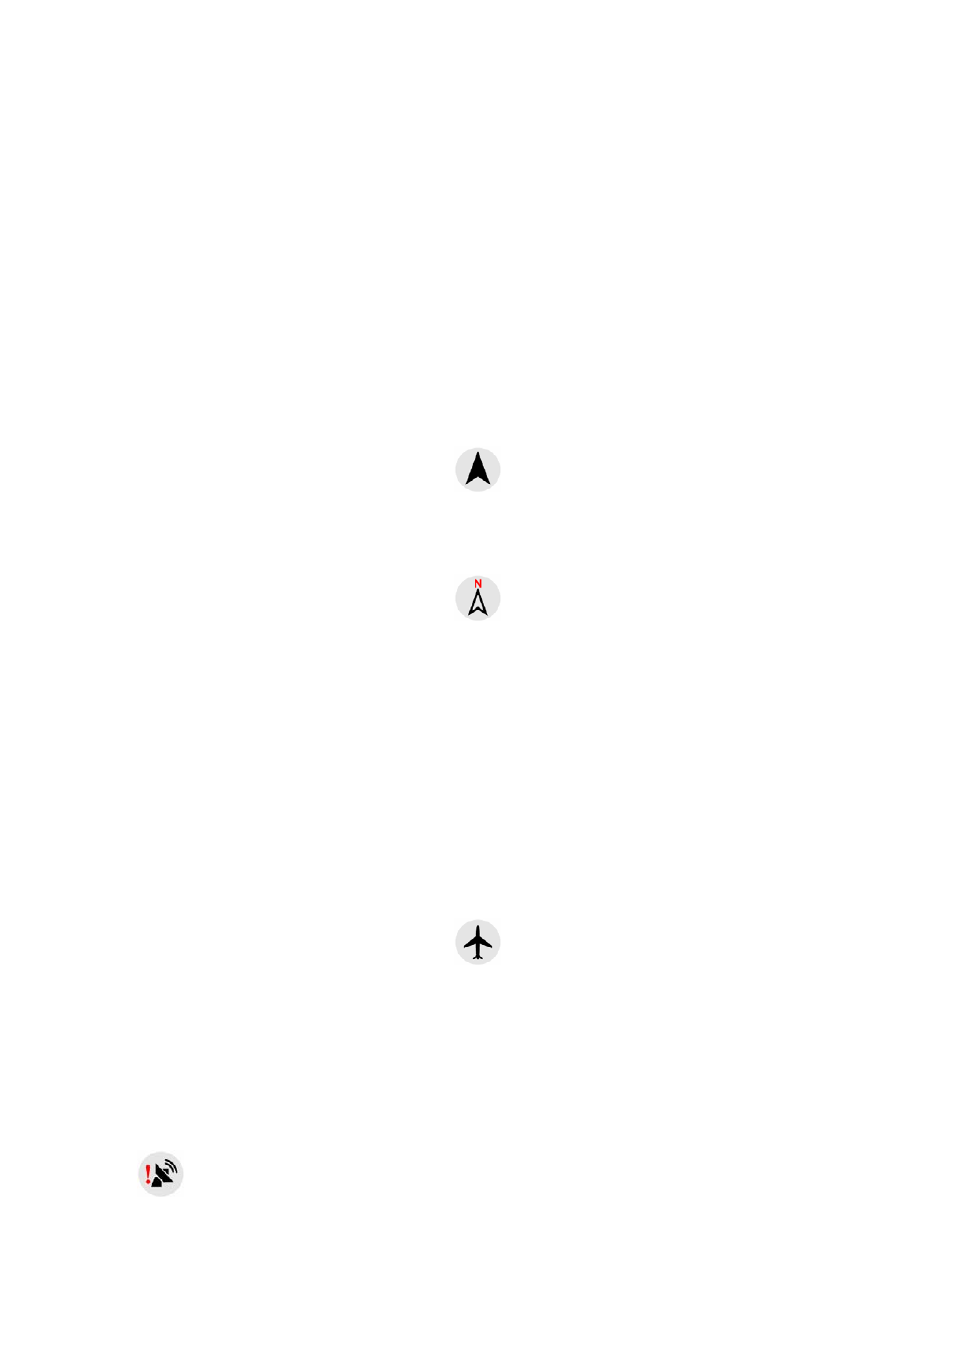
4.3.8 Map orientation and Overview (No. 10)
You can view the map screens in three different presentation modes. This switch will
cycle through them in the following order.
The usual map orientation for navigation is Track-up. It means MioMap rotates the
map during navigation to always face the direction of your travel. In this mode an
arrow (compass) points towards North.
Tap this icon to switch to North-up mode. Now the map is fixed to keep facing North.
The icon changes to show the new rotation mode.
Tap the icon again to enter Overview mode. This mode looks similar to the North-up
mode with one difference: the zoom level in this mode has a fixed default to give you
a better look of where you are on the map. You can change the zoom level at any
time, this will not cause the Follow button to appear, but when entering Overview
mode later, the default zoom level will be restored.
The arrow representing your position will be fixed in the middle of the screen. When
you move the map in Overview mode, the Follow button will appear, and when
pushed, it will move the map to have your current position in the middle of the map
again.
An aeroplane icon indicates Overview mode.
Tap the icon again to return to Track-up (automatic rotation) mode.
4.3.9 GPS position quality (No. 11)
Similarly to the icon found on the GPS Data screen (Page 34), the map screens also
inform you about the GPS signal:
•
The black satellite dish with the red exclamation mark shows there is no
connection with the GPS receiver. GPS navigation is not possible. Devices with a