Replacing the control panel, Replacing the system board – Gateway E-9722R User Manual
Page 56
CHAPTER 4: Installing Components
50
Replacing the control panel
To replace the control panel adapter card:
1
Follow the instructions in
“Preventing static electricity discharge” on page 24
. Make sure
that you turn off the server, then unplug the power cord(s) and all other cables connected
to the server.
2
Follow the instructions in
“Opening the server case” on page 25
.
3
Disconnect all cables from the control panel.
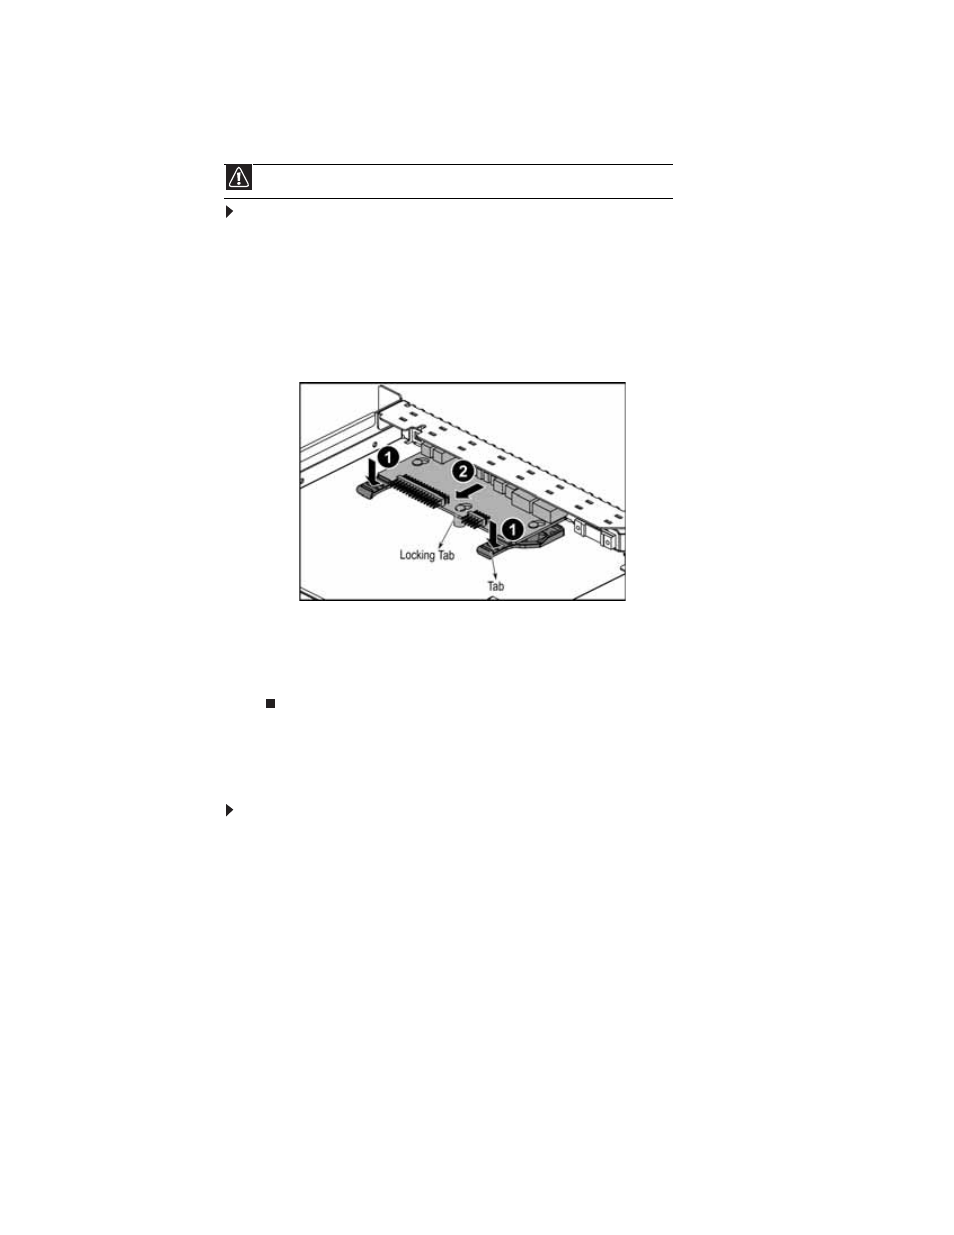
4
Press down the two side locking tabs, then pull the control panel back and lift it out of
the chassis
5
Holding the new control panel by the edges, align it with the locking tabs in the chassis,
then slide it toward the front of the chassis.
6
Reconnect the cables to the control panel.
7
Follow the instructions in
“Closing the server case” on page 27
Replacing the system board
To replace the system board:
1
Follow the instructions in
“Preventing static electricity discharge” on page 24
. Make sure
that you turn off the server, then unplug the power cord(s) and all other cables connected
to the server.
2
Follow the instructions in
“Opening the server case” on page 25
.
3
Remove the PCI riser assembly by following the instructions in
PCI expansion cards” on page 34
.
4
Remove the fan duct and system fan cage by following the instructions in
.
5
Remove the memory modules by following the instructions in
6
Remove the heatsinks and processors by following the instructions in
7
Disconnect all cables from the system board, noting their locations and orientation. (You
will reconnect the cables after you install the new board.)
Caution
Your server must be operated with a control panel in place.