Installation instructions, Installation, Fitting the glass window - e-studio – Stovax E-Studio PR0776 User Manual
Page 19
19
5
AR1997
10
A
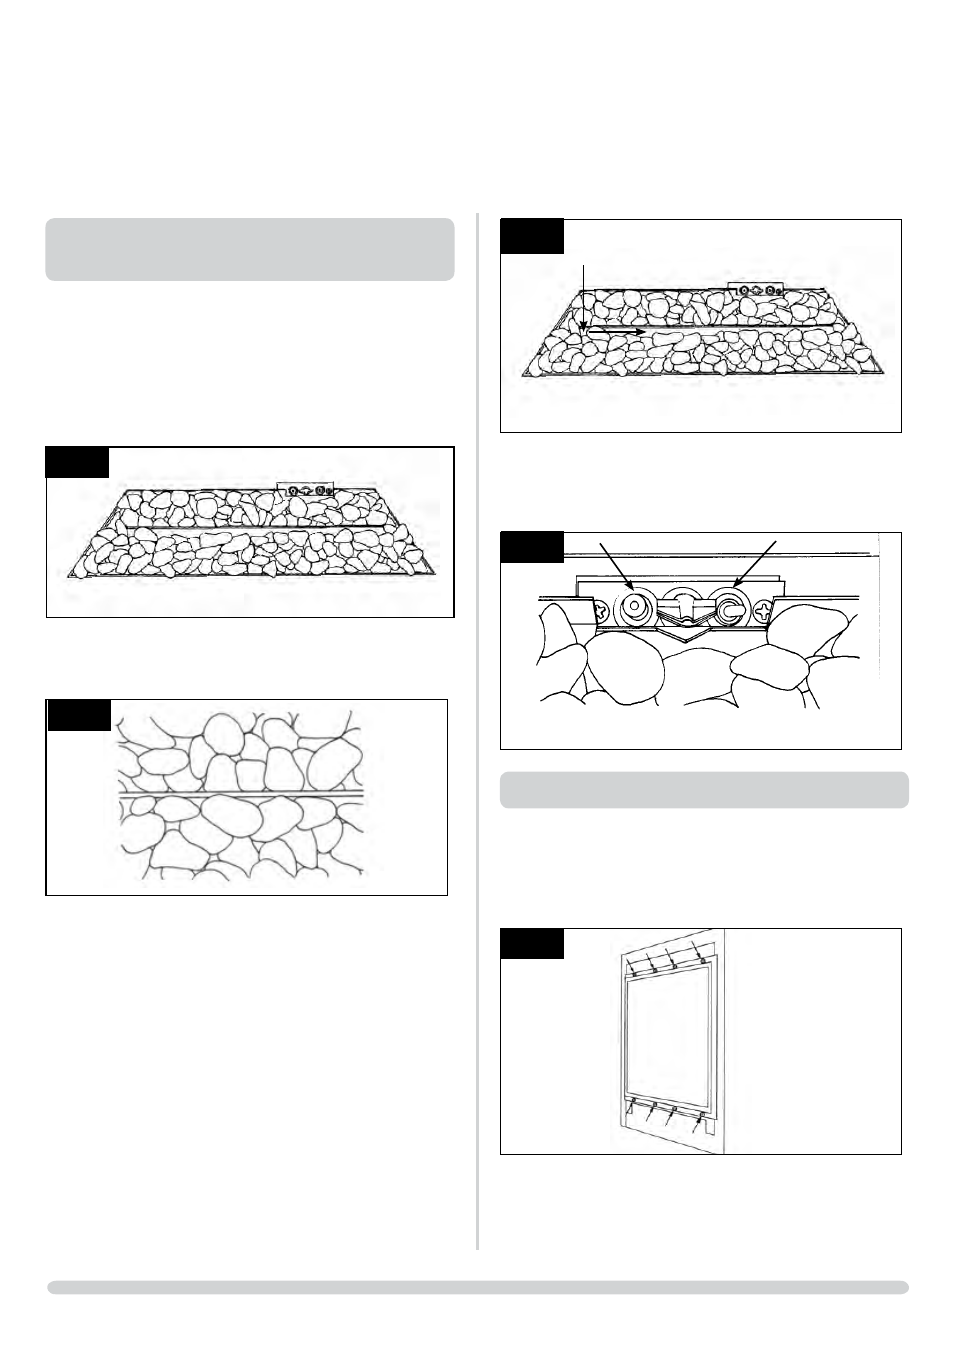
• Ensure that no chippings over-hang or fill the pilot area,
Arrow B, Diagram 11.
NOTE: ChIPPINGS ShOUlD NOT BE PlACED DIRECTlY
IN FRONT OF ThE PIlOT CROSS lIGhTING FlAME.
5
AR1998
B
B
11
FITTING ThE GlASS wINDOw - E-STUDIO
• Ensure that the fibre glass window seal on the box is
intact.
• Replace the one-piece glass window frame ensuring that
all 8 fixings are tight, Diagram 12.
5
AR1769
12
NEvER OPERATE ThE FIRE whEN ThE GlASS PANEl IS
REMOvED OR BROKEN
• Refer to the separate Frame Instructions to replace the
frame on the fire
INSTAllATION INSTRUCTIONS
INSTAllATION
9A. ARRANGEMENT OF ThE
FUEl BED COMPONENTS - E STUDIO
ONlY USE ThE CORRECT TYPE AND QUANTITY OF GRANITE
ChIPPINGS. AlwAYS FOllOw ThE FUEl BED lAYOUT AS
STATED IN ThESE INSTRUCTIONS. NEvER ChANGE ThE
lAYOUT FROM ThAT ShOwN hERE.
9.1 • Arrange the granite chippings in the areas highlighted in
Diagram 8. Granite chippings should be evenly distributed.
8
AR1997
• Lean the granite chippings against the burner ledges to
disguise the ledges, Diagram 9
5
AR1769
9
• Check that the port area. Arrow A, , Diagram 10 is clear
of granite chippings. This can be easily done by gently
running a screwdriver or similar object along this area.
NOTE: IT IS IMPORTANT ThE GRANITE ChIPPINGS DO
NOT COvER ThE PORT AREA IN BETwEEN ThE
BURNER lEDGES.