Installation instructions, Installation, Non recessed installation – Stovax E-Studio PR0776 User Manual
Page 17
17
1
AR1435
B
A
5.2 Gas pipe entry must come through the rear right-hand side
of the box. The rubber seal must be cut using a sharp knife
to allow the isolating elbow to pass through it.
• Ensure the rubber is not damaged when doing this,
Diagram 1, arrow B.
A means of isolation is provided with the appliance. This
must be fitted to the supply pipe prior to installing the
firebox.
The appliance can either be recessed into an inner leaf of
the wall. A 75mm rebate surround must be used with this
method. Or it can be installed in front of the wall in
conjunction with a fire surround constructed of a studwork
frame, Diagram 2 for options.
2
AR1428
AR1429
6. NON RECESSED INSTAllATION
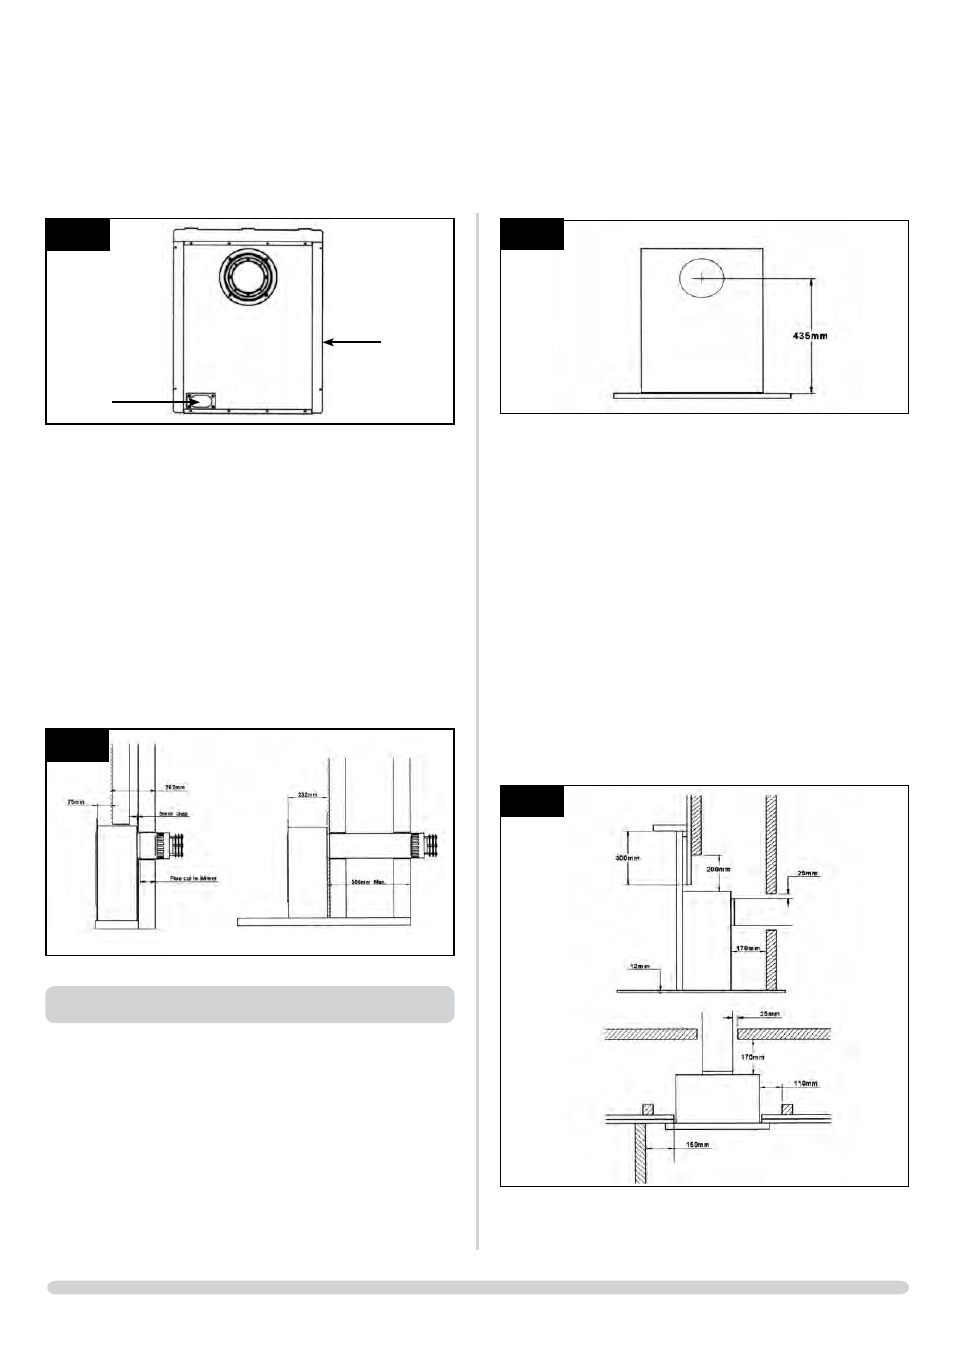
6.1 • Mark the position of the flue on the inner wall by
measuring from the top of the finished hearth level,
Diagram 3.
INSTAllATION INSTRUCTIONS
INSTAllATION
3
AR1436
6.2 A 152mm (6’) diameter hole is required to install the flue.
This can be achieved by either:
a) Core drill
b) Hammer and chisel.
It is advisable to drill small holes around the circumference
when using method b. Make good both ends of the hole.
6.3 It will now be necessary to construct a studwork frame to
house the appliance. The minimum depth of the aperture
must be 237mm. This includes an air gap of 5mm behind
the appliance. The sides must be lined with non-
combustible material for the full depth of the aperture.
6.4 Combustible parts of the studwork frame must not be any
closer than the minimum dimensions shown in Diagram 4.
These dimensions need to be maintained even if the frame
work is protected by non combustible material.
6.5 Do not pack the void around or above the appliance with
insulation material such as mineral wool.
4
AR1430
AR1431