Mounting featherboard in miter slot, Mounting featherboards with clamps – Grizzly G0651 User Manual
Page 57
model g0651/g0652 (mfg. since 1/10)
-55-
Mounting Featherboard in Miter Slot
1. lower the saw blade, then adjust the fence to
the desired width and secure it.
2. place the workpiece evenly against the fence,
making sure it is 1" behind the blade.
3. slide the featherboard miter bar into the miter
slot, making sure the fingers slant toward the
blade, as shown in
Figure 81.
;ZVi]ZgWdVgY
7aVYZ
Ldg`e^ZXZ
Figure 81. Featherboard installed in miter slot
and supporting workpiece for ripping cut.
4. position the fingered edge of the feather-
board against the edge of the workpiece, so
that all of the fingers contact the workpiece.
slide the featherboard toward the blade until
the first finger is nearly even with the end of
the workpiece, which should be 1" away from
the blade.
5. double check the workpiece and the feather-
board to ensure they are properly positioned
as described in
Step 4. then secure the
featherboard to the table. Check the feather-
board by hand to make sure it is tight.
Note: The featherboard should be placed
firmly enough against the workpiece to keep
it against the fence but not so tight that it is
difficult to feed the workpiece.
Mounting
Featherboards
with
clamps
1. lower the saw blade, then adjust the fence to
the desired width and secure it.
2. place the workpiece against the fence, mak-
ing sure it is 1" behind the blade.
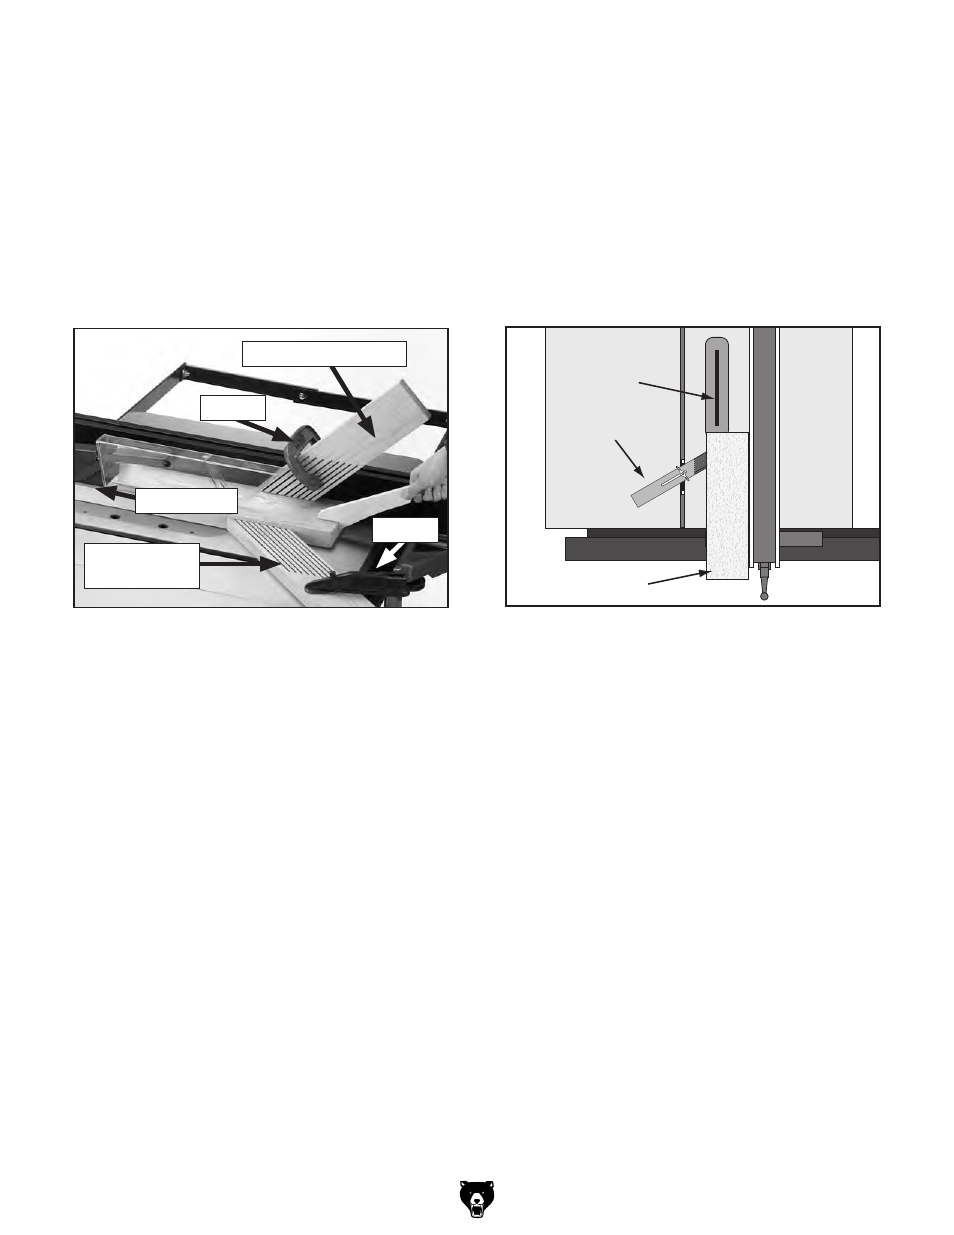
3. place a featherboard on the table away from
the blade so all fingers point forward and
contact the workpiece (see
Figure 80).
4. secure the featherboard to the table with a
clamp.
5. Check the featherboard with your thumb to
ensure it is secure.
— if the featherboard moves, tighten the
clamp more.
6. mount a second featherboard to the fence
with another clamp (see
Figure 80), then
repeat
Step 5 to ensure it is secure.
Figure 80. example of featherboards secured
with clamps.
Fence Featherboard
table
Featherboard
Clamp
Cutting path
Clamp