When to use the blade guard, When not to use the blade guard – Grizzly G0651 User Manual
Page 42
-40-
model g0651/g0652 (mfg. since 1/10)
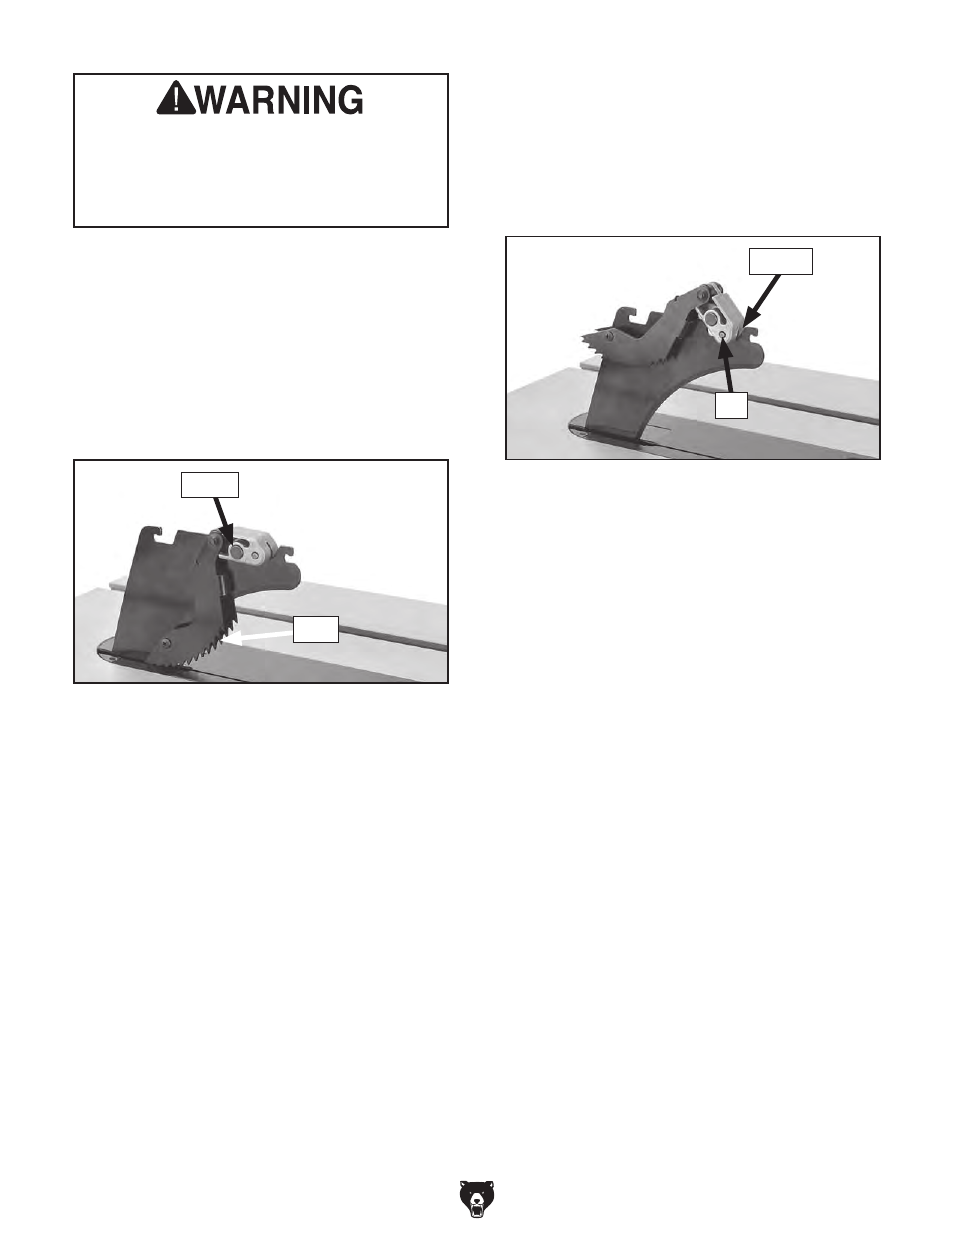
Re-installing Pawls
1. loosen the knob on top of the spreader, then
remove the blade guard.
2. slide the pin in the pawl block into the sec-
ond groove from the front of the spreader, as
shown in
Figure 54.
3. press the button on the pawl block shown in
Figure 53, then pivot the pawls down until
they lock into place.
4. re-install the blade guard onto the spreader
and secure with the top knob.
Figure 54. re-installing pawls.
groove
pin
When to use the Blade Guard
the blade guard assembly must always be
installed on the saw for all normal through cuts
(those where the blade cuts all the way through
the thickness of the workpiece).
When Not to use the Blade Guard
the blade guard cannot be used for any non-
through cuts (those in which the blade does
not cut all the way through the thickness of the
workpiece).
sometimes the blade guard or its components
can get in the way when cutting very narrow
workpieces or other specialized cuts. Because
the blade guard is provided to decrease your risk
of injury, it should not be used if it gets in the way
of making a safe cut. use good judgment!
IMpORTANT: Whenever the blade guard cannot
be used, the riving knife must be installed.
We do not recommend removing the pawls
during normal operations unless absolutely
necessary. In most situations, removing the
pawls will increase your risk of serious per-
sonal injury in the event of a kickback.
Figure 53. Button for removing pawls.
Button
pawl
3. re-install the blade guard onto the spreader,
making sure the front and back pins on the
blade guard slide all the way into the spread-
er slots, then tighten the top knob to secure
the guard.
To remove the pawls:
1. loosen the knob on top of the spreader
several turns, then remove the blade guard
assembly.
2. press the button (see Figure 53) on the block
that holds the pawls, then remove the pawls
from the spreader.