Searching for available channels within a, Group (clear channel scan) – Sony VCT-SP2BP Camcorder Shoulder Support User Manual
Page 28
28
3
Press the + or – button to select the desired group
name, then press the SET button.
The channel group is set, and the channel number
display starts flashing.
4
Press the + or – button to select the desired channel
number, then press the SET button.
The displays stops flashing and the desired channel is
set.
Procedure for portable diversity tuner
(URX-P41D)
For details about the channel groups and channels that can
be selected, refer to the “Frequency List”.
1
Press the MENU button to display the RX1 menu or
RX2 menu, then press the + or – button to display the
GP/CH screen.
2
Press and hold the SET button for one second or
longer.
The channel group display starts flashing.
3
Press the + or – button to select the desired group
name, then press the SET button.
The channel group is set, and the channel number
display starts flashing.
4
Press the + or – button to select the desired channel
number, then press the SET button.
The displays stops flashing and the desired channel is
set.
• If there is no user input within ten seconds after the
channel group display or channel number display starts
flashing, the displayed setting that is flashing is saved.
The same applies when setting other parameters.
• The frequency indicator changes in response to the
channel number.
• The tuner continues to receive, even when setting the
receive channel.
• Do not remove the batteries while setting the receive
channel. If they are removed or the power is turned off,
power the unit on again and repeat the procedure from
the beginning.
• Make sure that the same channel is set on the
transmitter and tuner within the same system.
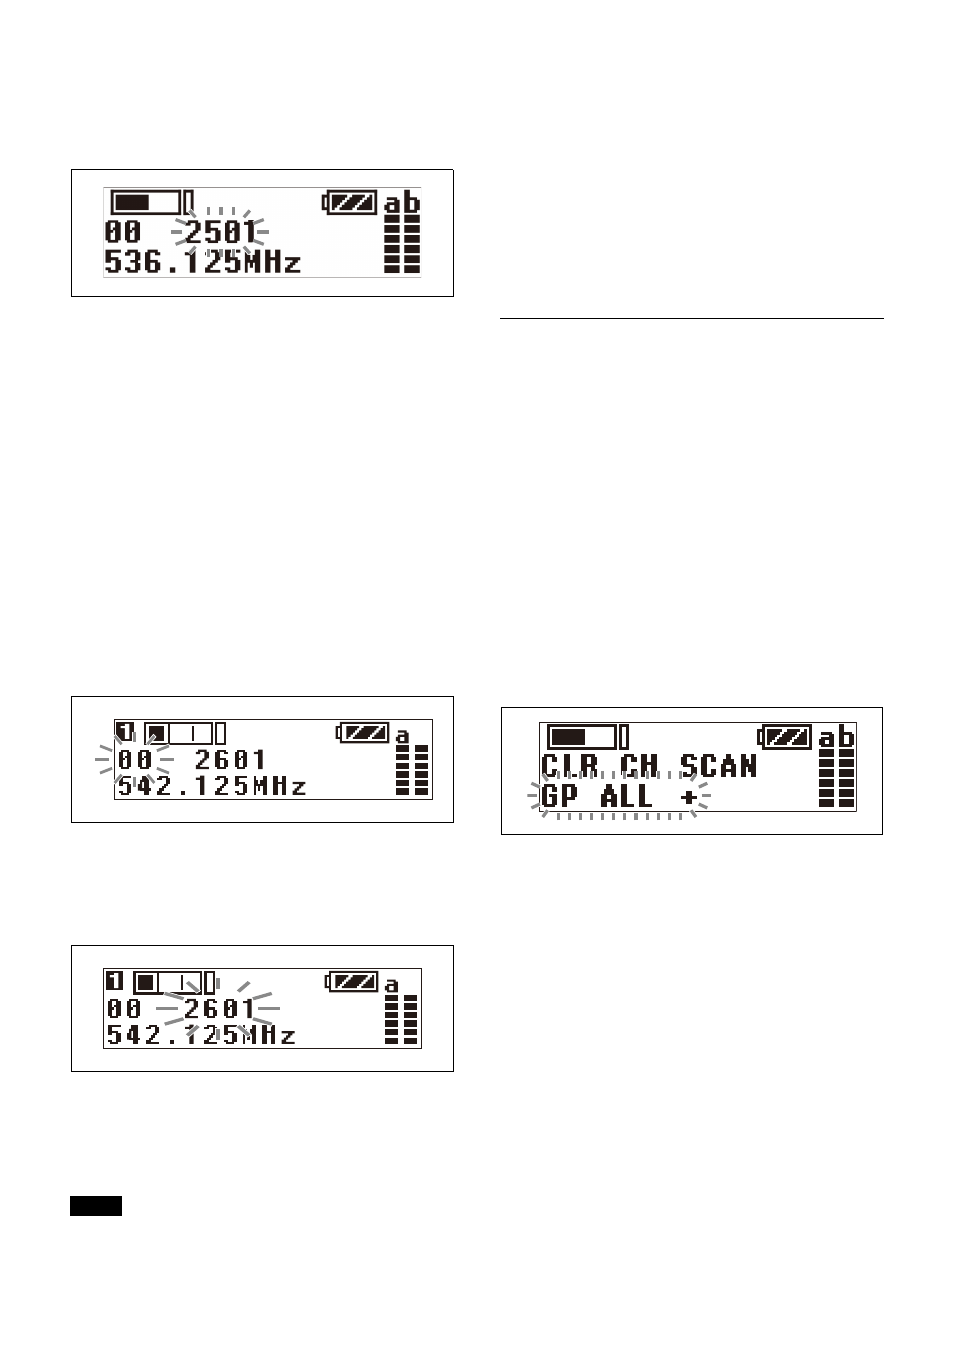
Searching for available channels
within a group (Clear Channel Scan)
Procedure for portable diversity tuner (URX-P40)
You can search for available channels within the
specified channel group.
Before performing this procedure, select the channel
group.
For details, see “Setting the receive channel” (page 27).
1
Press the + or – button to display the CLR CH SCAN
menu.
2
Press and hold the SET button for one second or
longer.
Press and hold until the channel group and “+”
display starts flashing.
3
Press the + button.
The tuner starts to scan through the selected channel
group. When available channels are found, the first
channel number among the available channels starts
flashing on the display.
To display the next available channel number
Press the + button.
To cancel searching
Press the – button. The display returns to the CLR CH
SCAN menu.
4
Press the SET button when the desired channel
number starts flashing.
The search for available channels finishes and the
displayed channel is set.
Once a channel is confirmed, you can select whether
to send the setting via NFC communication.
Notes