Sony VCT-SP2BP Camcorder Shoulder Support User Manual
Page 24
24
Information about the channel set on the tuner is sent
to the transmitter, and then the transmit channel is set.
“COMPLETE” is shown on the display of the
transmitter and tuner, and the transmitter vibrates
when setup is finished.
If the transmitter is turned off when NFC
communication is initiated, the transmitter
automatically turns on and starts transmitting.
• NFC communication lasts approximately
20 seconds. Perform step
4
within 20 seconds of
performing step
3
. If 20 seconds have elapsed, you
can reestablish NFC communication using the
SYNC RX->TX menu on the tuner.
• Communications using NFC may be adversely
affected, depending on the surrounding
environment. If this occurs, use the SYNC
RX->TX menu on the tuner to reestablish the link.
• If “COMPLETE” is shown on the display of the
tuner but the transmitter does not vibrate, the setup
may not be finished. If this occurs, use the SYNC
RX->TX menu on the tuner to reestablish the link.
Procedure for portable diversity tuner
(URX-P41D)
1
Connect the tuner as required.
For details about example connections, see “System
Configuration Example” (page 45).
2
Turn on both the POWER switches or just the
POWER switch for the tuner you want to use.
Some noise may occur when power is turned on.
Accordingly, turn down the audio input level of
devices connected to the tuner when turning the
power on.
3
Press and hold the NFC SYNC button on the tuner for
at least three seconds.
Clear Channel Scan starts.
When GROUP is set in SCAN TYPE
Searches for an available channel within the
configured channel group.
When Clear Channel Scan finishes, the channel with
the least noise and interference will be set.
When the channel is set, NFC or infrared
communication starts automatically.
For details about how to set the group, see “Setting
the receive channel” (page 27).
• When both tuner 1 and tuner 2 are turned on, scans
in the band group configured on tuner 1.
Accordingly, the tuner 2 band setting is set to the
same band group as tuner 1. To set different band
groups on tuners 1 and 2, turn on only one of the
tuners at a time and press the NFC SYNC button to
start scanning.
• If you select a group other than a group that
supports multiple channel operation and use two or
more UWP-D series at the same time, interference
may occur. Set the channel group taking into
account multiple channels, or set it to an unaffected
channel.
For details about the groups and channels in each
frequency band, refer to the “Frequency List”.
When ALL BAND is set in SCAN TYPE
Searches for a available channel from among the
receive frequency bands. When the detected receive
channel options and frequencies are displayed
alternately, press the SET button to confirm.
To use the confirmed channel, press the SET button
to start NFC or infrared communication. To select
another option, press the + button and then press the
SET button. This operation displays the next option.
For details about how to set SCAN TYPE, see
“Selecting the scan type (SCAN TYPE)” (page 35).
The SCAN TYPE menu is not available on the Japan
model, Korea model, 90U model, and E model, so
SCAN TYPE cannot be selected.
4
Send information about the channel set on the tuner to
the transmitter.
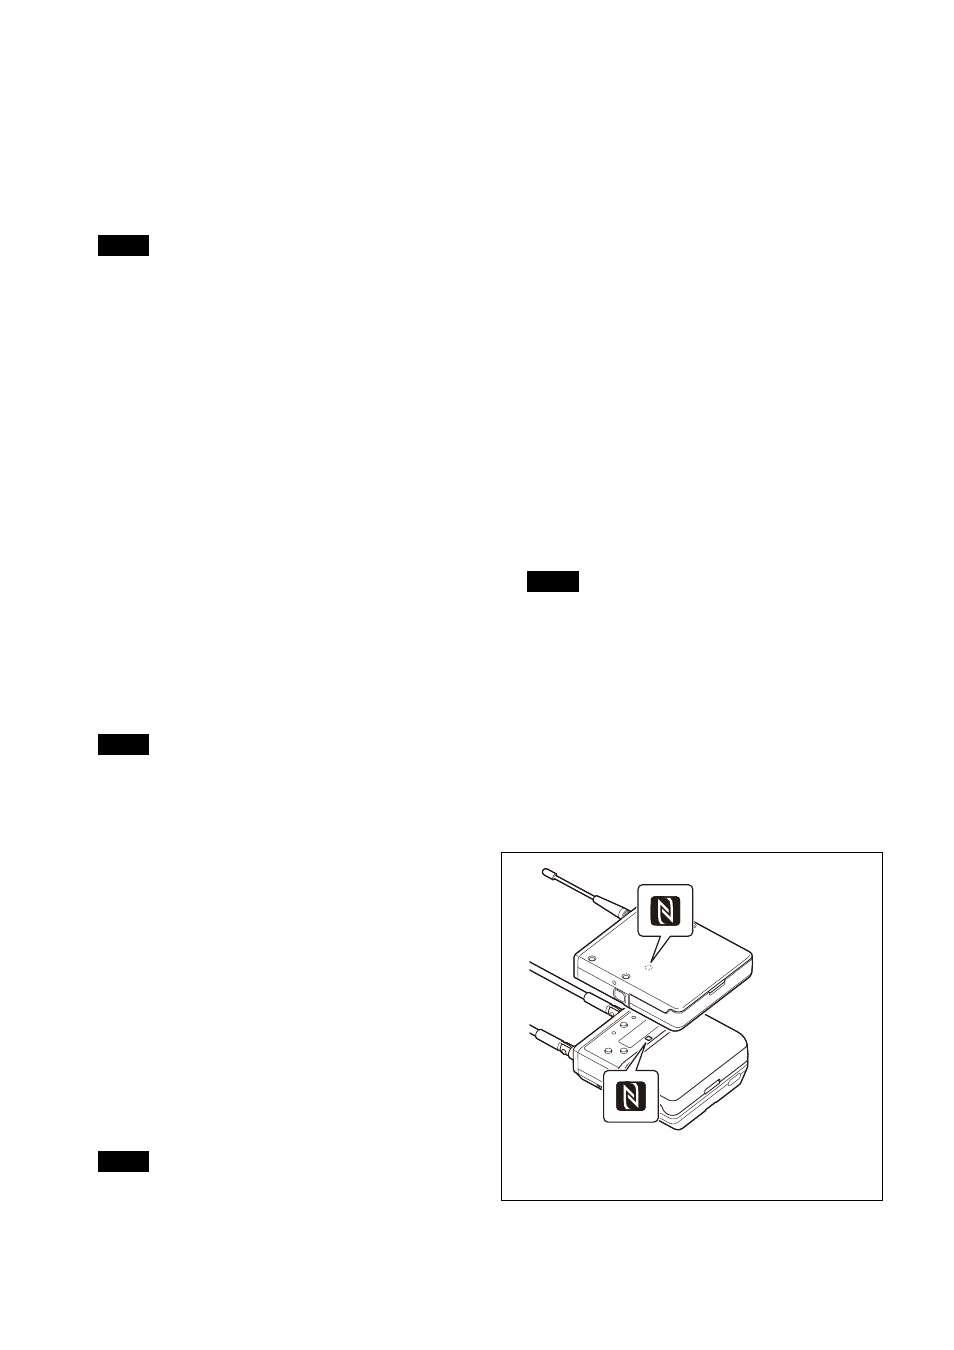
When SYNC MODE is set to NFC
Place the N-Marks of both the tuner and transmitter in
close proximity (approximately 5 mm).
At this time, make sure that the transmitter is turned
on or that the battery level is sufficient and the
transmitter is turned off.
Notes
Note
Notes
Note
Example using a body-pack transmitter (UTX-B40).
Similarly, place the N-Marks in close proximity when using
other types of transmitters.