Assigning e911 location ids on altigen ip phones, E 10 – AltiGen MAXCS 7.0 Update 1 New Features Guide User Manual
Page 10
MaxCS 7.0 Update 1 New Features Guide
Page 10 of 26
3.
Once you check that checkbox, the Password field above it becomes active. Enter a password. Your entry
will be the password that the user must enter in order to change the Location ID assigned to the phone.
Click OK.
You can use the Apply To feature to apply this requirement and the password to multiple phones.
Assigning E911 Location IDs on AltiGen IP Phones
Administrators can either push the correct E911 Location ID to an AltiGen IP phone, or they can have users
enter the Location ID manually on the phone itself.
To push an E911 Location ID assignment to an IP phone,
1.
In MaxAdministrator, select PBX > Location Based E911 Configuration.
2.
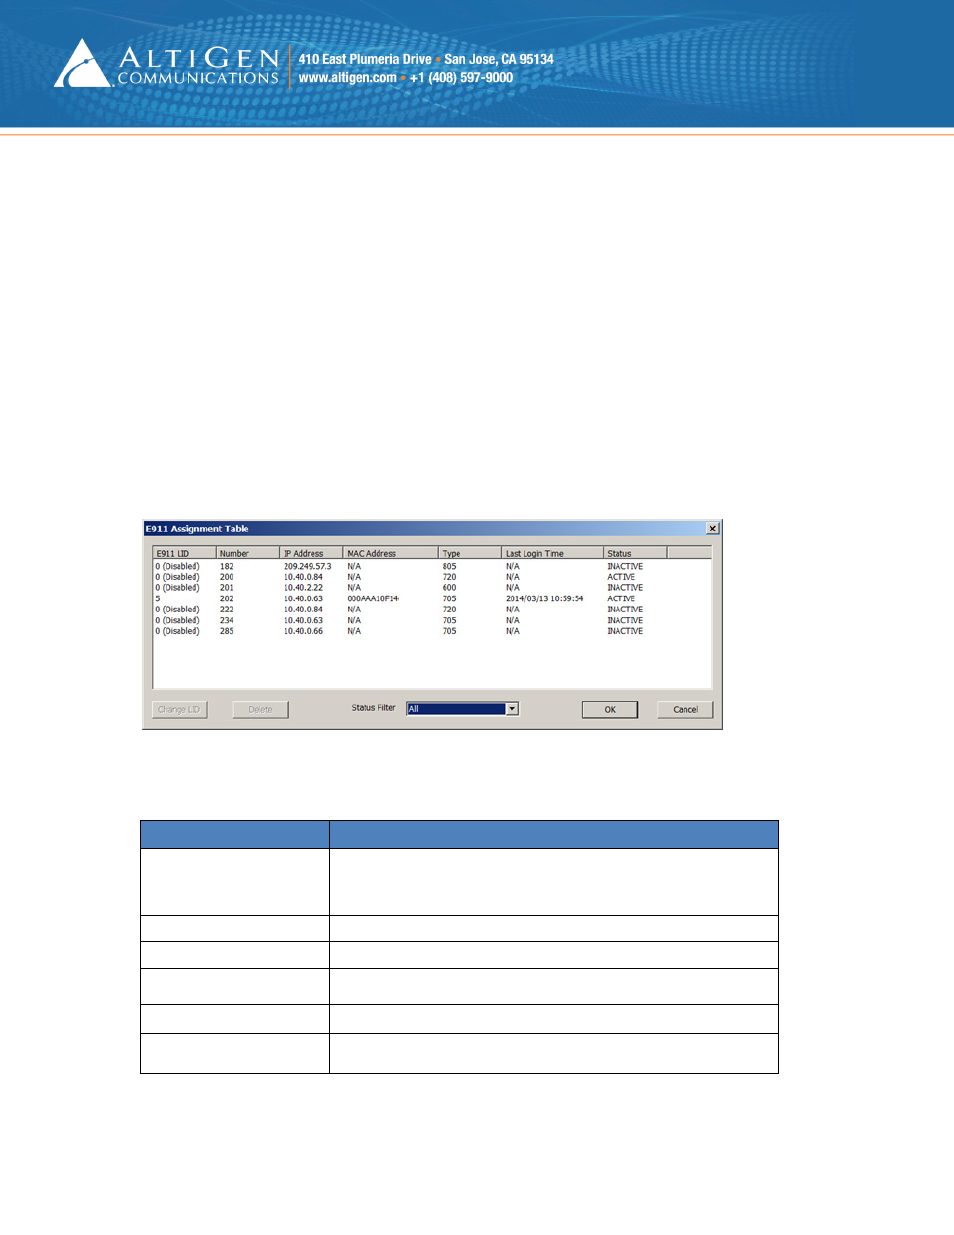
Click View E911 Assignments.
The table lists devices that have, at some point, registered with MaxCS.
3.
Click a column to sort the table. You can also filter the data by choosing All, Active, or Inactive from the
Status Filter pulldown menu.
Figure 5: The E911 Assignment table
The following table describes the fields in this panel.
Table 2: E911 Assignment fields
E911 Assignment Field
Description
E911 LID (Location ID)
The Location ID assigned to this IP phone.
Note: A phone with a Location ID of “0 (Disabled)” either does not have
the correct firmware or does not have any E911 Location ID assigned to it.
Number
The extension number of this IP phone.
IP Address
The IP address of this IP phone.
MAC Address
The MAC address of this IP phone.
Type
The type / model number of this IP phone.
Last Login Time
The last date and time that this IP phone logged into the MaxCS system.