Havis-Shields Kwik-Kit KK-120-05 User Manual
Page 17
Begin to tighten ALL loose hardware on the remainder of the unit,
being sure to align edges and bends of materials being tightened. This
will square the unit to itself.
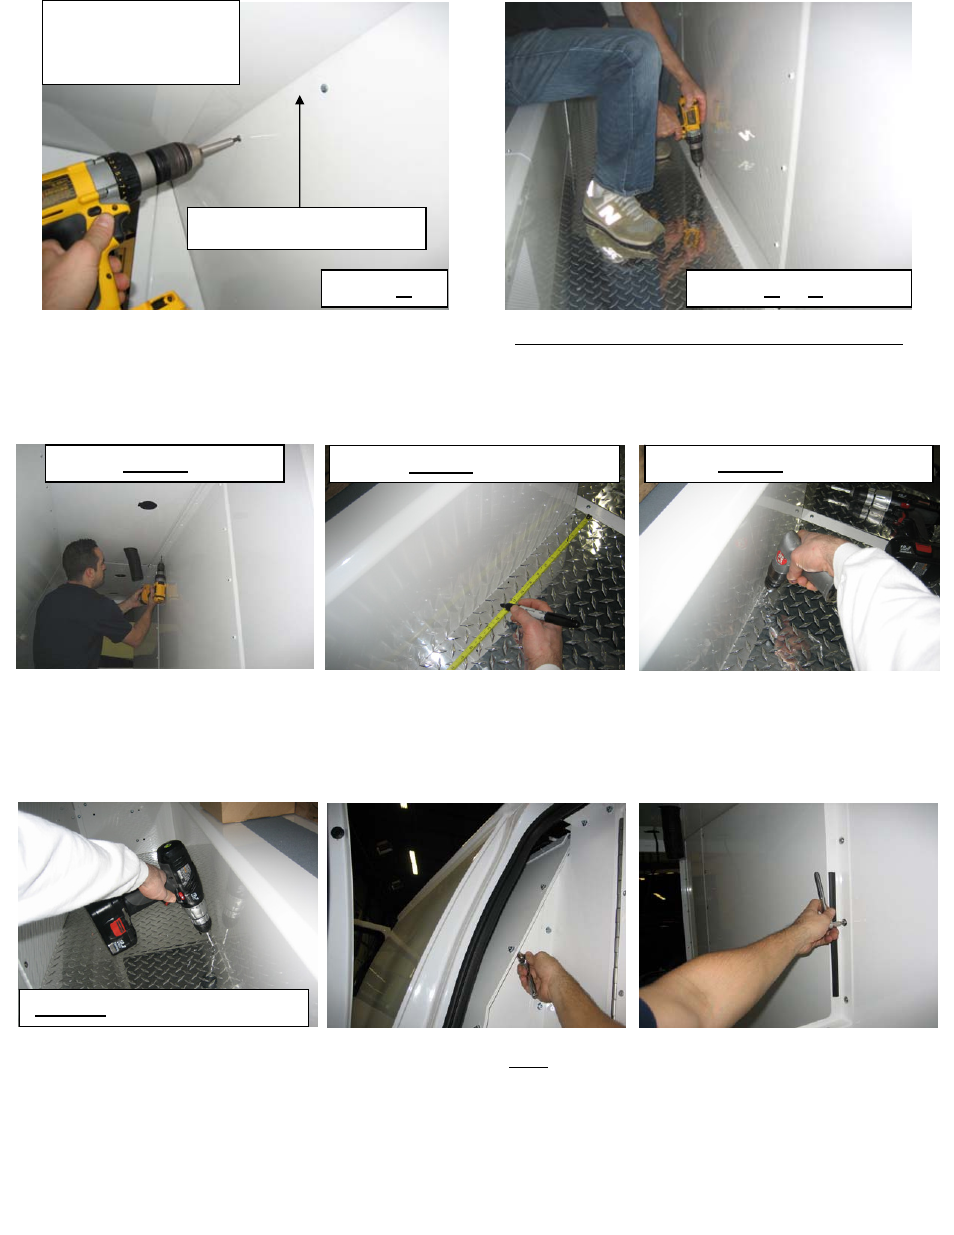
Pre-drill through Ceiling sections, (using
Divider as a template), with 3/16” drill
bit and attach using ¼” x 1 ½” hex head
lag bolts
Item #5 through #8 into #7
Attach remainder of Diamond plate floor. Pre-drill
diamond floor (only) w/ 3/16” hole and 1/8” hole through
floor of vehicle
Item #4 through #1 into van floor
Item 4 through #1 into van floor
Attach to wood floor or rubber
floor mat using #10 x 1” Phillips
pan head sheet metal screws
Through Item #4, #1, & van floor
Be Sure Floor Is Square To Benches & Bulkheads.
Attach Divider to vehicle. Pre-drill through floor(s)
using 3/16” drill bit and attach using ¼” x 1 ½” hex
head lag bolts
Item #5 & #4 to van floor
Note: Ceiling is behind wall
Be careful when pre-
drilling not to hit
hoses, wires, etc…
Pre-drill ceiling with 5/32” drill bit and attach #10 x
1” Phillips pan head sheet metal screws to hold
Ceiling to Bench/Wall assembly. Repeat these steps
on the Passenger-side Ceiling section
Item #8 to #2
KK-XXX-05_INST_8-07
17