4 3d setup, 3d setup, Why change the 3d setup – Barco F80-4K9 9000-Lumen 4K UHD DLP Laser Projector (No Lens) User Manual
Page 113: Choosing the desired output mode, How to adjust the projector to the 3d emitter
113
R5906852 /09
F80
Source
Layout mode
Video Timing /
cable
Fixed
configuration?
Color depth
Active Stereo
(sequential L/R)
Standard layout (1x1
layout)
2560 x 1600 @120
Hz
30 bpp
Passive Stereo
(separate L/R)
Standard layout (1x1
layout)
3840 x 2160 @60 Hz •
Cable 1: left eye
•
Cable 2: right eye
30 bpp
Passive Stereo (dual
pipe L/R)
2 Column mode (2x1
layout)
1920 x 2160 @60 Hz •
Cable 1: left eye
•
Cable 2: right eye
30 bpp
8.12.4 3D Setup
Why change the 3D setup?
While Barco can provide a 3D emitter and active shutter glasses as options to this projector, you are also free
to use a 3D emitter and active shutter glasses of your own choice. Since glasses and emitter can have various
specifications compared to the ones Barco can provide, the 3D setup menu allows you to configure the output
image to the specifications of your glasses and emitter. The following can be configured:
•
Swap Eyes
: You can choose to invert the stereo Sync output signal ( depending on the chosen 3D emitter
and glasses).
•
Swap frame pair
: This setting allows you to correct the frame doubling sequence. If the frame rate of the
projected moving 3D content doesn’t look smooth, this option may help improve this.
•
Dark time
: You can select how much dark time the projected image will have between frames. You can
choose one of the options between 1000 µs and 2500 µs.
•
Output mode
: Choose the desired output mode. For more details, see further.
•
Sync Delay
: You can increase or decrease the sync delay. The scale goes from –10 000 µs to +10 000 µs
with a step of 100 µs.
Choosing the desired output mode
The following output modes are available:
•
AutoStereo
: Automatic mode (2D input = 2D output, 3D input = Active Stereo output).
•
Mono
: Forces all source signals to 2D output.
•
ActiveStereo
: Forces all source signals to Active Stereoscopic 3D.
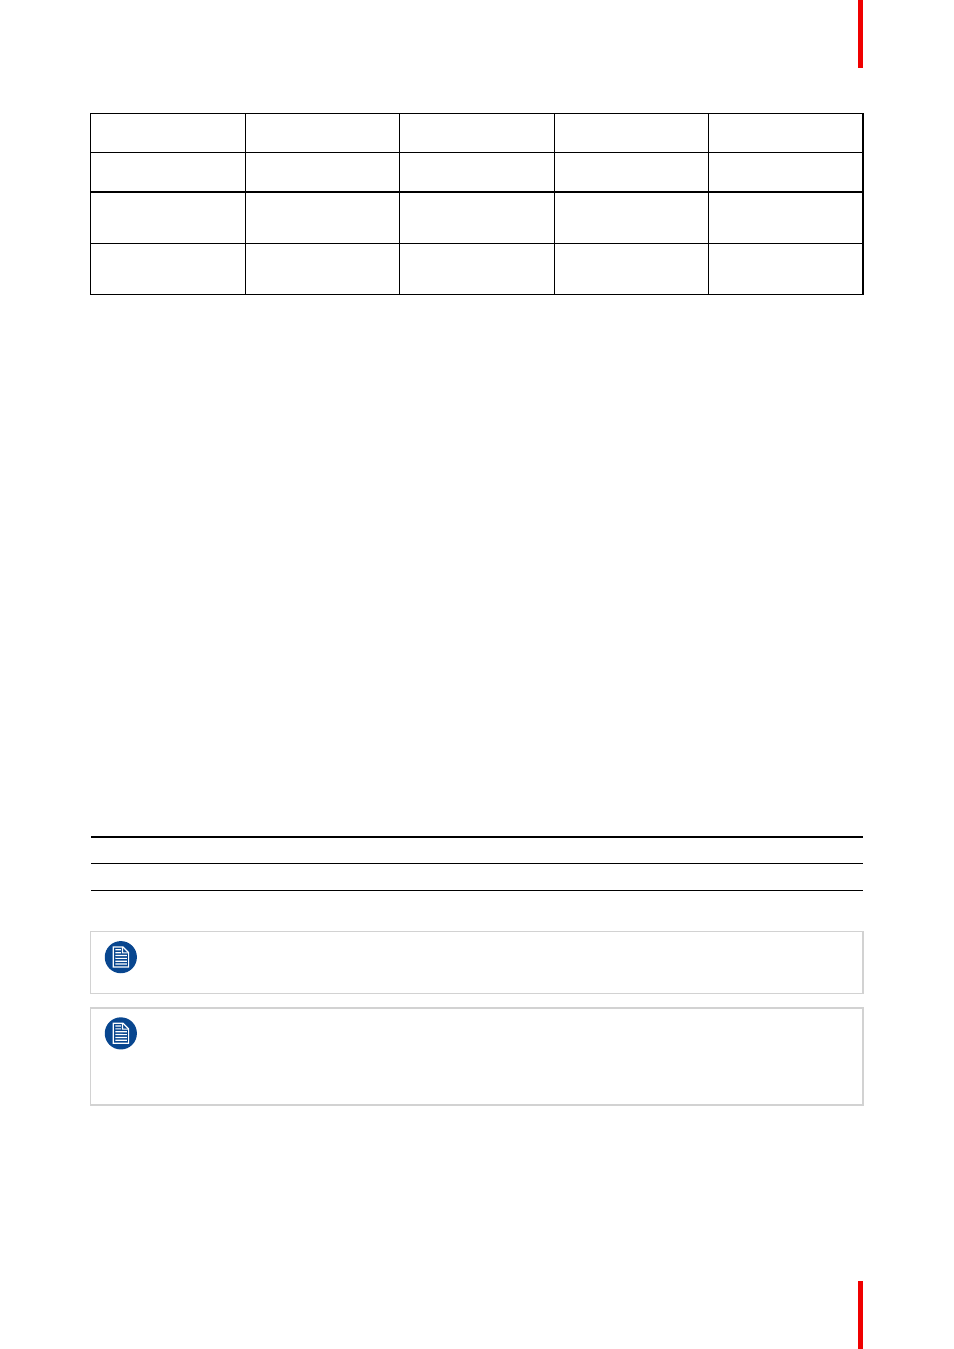
Use the following table as an indicator of what display mode you require.
Source signal
AutoStereo
Mono
ActiveStereo
2D Source
Output is a 2D image
Output is a 2D image
Output is in Active Stereo
Active Stereo source
Output is in Active Stereo Output is a 2D image
Output is in Active Stereo
Passive Stereo source
Output is in Active Stereo Output is a 2D image
Output is in Active Stereo
When a different Display Mode is chosen compared to the source signal (e.g. Active Stereo source
with Mono output), advanced image processing will make sure you a desirable image will be
displayed.
If a 3D emitter is used that radiates infrared beams (IR beams), the IR beams may interfere with the
IR communication between projector and the RCU. If such interference occurs, connect the RCU to
the projector using the remote cable. It is also advised to turn the IR receivers on the projector off to
avoid the 3D emitter interference. To turn off the IR receivers, see
“Pulse RCU, function of the on/off
.
How to adjust the projector to the 3D emitter?
1.
In the main menu, select
Installation → 3D Setup
.