ARRI ALEXA Mini LF Ready to Shoot V-Mount Set (LPL) User Manual
Page 30
Lens Mounts and Lens Handling
30
Attaching a Lens
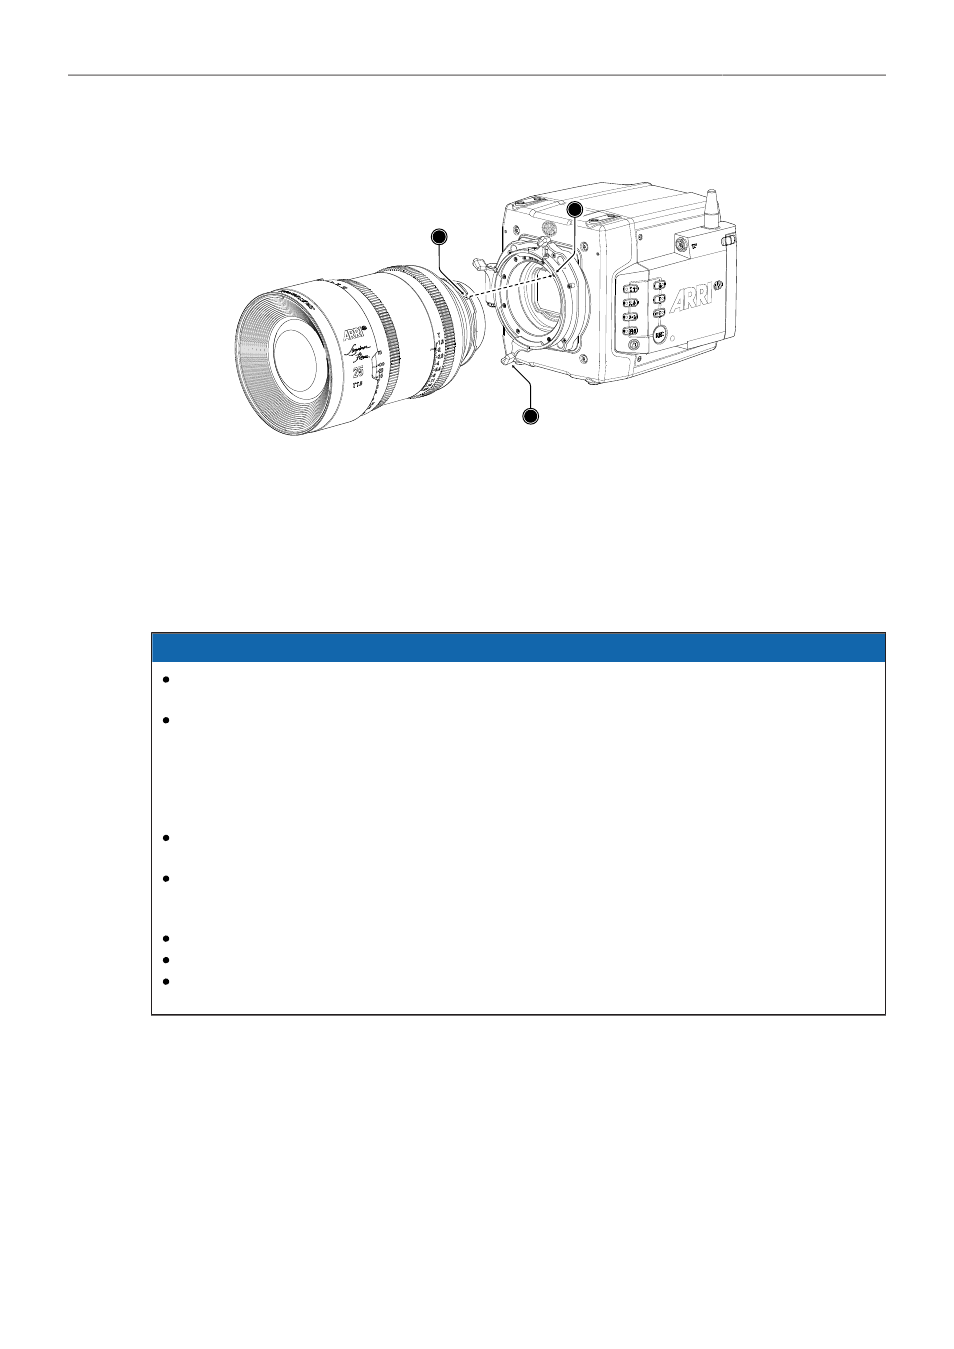
1
2
3
1. Carefully insert the lens into the lens port. Align the notch in the lens flange (1) with the index pin on
the lens mount (2), keeping the lens rotated into a position where the lens markings are visible from
either side of the camera.
2. Press the lens flange flat onto the lens mount.
3. Turn the bayonet ring (3) clockwise until the lens is locked securely.
4. Ensure that the lens is properly mounted.
NOTICE
Changing camera lenses should be done in a dry and dust-free environment. If this is not
possible, take extra care that no dust enters the camera while the lens is off.
When changing lenses, always perform a dust check to make sure no dust has settled on the
sensor cover glass. The sophisticated design principle of the camera’s optical module delivers
outstanding images with a cinematic look and feel, but also makes the imager sensitive to
contamination. Dust particles that have settled on the sensor cover glass during a lens change
may become visible as dark spots in the output image, similar to lint leaving marks on exposed
film. The degree of this effect depends on the aperture of the lens.
When no lens is attached to the camera, immediately place the protective cap on the lens mount
to avoid contamination of the sensor cover glass.
Heavy lenses (above 3 kg / 6.6 lbs) require additional lens support. Using a lens support
guarantees that the weight of the lens will not influence the flange focal depth and reduces stress
on the lens mount.
Do not short-circuit the LDS contacts.
Never exceed the maximum lens mount depth.
Have every lens properly shimmed as prescribed by the manufacturer.
Lens Support
To support a lens use 15 mm or 19 mm studio rods and an appropriate lens bridge. 15 mm rods require
a bridge plate with 15 mm studio rod support, such as a BP-3 / BP-9 + MAP-2, while 19 mm studio
rods require a bridge plate with 19 mm studio rod support, such as a BP-12 or BP-5 / BP-8 + BPA-4.
Mount the Lens Support LS-10 for 15 mm rods by pushing it onto the rods from the front. Mount the
Lens Support LS-9 for 19 mm studio rods by clipping it on the rods from the top. Slide the bridge into
position on the rods directly under the lens support ring on the lens, and fix it in place by tightening the
lever on its side. Align and tighten the center screw in the lens support ring, adjusting the height of the
center screw with the lever on the back of the lens bridge.