Chapter 2 installation instructions – GeChic On-Lap 1102E 11.6" 16:9 Portable IPS Monitor User Manual
Page 9
Chapter 2 Installation Instructions
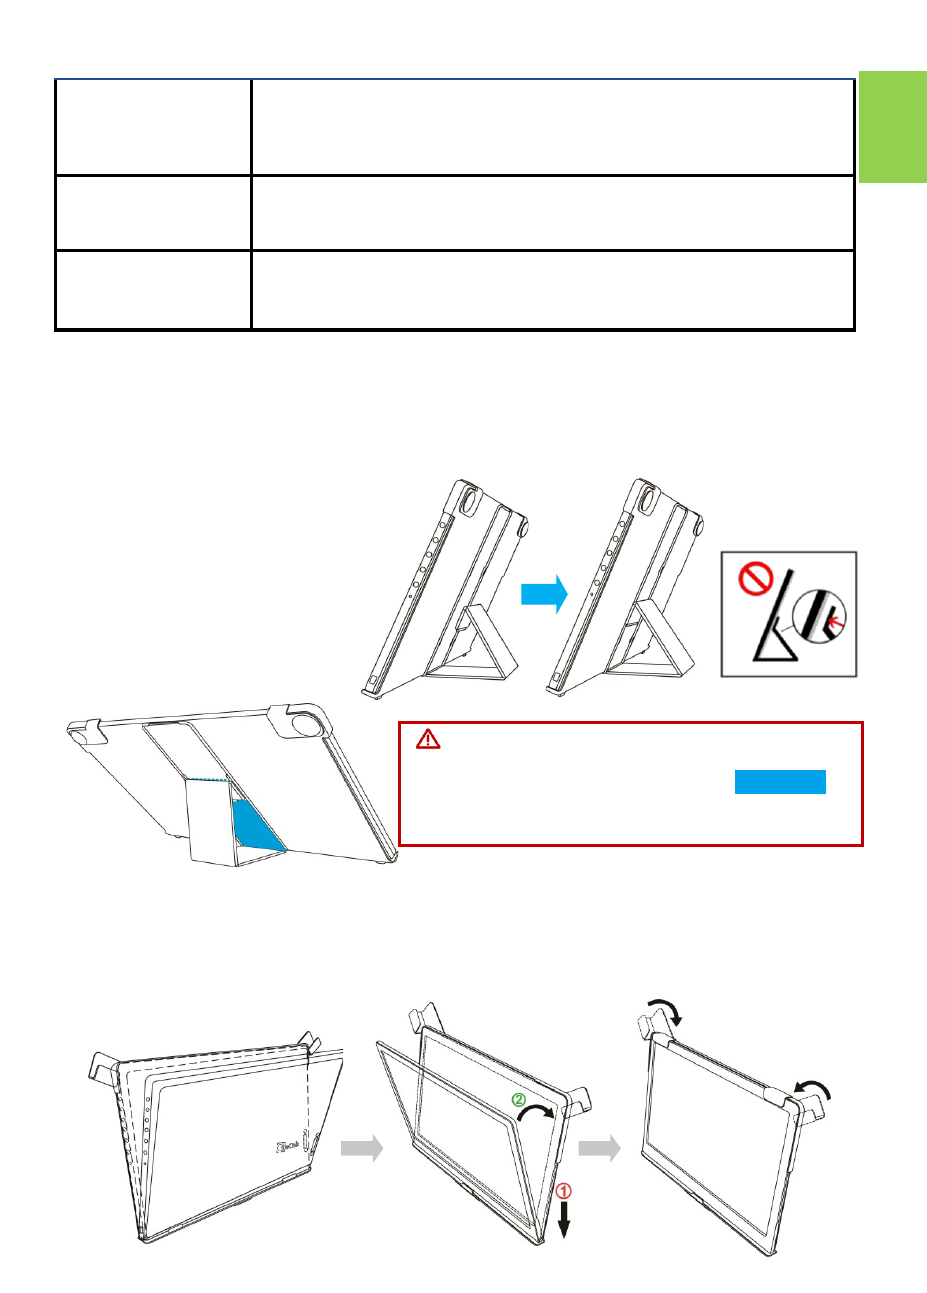
Section 1 Installation of Horizontal Display
Refer to the Fig.,
①
take
the magnetic buckle off
firstly,
②
fold and attach
the rubber side of the
magnetic buckle
on
the
mental plate
. Adjust the
position of the magnet
buckle to change the view-
ing angles.
The min. viewing angle of horizontal
display is 40 degrees. Do not attach the
magnetic buckle higher than the
blue line
,
otherwise it may cause the monitor over-
turning.
3
Rear Dock
The Rear Dock shall be installed on the backside connector of
1102/1503. It equips with HDMI
-
A input and USB
-
A input for
installing Computer Stick or HDMI wireless display. For the usage
of Rear Dock, please refer to Chapter 2>Section 8.
1102 Multi
Mount Kit
Proprietary for On
-
Lap1102 . Can be used as a stand of touch
monitor for varies viewing angles; can be installed on wall mount
or arm of VESA 75.
Please refer to Chapter 2.
1102 Tripod
Mount Kit
(1/4”
screw hole)
Proprietary for On
-
Lap1102. A
1/4”
screw hole allows you to
install On
-
Lap1102 on a camera tripod.
Please refer to Chapter 2.
As the fig. below, rotate aside the Cover Locks firstly, and take the monitor out.
Then turn the monitor's backside to the Protective Cover:
○
1
Put the bottom half
of the monitor into the Protective Cover, and
○
2
Put the top half of the monitor
into the Protective Cover. Rotate down the Cover Locks to prevent the monitor
from sliding out.
①
②