GeChic On-Lap 1102E 11.6" 16:9 Portable IPS Monitor User Manual
Page 16
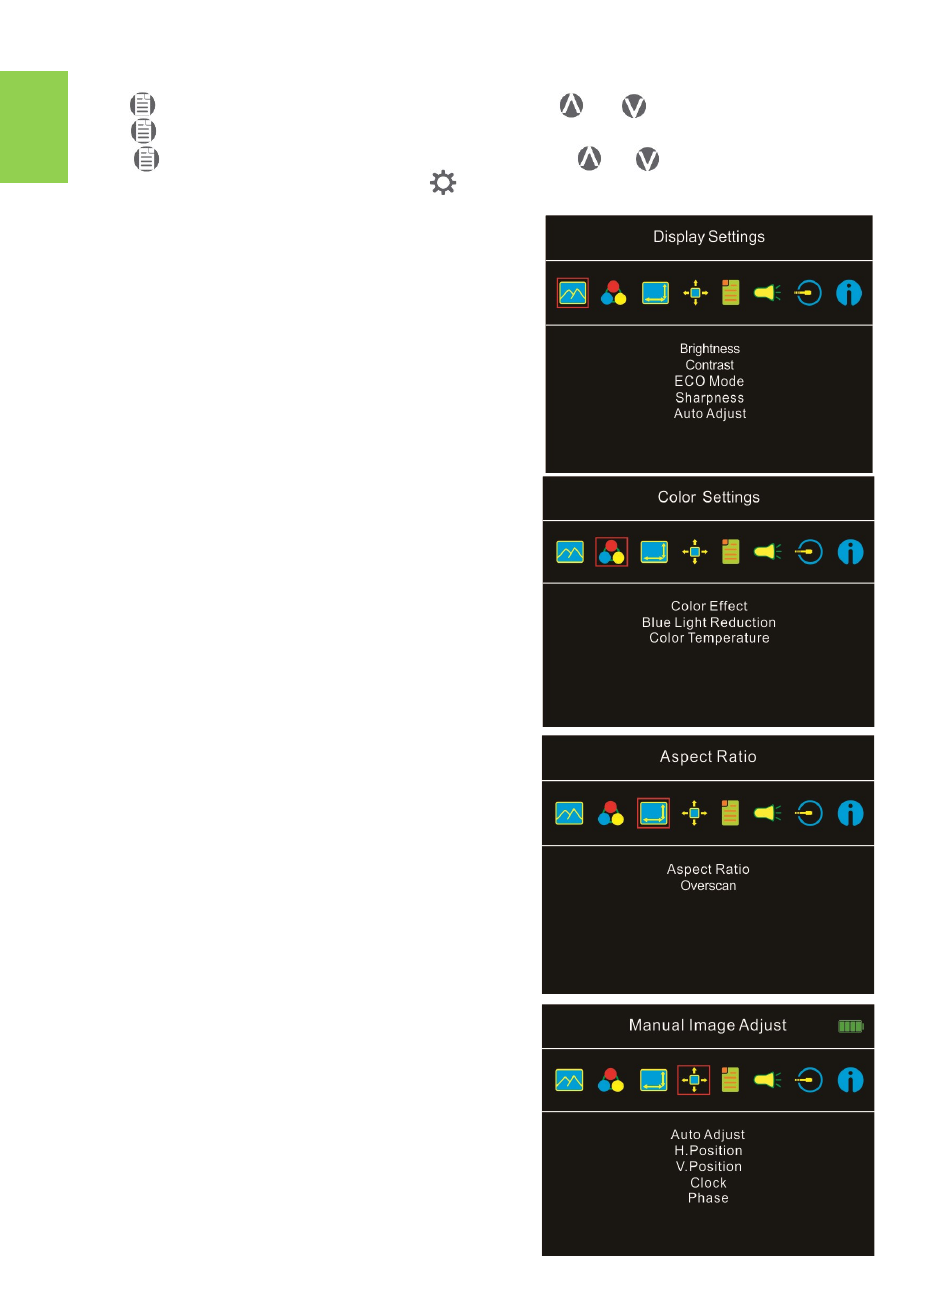
4.
Aspect Ratio
1)
Aspect ratio: When select "16:9 Full
Screen", the monitor displays a 16:9 im-
age in full screen. When select 4:3, the
monitor displays a 4:3 image with left
-
right side black borders to fill the 16:9
screen. When select "Original", the moni-
tor displays the image in its original size.
2)
Overscan:
only available when inputting
HDMI video signal (ex:1080P/720P). Ena-
bling this function allows you to calibrate
the display area.
5. Manual Image Adjust
1) Auto Adjust: Adjust image settings automatically.
Only available when inputting VGA video signal.
2) H. Position: Move screen image to left/right.
3) V. Position: Move up/down screen image.
4) Clock: Adjust the pixel clock for horizontal
sweep. If the frequency is not correct, the screen
shows vertical stripes and the image is not pro-
portional.
5) Phase: Adjust the phase of the pixel clock signal.
With a wrong phase adjustment, the screen
shows horizontal disturbances.
10
1.
Basic Button Operation
Press button to launch the OSD panel. Press or to view the items.
Press to launch the selected item. If the selected item has sub
-
items,
press again to launch the sub
-
items, and press or to select the
settings of sub
-
items. To exit, press . Repeat the steps above to adjust the
other settings.
2.
Display Settings
As the fig. shown, enter "Display Settings" to
adjust "Brightness", "Contrast", "Sharpness",
and the other functions.
1)
ECO Mode: The maximum brightness is at
50 in Eco Mode.
2)
Auto Adjust: Launch "Auto Contrast Ad-
just" and "Auto Brightness Adjust" to ad-
just brightness and contrast automatically
to ensure the highest quality when display-
ing moving images.
3.
Color Settings
1)
Color Effect: In Color Effect, there are 4
modes: "Standard", "Photo", "Game", and
"Movie" offered to be selected.
2)
Blue Light Reduction: Select "On" to reduc-
es the screen's blue light automatically.
3)
Color Temperature: Select "Cool" to in-
crease the blue color of the image; Select
"Warm" to increase the red color of the
image. Select "User" to adjust the RGB
color settings manually.