Editing movies – Canon PowerShot SX720 HS User Manual
Page 105

105
Before Use
Basic Guide
Advanced Guide
Index
Camera Basics
Auto Mode /
Hybrid Auto Mode
Other Shooting Modes
P Mode
Tv, Av, and M Mode
Playback Mode
Wi-Fi Functions
Setting Menu
Accessories
Appendix
Editing Movies
Still Images
Movies
You can remove unneeded portions from the beginning and end of movies
(excluding digest movies, = 34).
1
Choose [ ].
●
Following steps 1 – 5 in “Viewing”
(= 87), choose [ ] and press the [ ]
button.
●
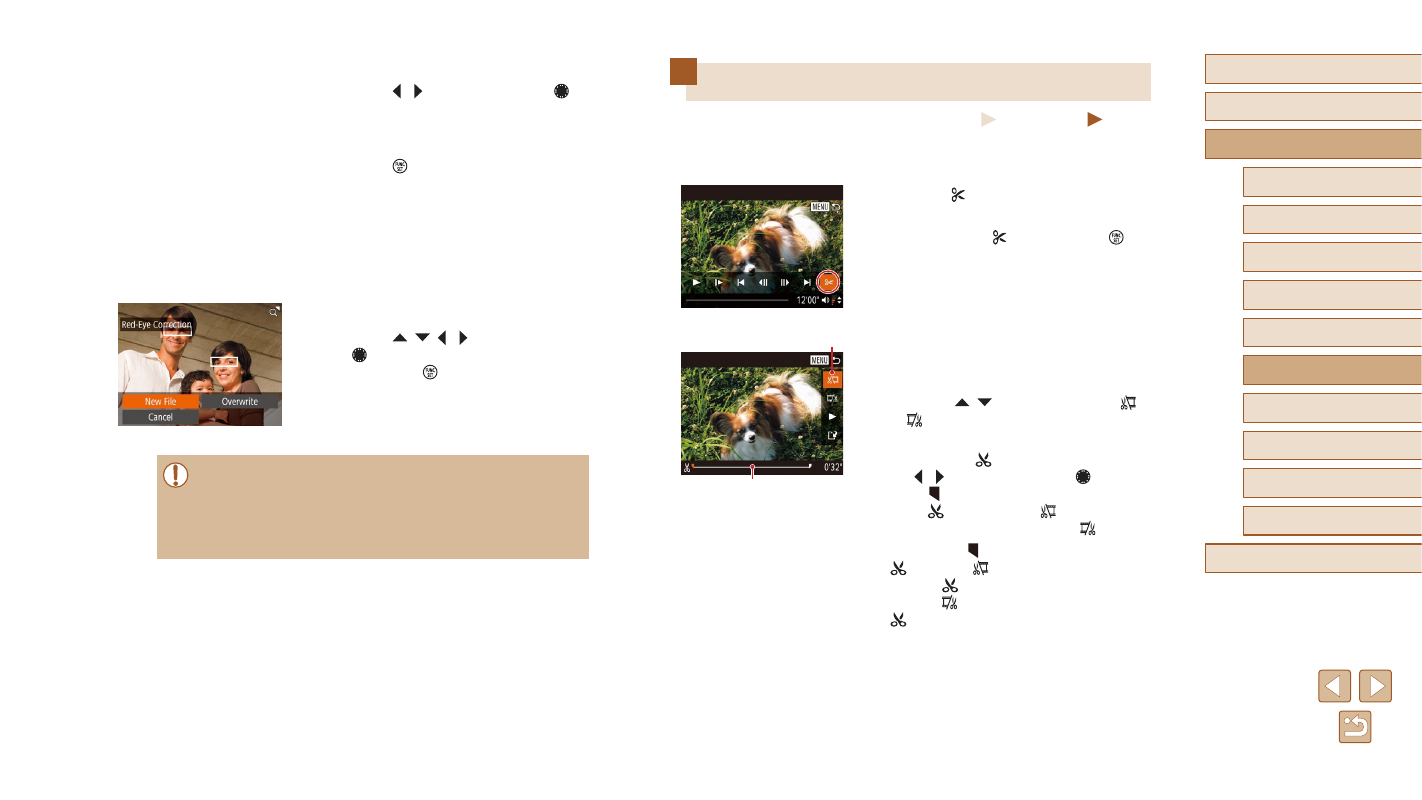
The movie editing panel and editing bar
are now displayed.
2
Specify portions to cut.
●
(1) is the movie editing panel, and (2) is
the editing bar.
●
Press the [ ][ ] buttons to choose [ ]
or [ ].
●
To view the portions you can cut
(identified by [ ] on the screen), press
the [ ][ ] buttons or turn the [ ] dial to
move [ ]. Cut the beginning of the movie
(from [ ]) by choosing [ ], and cut the
end of the movie by choosing [ ].
●
If you move [ ] to a position other than a
[ ] mark, in [ ] the portion before the
nearest [ ] mark on the left will be cut,
while in [ ] the portion after the nearest
[ ] mark on the right will be cut.
(1)
(2)
2
Choose an image.
●
Press the [ ][ ] buttons or turn the [ ]
dial to choose an image.
3
Correct the image.
●
Press the [ ] button.
●
Red-eye detected by the camera is now
corrected, and frames are displayed
around corrected image areas.
●
Enlarge or reduce images as needed.
Follow the steps in “Magnifying Images”
4
Save as a new image and review.
●
Press the [ ][ ][ ][ ] buttons or turn
the [ ] dial to choose [New File], and
then press the [ ] button.
●
The image is now saved as a new file.
●
Follow step 5 in “Resizing Images”
●
Some images may not be corrected accurately.
●
To overwrite the original image with the corrected image, choose
[Overwrite] in step 4. In this case, the original image will be
erased.
●
Protected images cannot be overwritten.
