Multi-Contact MA259 User Manual
Page 6
Advanced Contact Technology
6 / 8
www.multi-contact.com
16
17
18
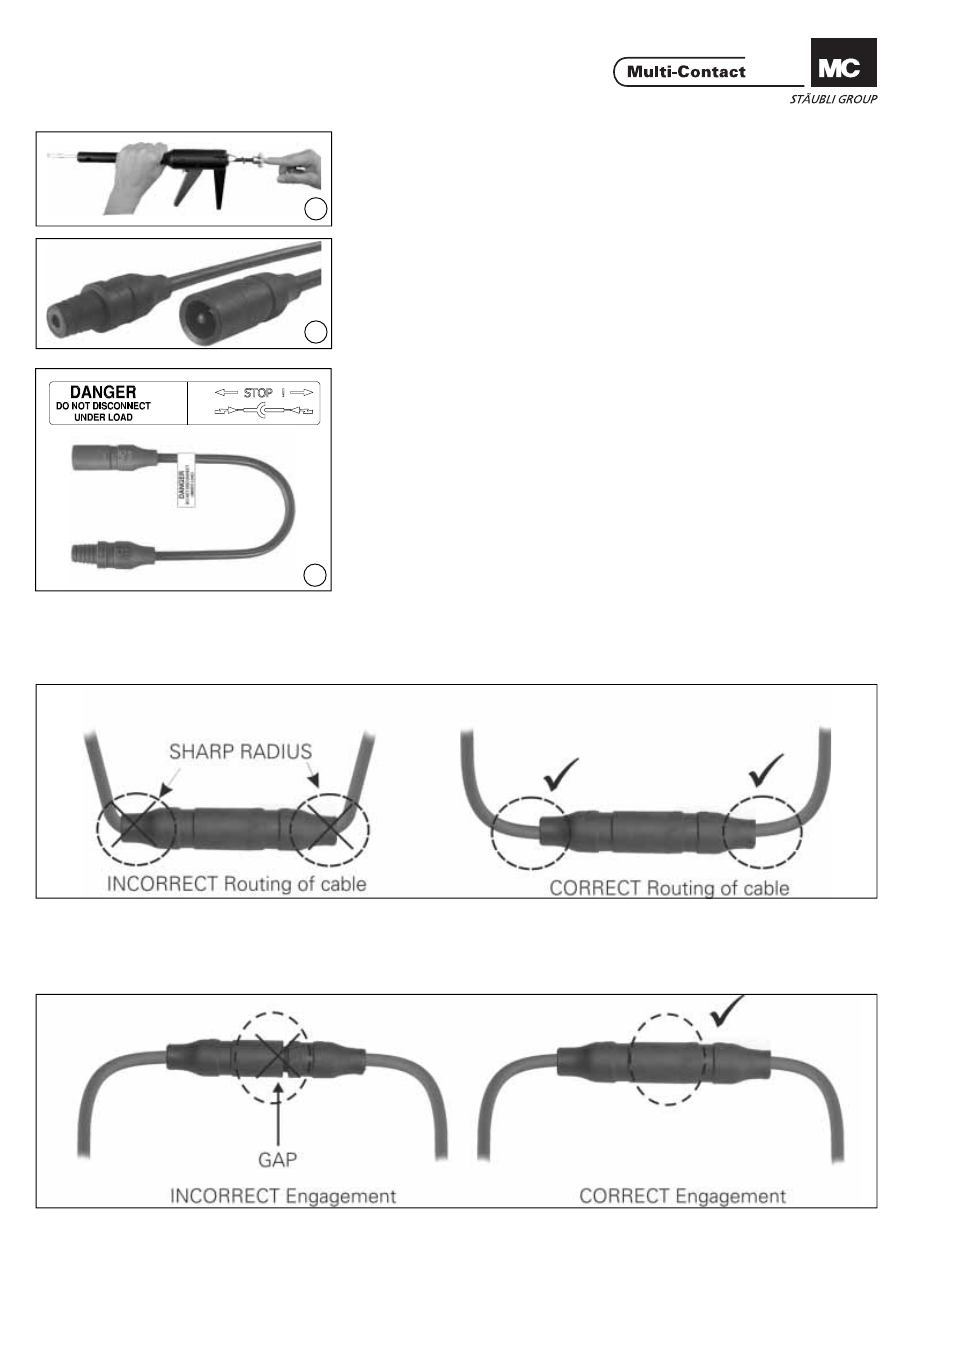
(ill. 16)
Retire la varilla de tracción Z hasta su
posición inicial. Retire el husillo cónico
K de la herramienta de ensamblado.
(ill. 16)
Return the puller rod Z to its starting
position.
Remove the tapered spindle K from
the assembly tool.
(ill. 17)
Tirando ligeramente del cable, asegu-
rarse de que el manguito ha encajado
correctamente sobre la pieza metálica.
Si la posición de la instalación es
correcta, las piezas instaladas de-
berán quedar a haces con el frente del
aislante.
(ill. 17)
Pull gently on the lead to check that
the sleeve is correctly locked in place
on the metal part.
If it is correcly located, the fi tted parts
must be fl ush with the front face of
the insulator.
(ill. 18)
Colocar la etiqueta „DANGER – DO
NOT DISCONNECT UNDER LOAD“
lo mas cercano posible del conector
macho.
(ill. 18)
Affi x the supplied sticker “DANGER
– DO NOT DISCONNECT UNDER
LOAD” in the vicinity of the PV cou-
pler.
Disposición del cable
Cable routing
Referir a la especifi cación del fabrican-
te del cable para el radio de curvatura.
Refer to cable manufactures specifi ca-
tion for minimum bending radius.
Conexión
Engagement
Verifi que que las piezas de conexión
se encuentren totalmente aseguradas.
Check that the coupler parts are fully
engaged.